
Advanced Click Tracking Using Google Tag Manager
Setup requirements
For this tutorial we are assuming you have:
- Kissmetrics and Google Tag Manager Javascript snippets installed
- Fundamental knowledge of Javascript and HTML elements
- Basic understanding of Google Tag Manager
Goal:We are going to go through the process of tracking a click where the clicked element shares the same
IDorClassas other elements on page. Even though the elements are the same we'll want different properties to be sent depending on the clicked element.
Let's start with some HTML
<h1>Advanced Click Tracking</h1>
<div class="tiles_wrapper">
<div class="tile">
<div class="tile_content">
<div class="main_icon"></div>
<div class="main_title">Trades & Services</div>
</div>
<div class="tile_content">
<a href="#popup1"> <div class="get_quote_button">GET QUOTES</div></a>
</div>
</div>
<p>
<div class="tile">
<div class="tile_content">
<div class="main_icon"></div>
<div class="main_title">Retail & Hospitality</div>
</div>
<div class="tile_content">
<a href="#popup2"> <div class="get_quote_button">GET QUOTES</div></a>
</div>
</div>
<p>
<div class="tile">
<div class="tile_content">
<div class="main_icon"></div>
<div class="main_title">Professional Occupations</div>
</div>
<div class="tile_content">
<a href="#popup3"><div class="get_quote_button">GET QUOTES</div></a>
</div>
</div>
<p>
<div class="tile">
<div class="tile_content">
<div class="main_icon"></div>
<div class="main_title">Other Occupations</div>
</div>
<div class="tile_content">
<a href="#popup4"><div class="get_quote_button">GET QUOTES</div></a>
</div>
</div>
</div>
</body>Identify what the user clicks
Let's say we want to track when a user clicks on the GET QUOTES link. If this was a single link we would create a trigger in Google Tag Manager that would fire when we clicked on the class associated with the link.
<div class="get_quote_button">GET QUOTES</div>Let's create this in GTM.
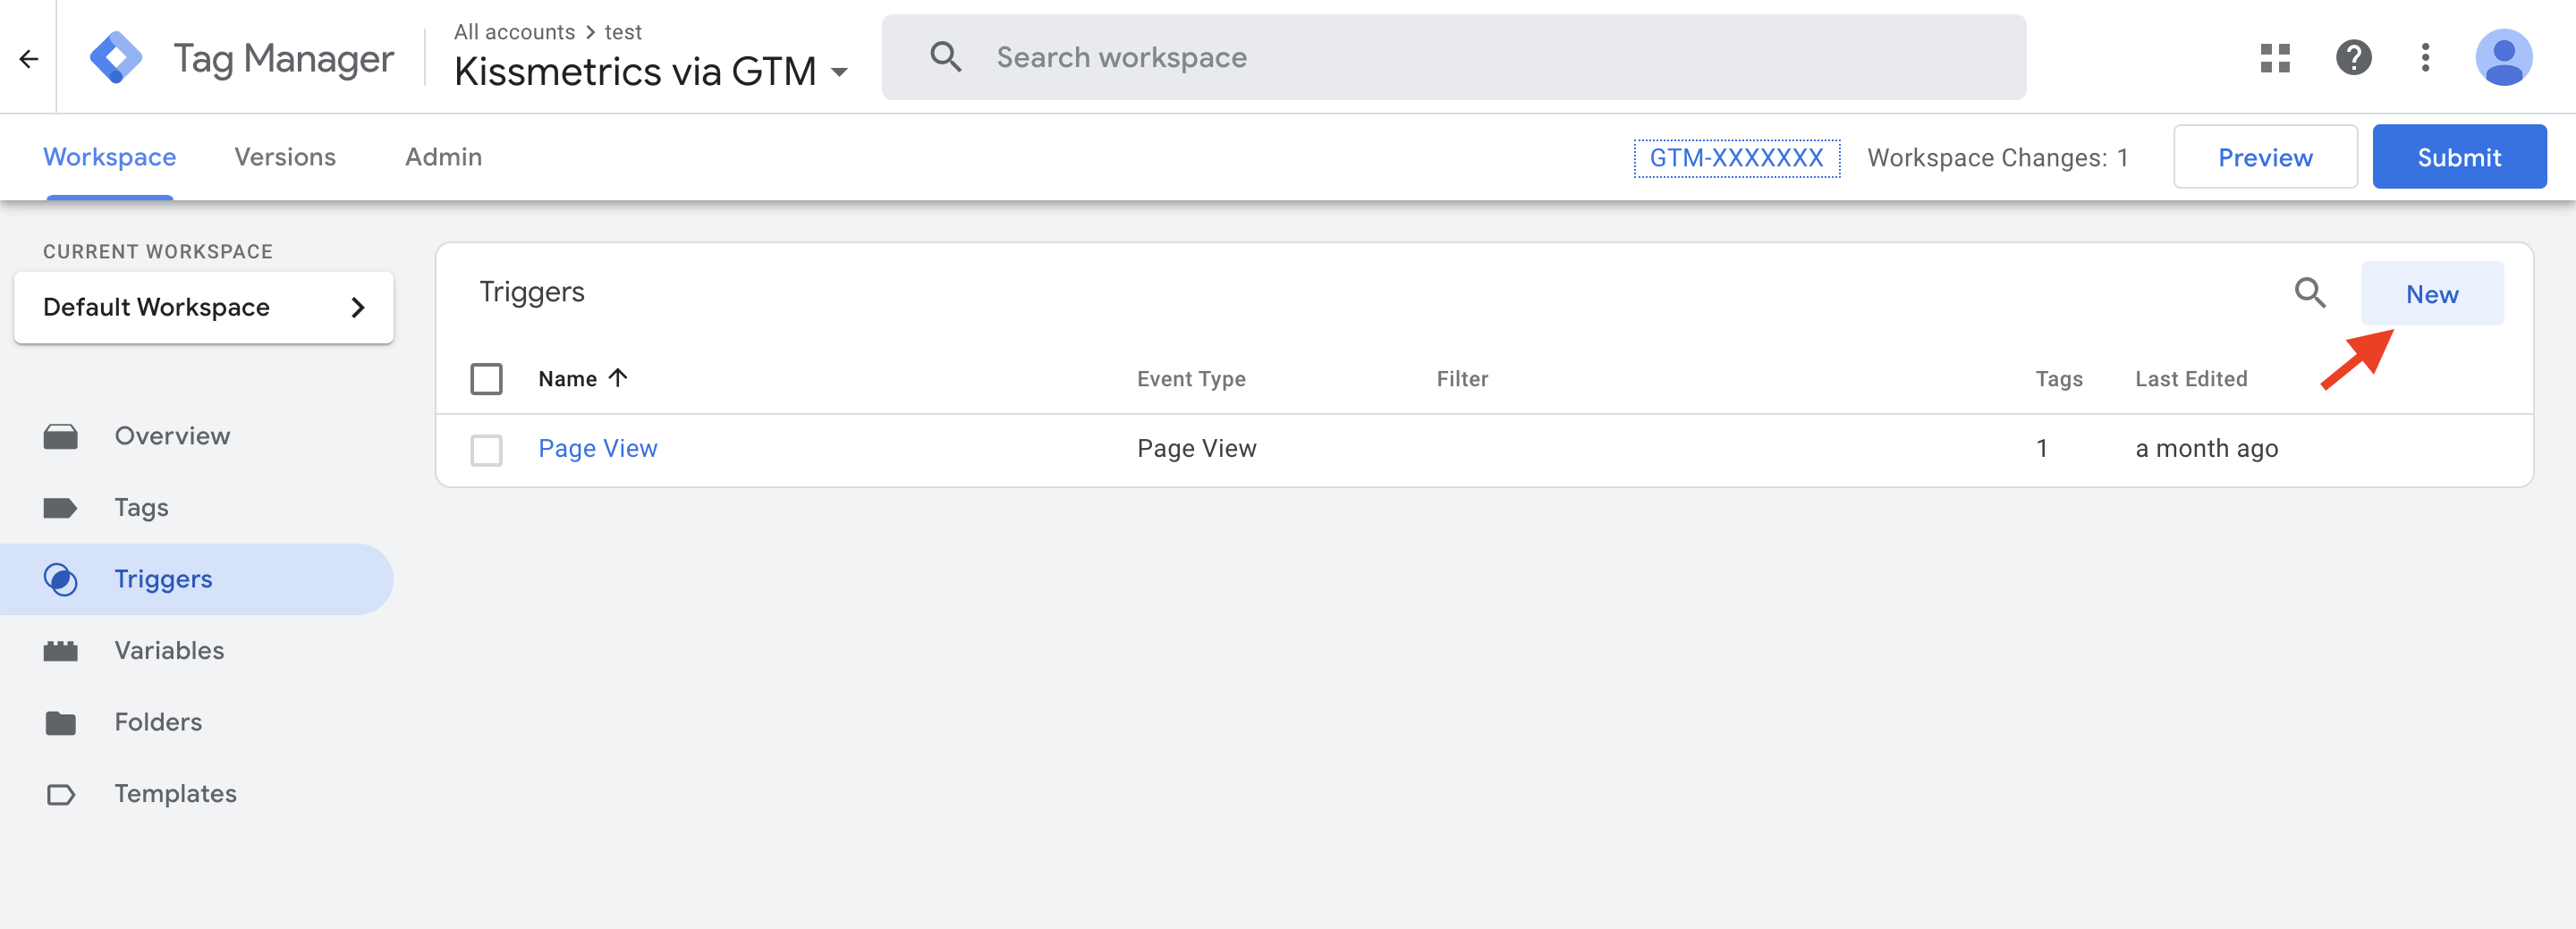
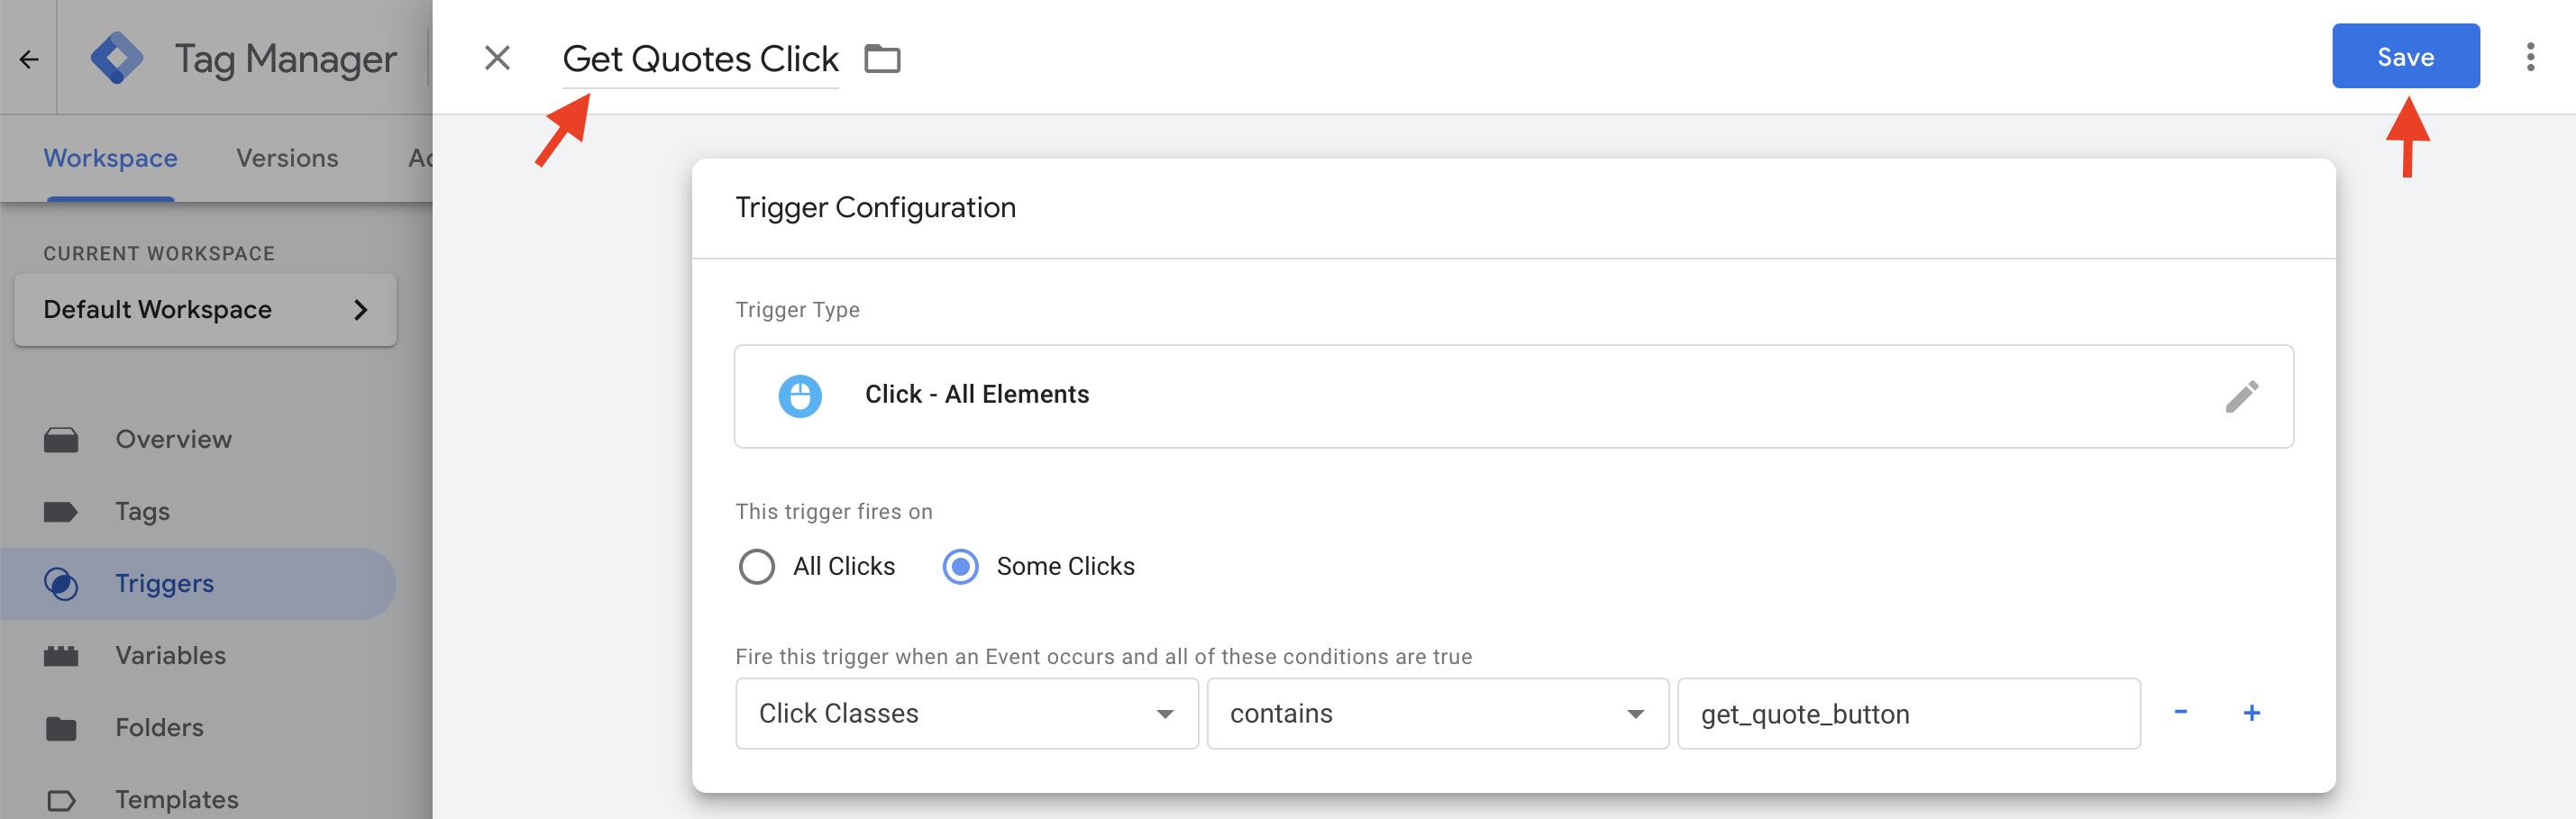
Create the Trigger
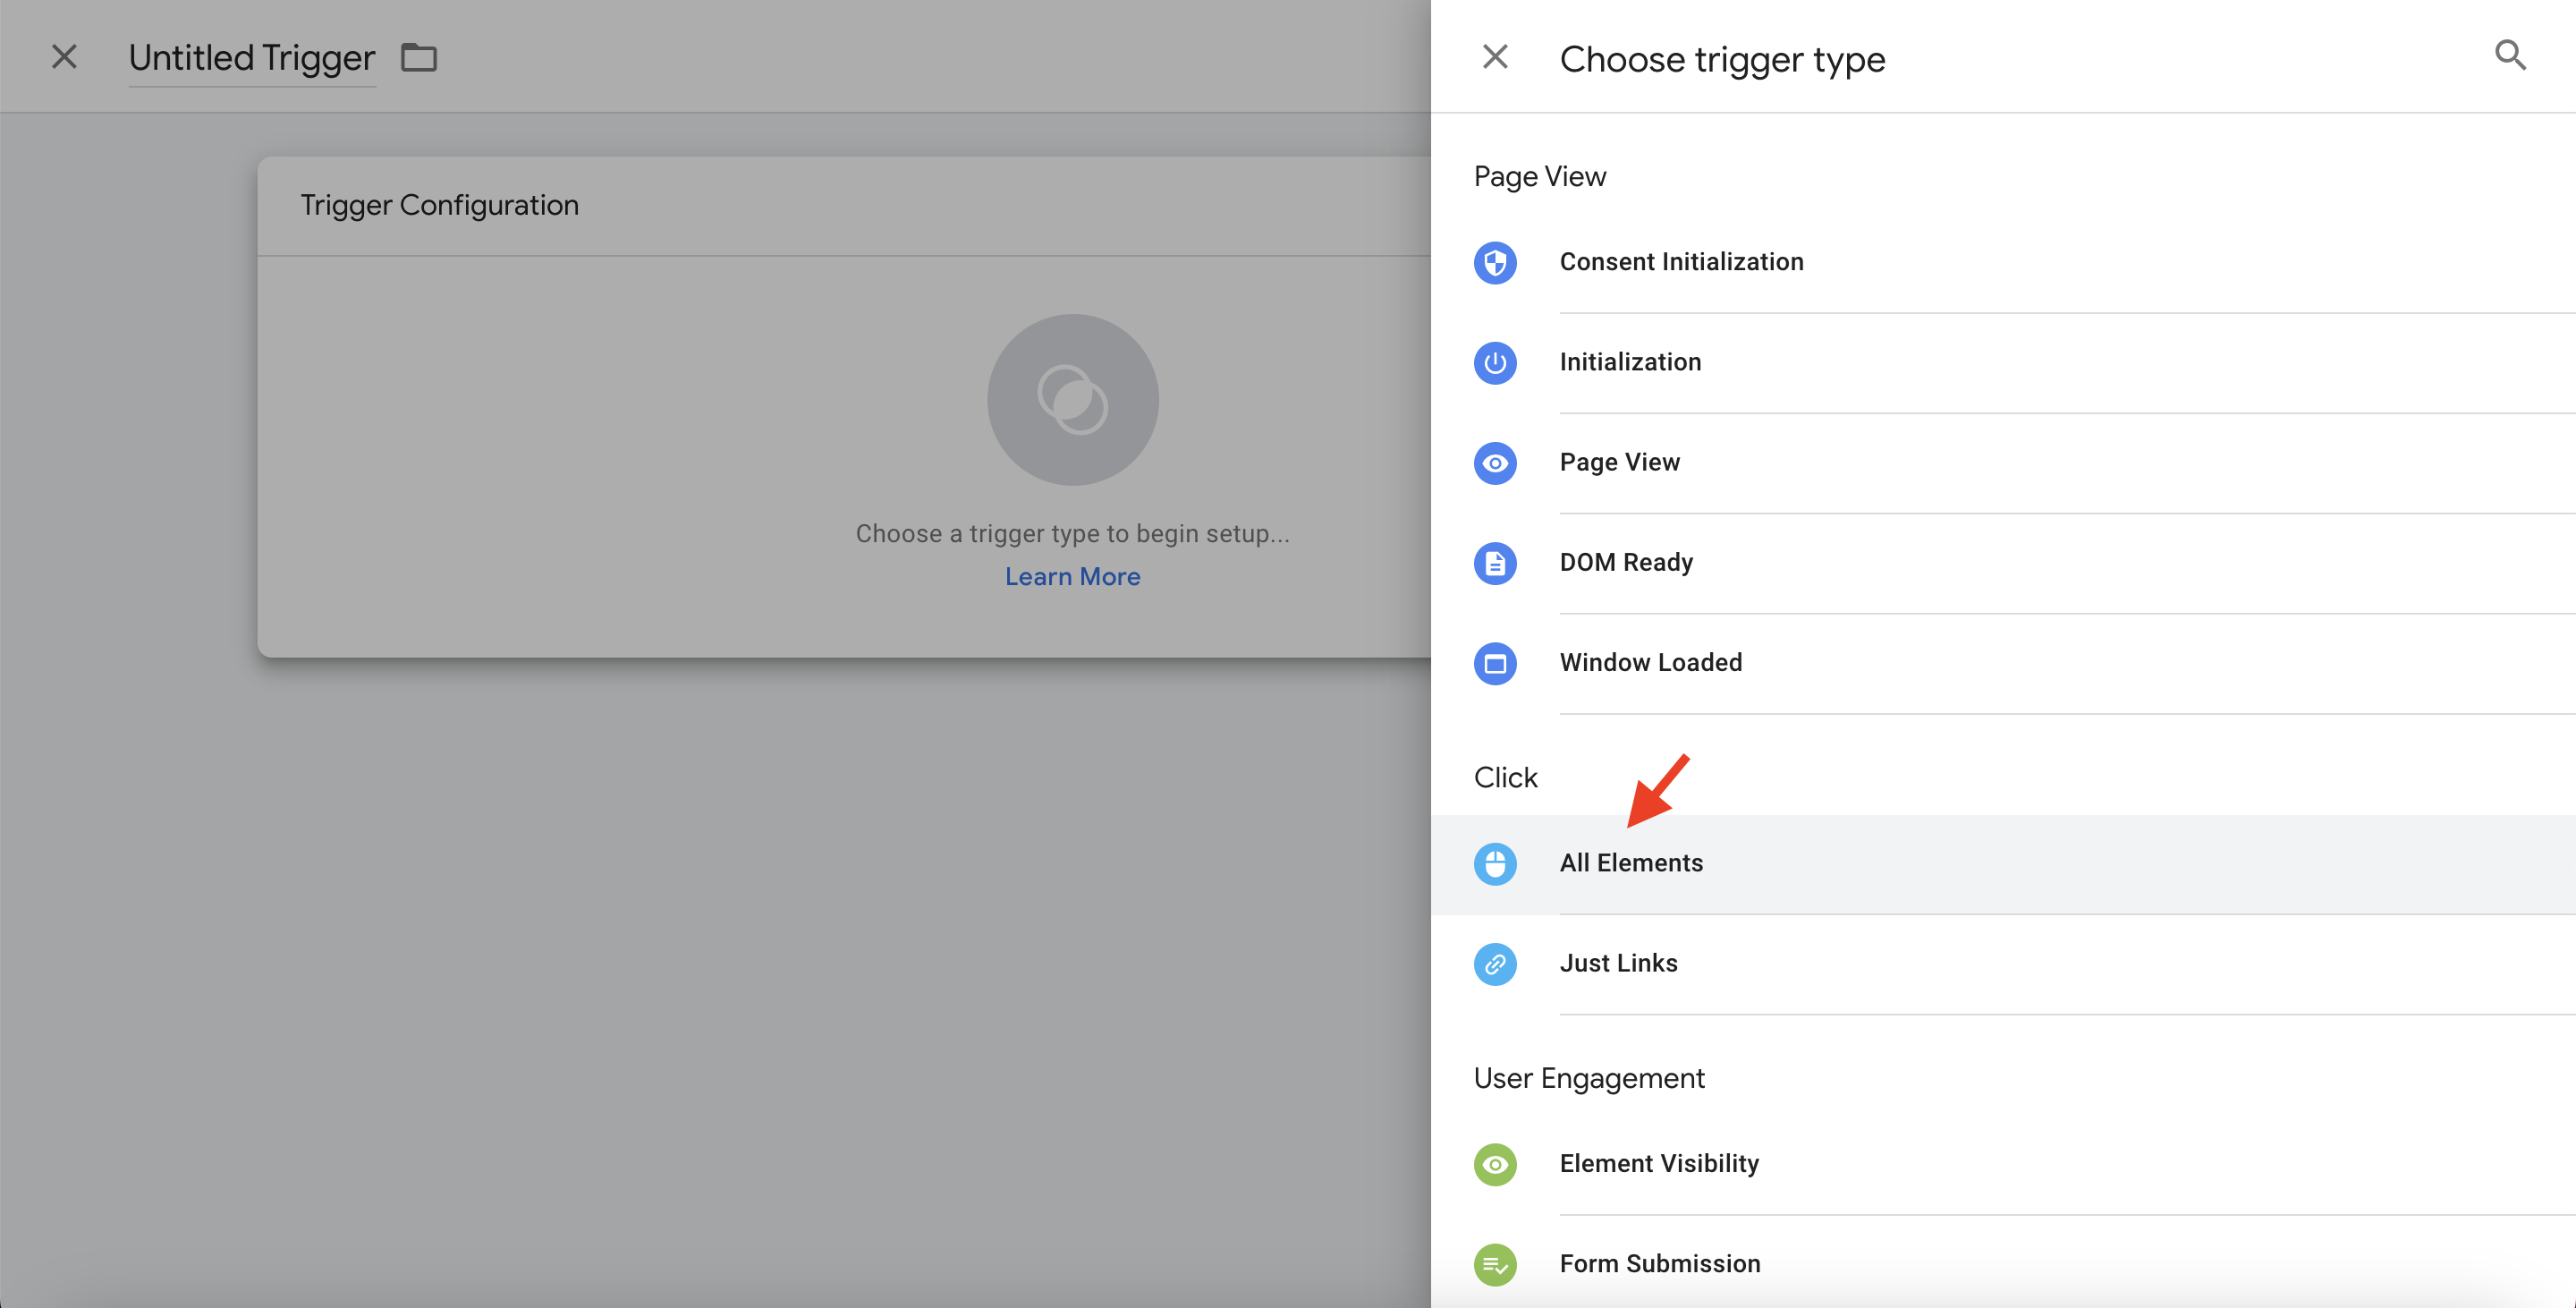
- Navigate to your GTM's container and create a new Trigger.
- Select the following trigger type Click-All Elements
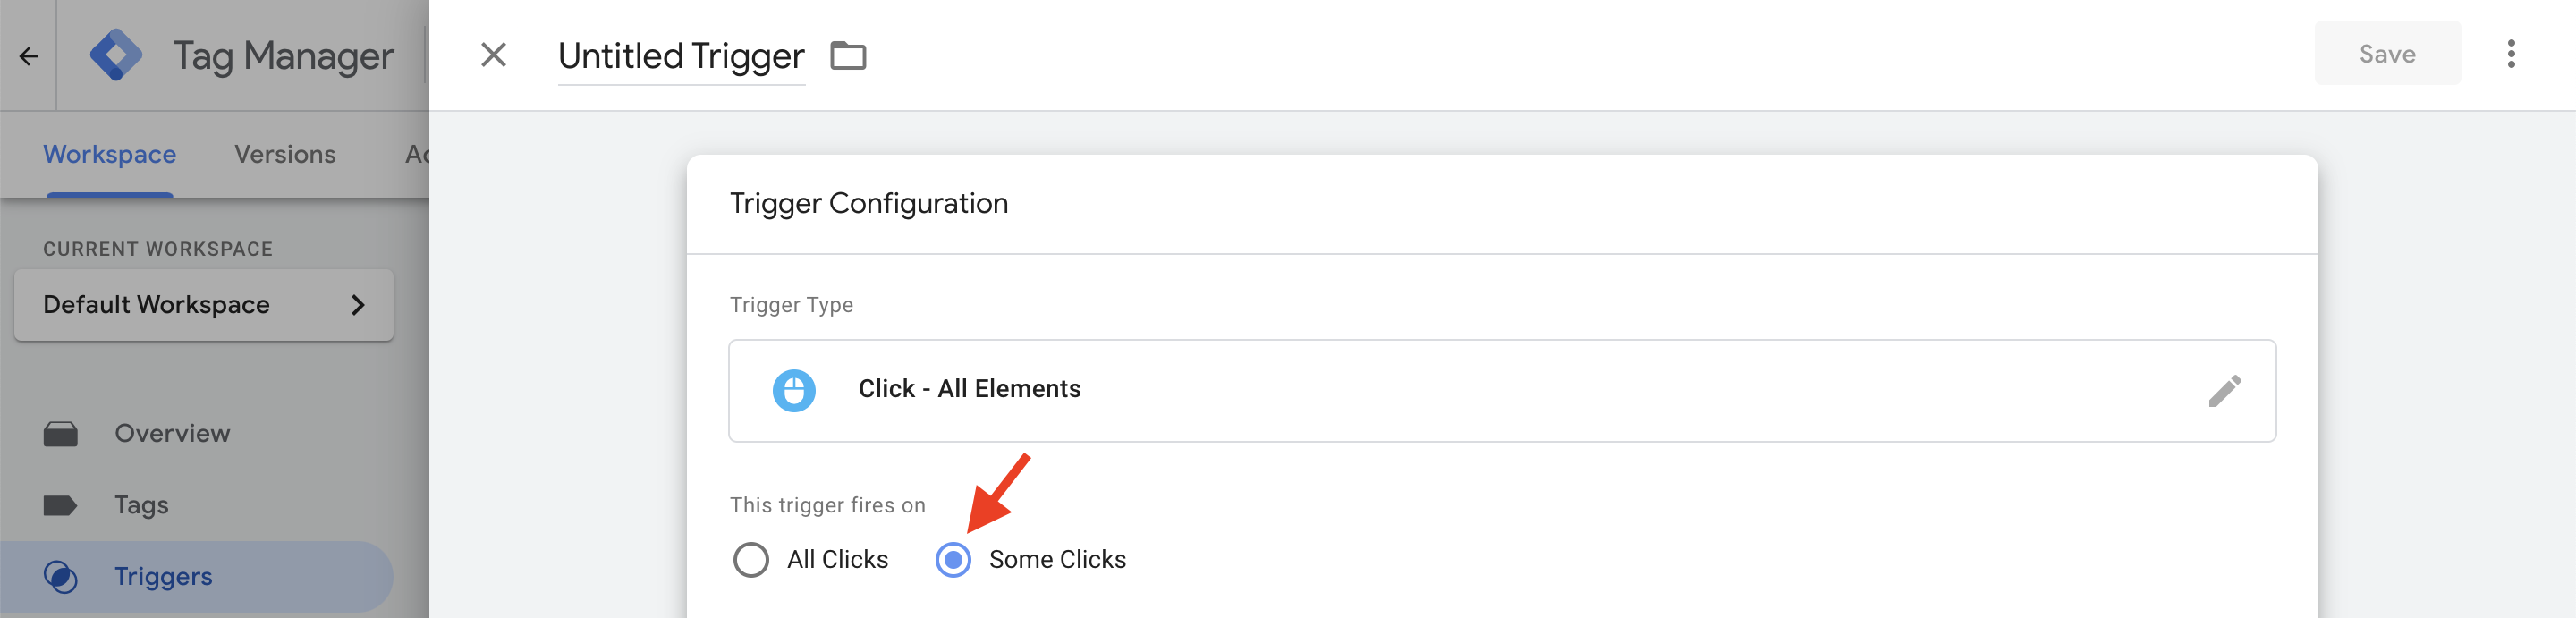
- Specify for the trigger to fire on Some Clicks
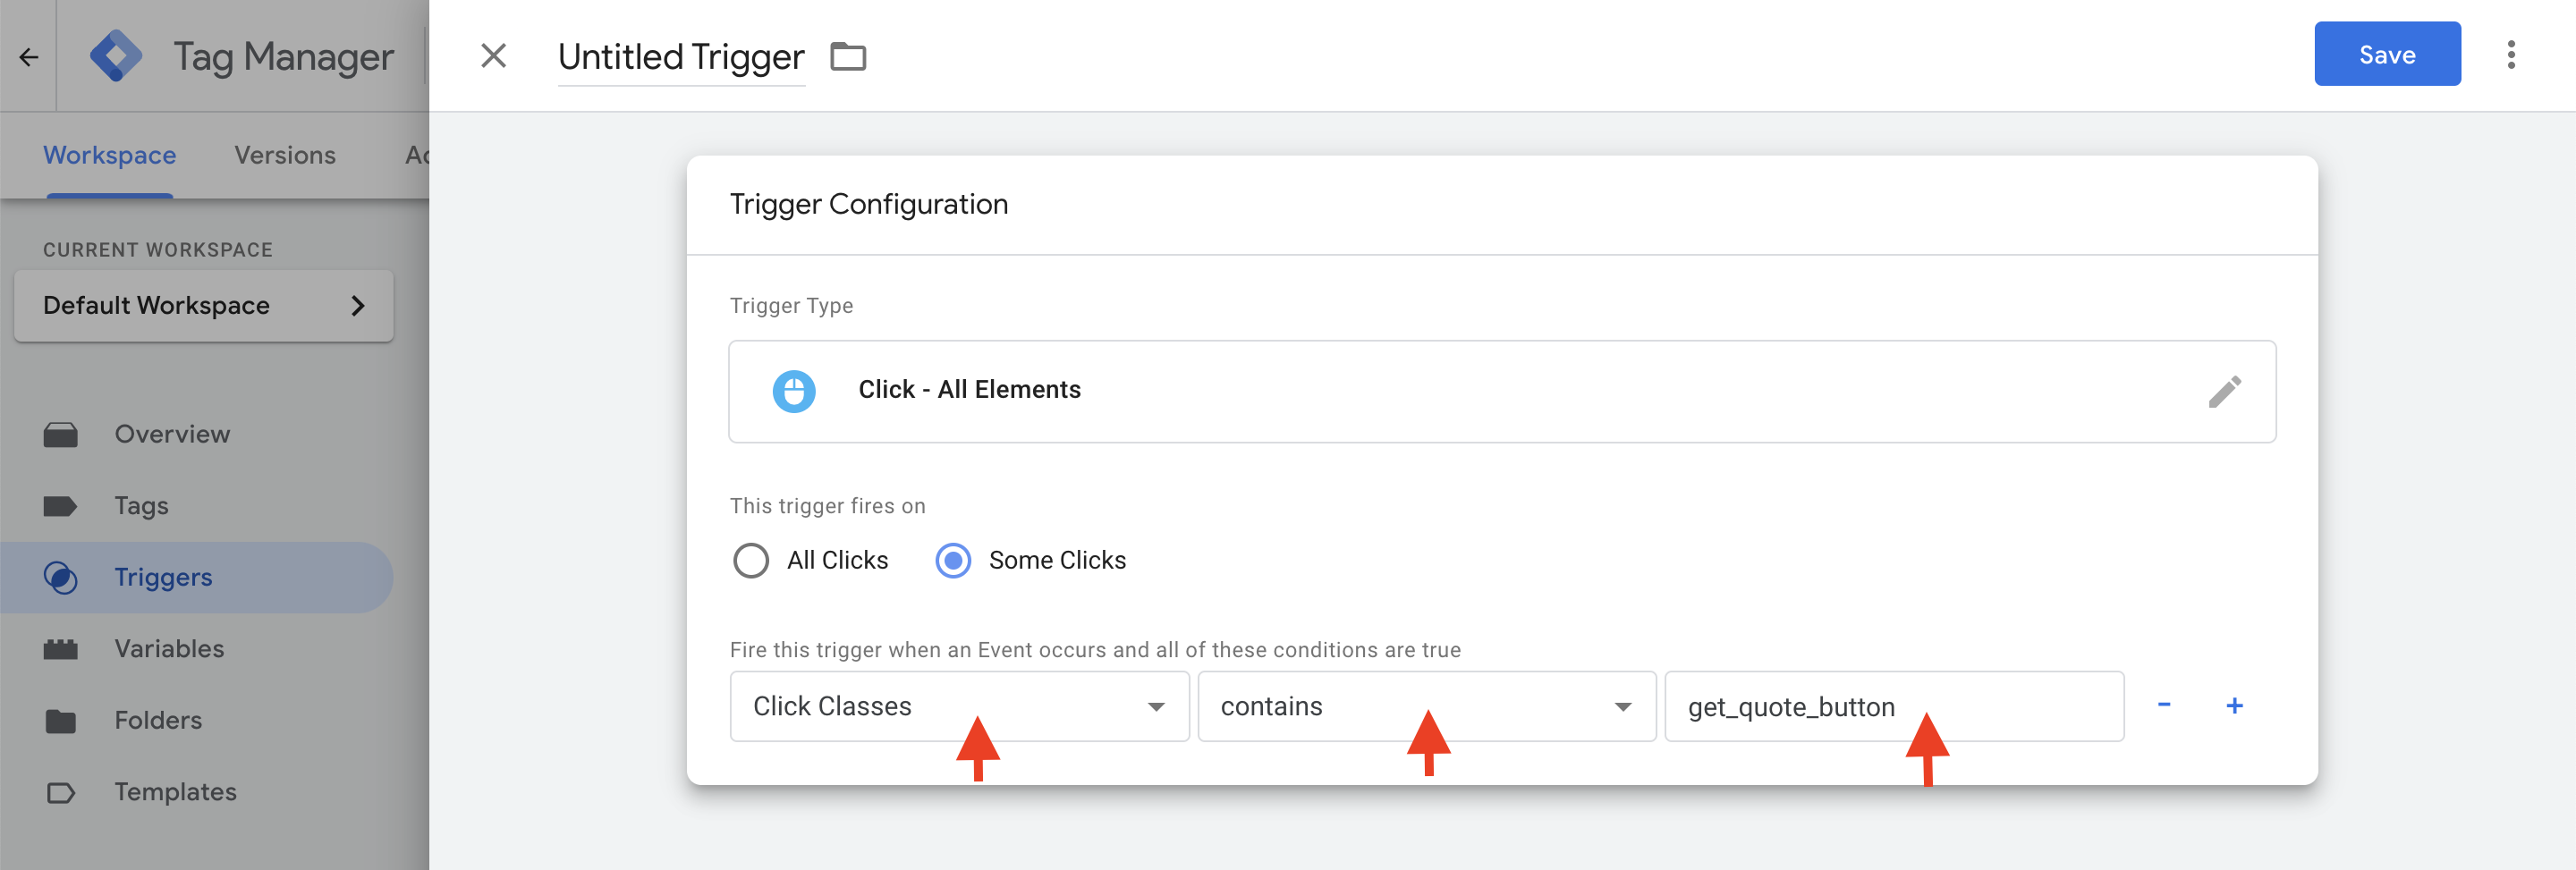
- Under the Fire this trigger when an Event occurs and all of these conditions are true row:
- In the first drop down select Click Classes. You may have to find this under Choose Built-In Variable...
- In the second drop down select contains
- In the last drop down enter in our class
get_quote_button
- We'll name this Trigger Get Quotes Click and then save it.
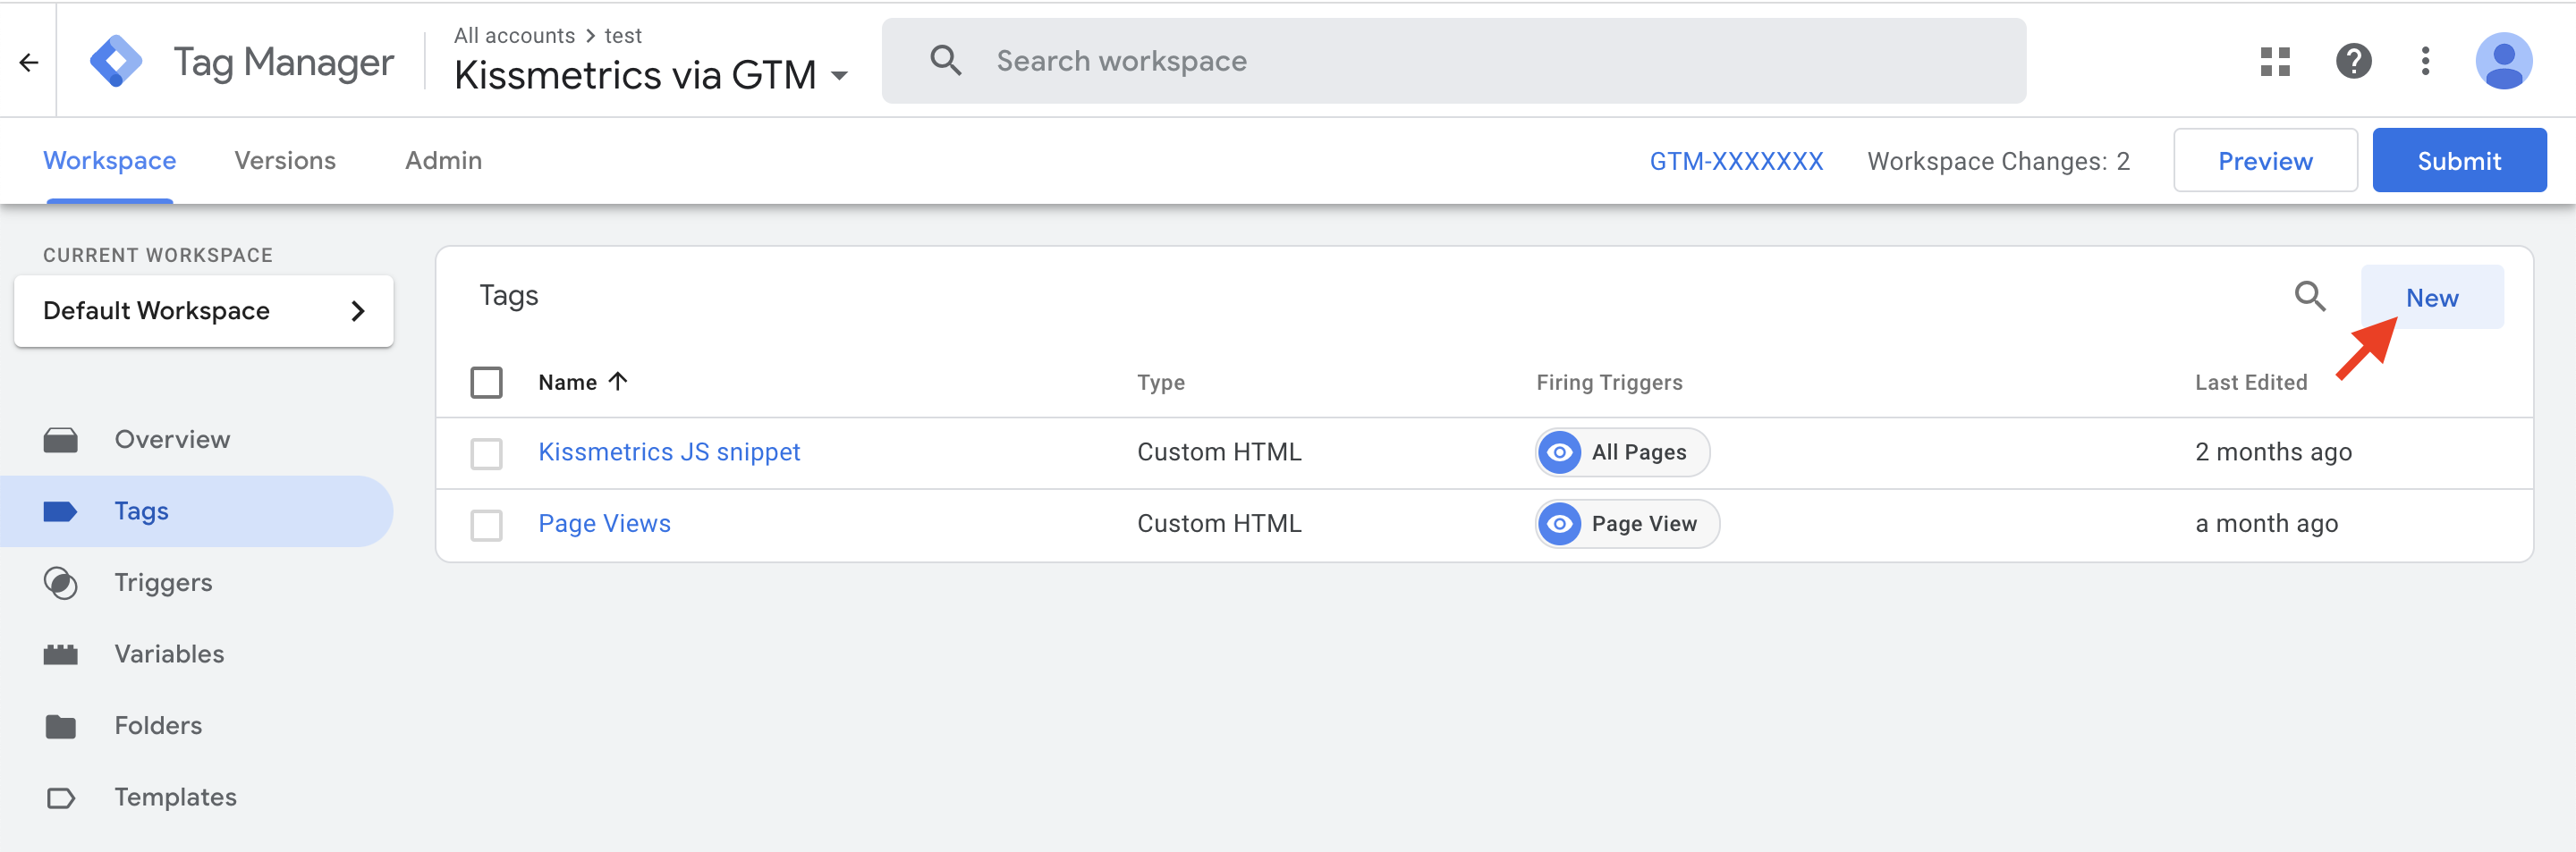
Create the Tag
Now we need to make the Tag that will use the Get Quotes Click trigger we just created.
- Select the Tags category and create a new Tag
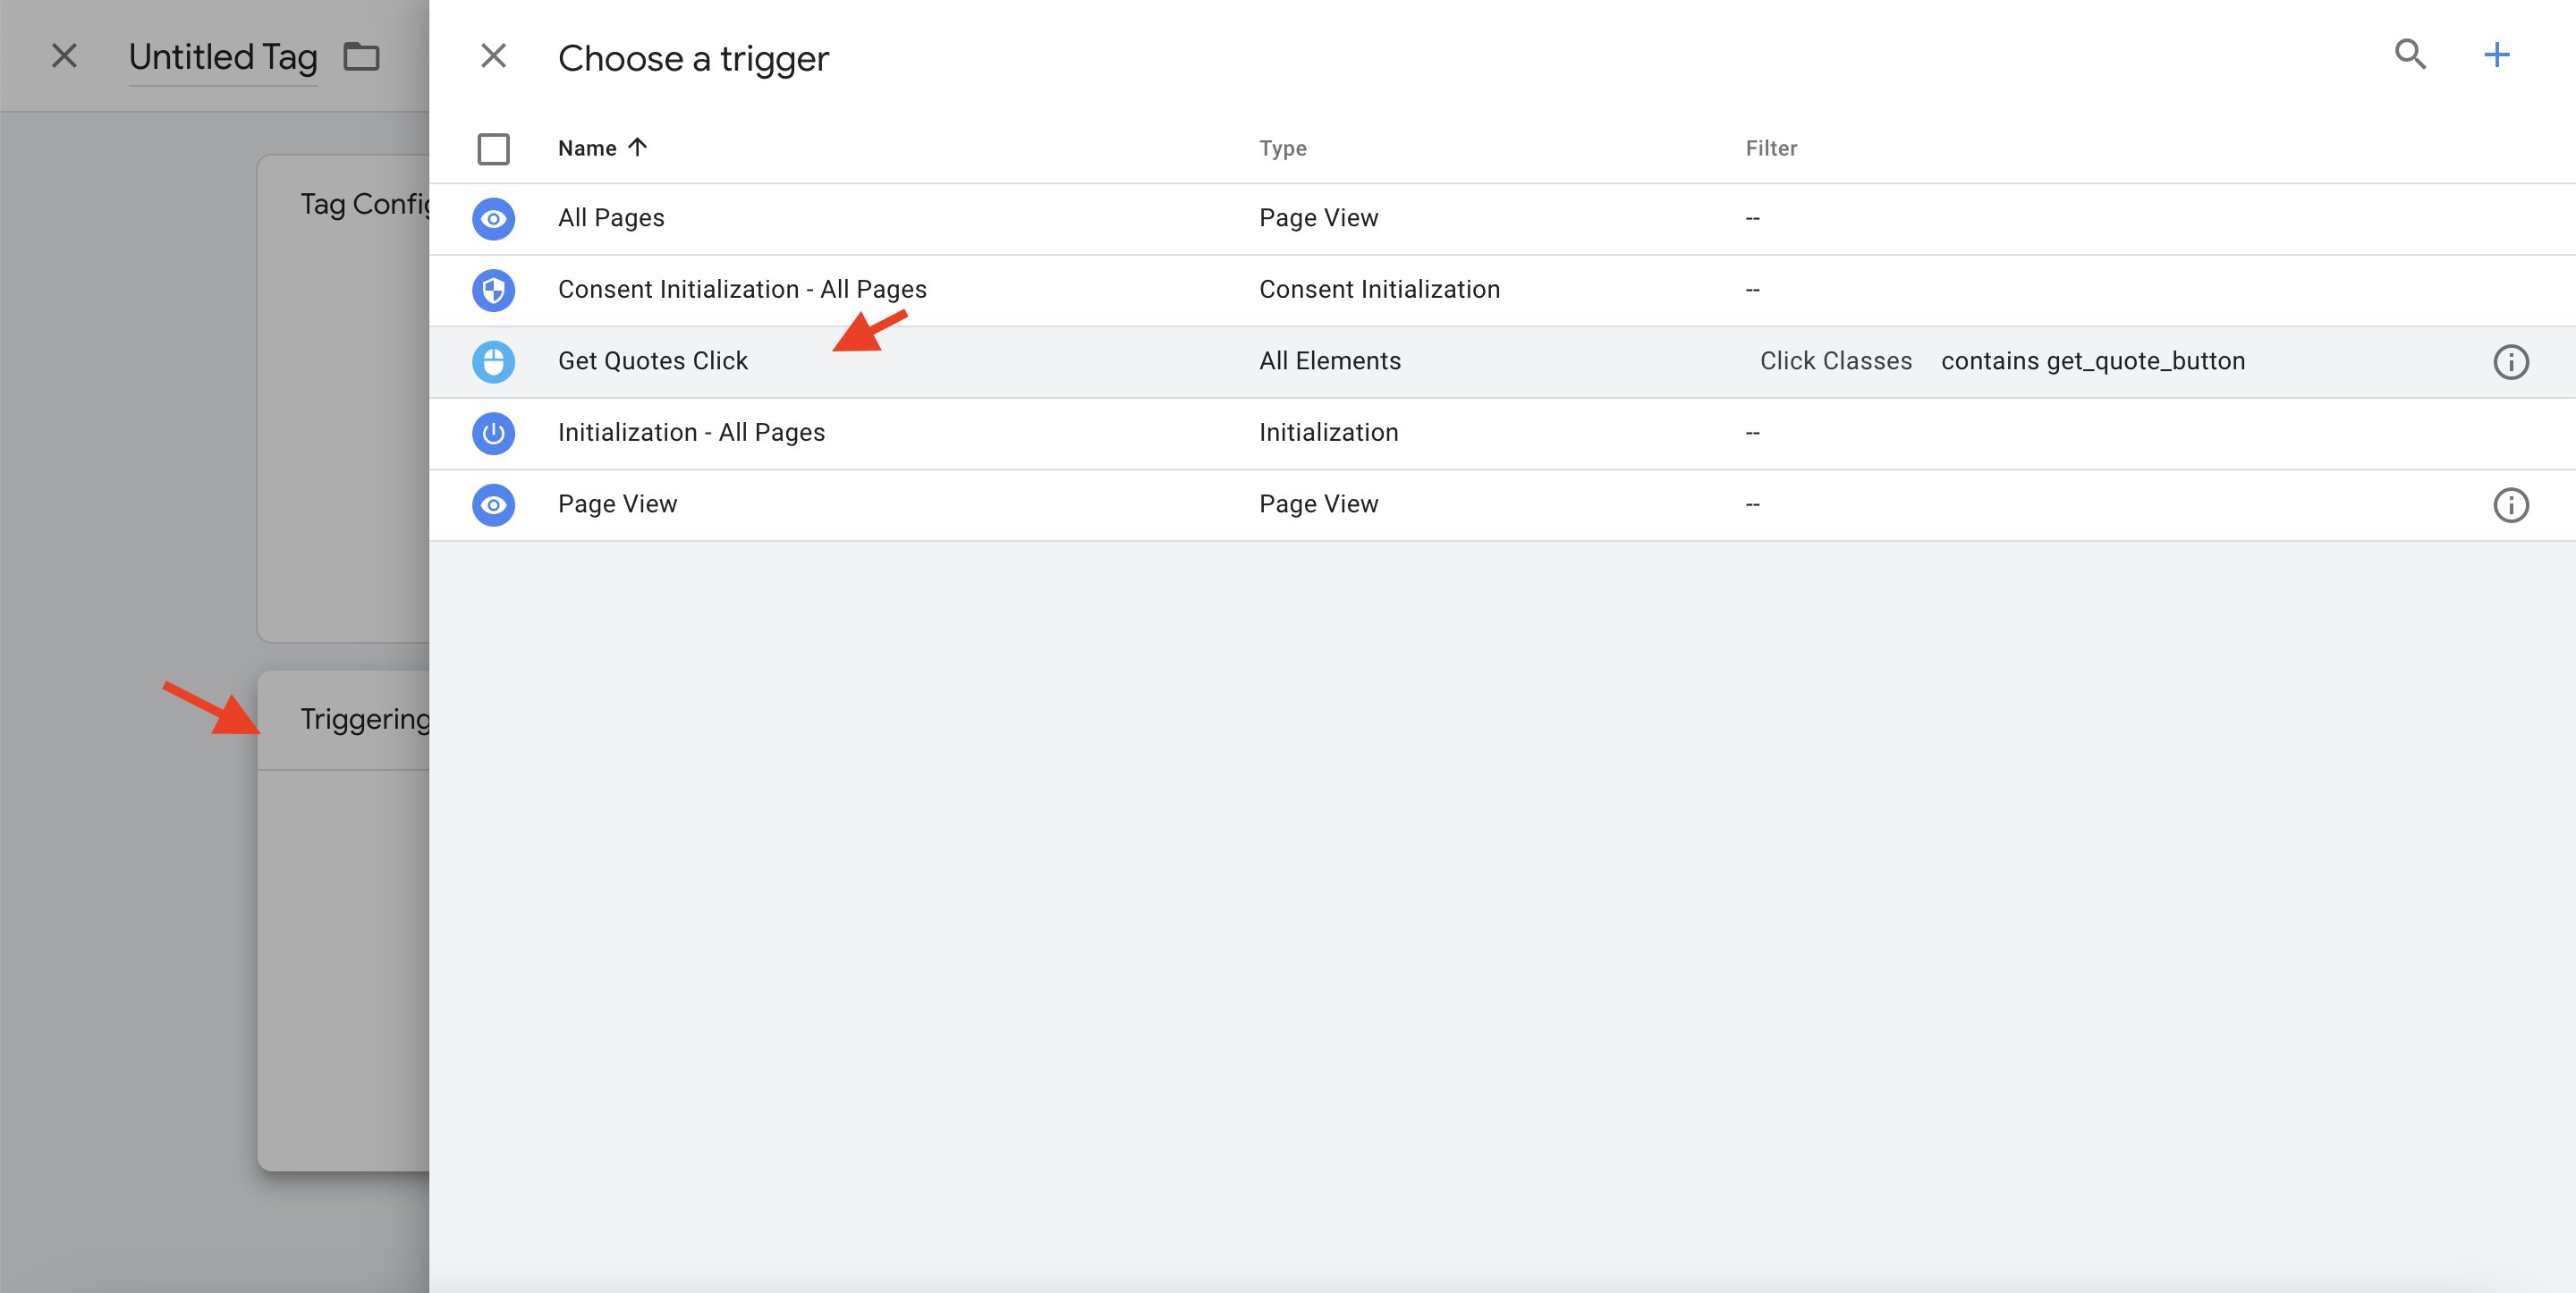
- Click on the Triggering box and select Get Quotes Click
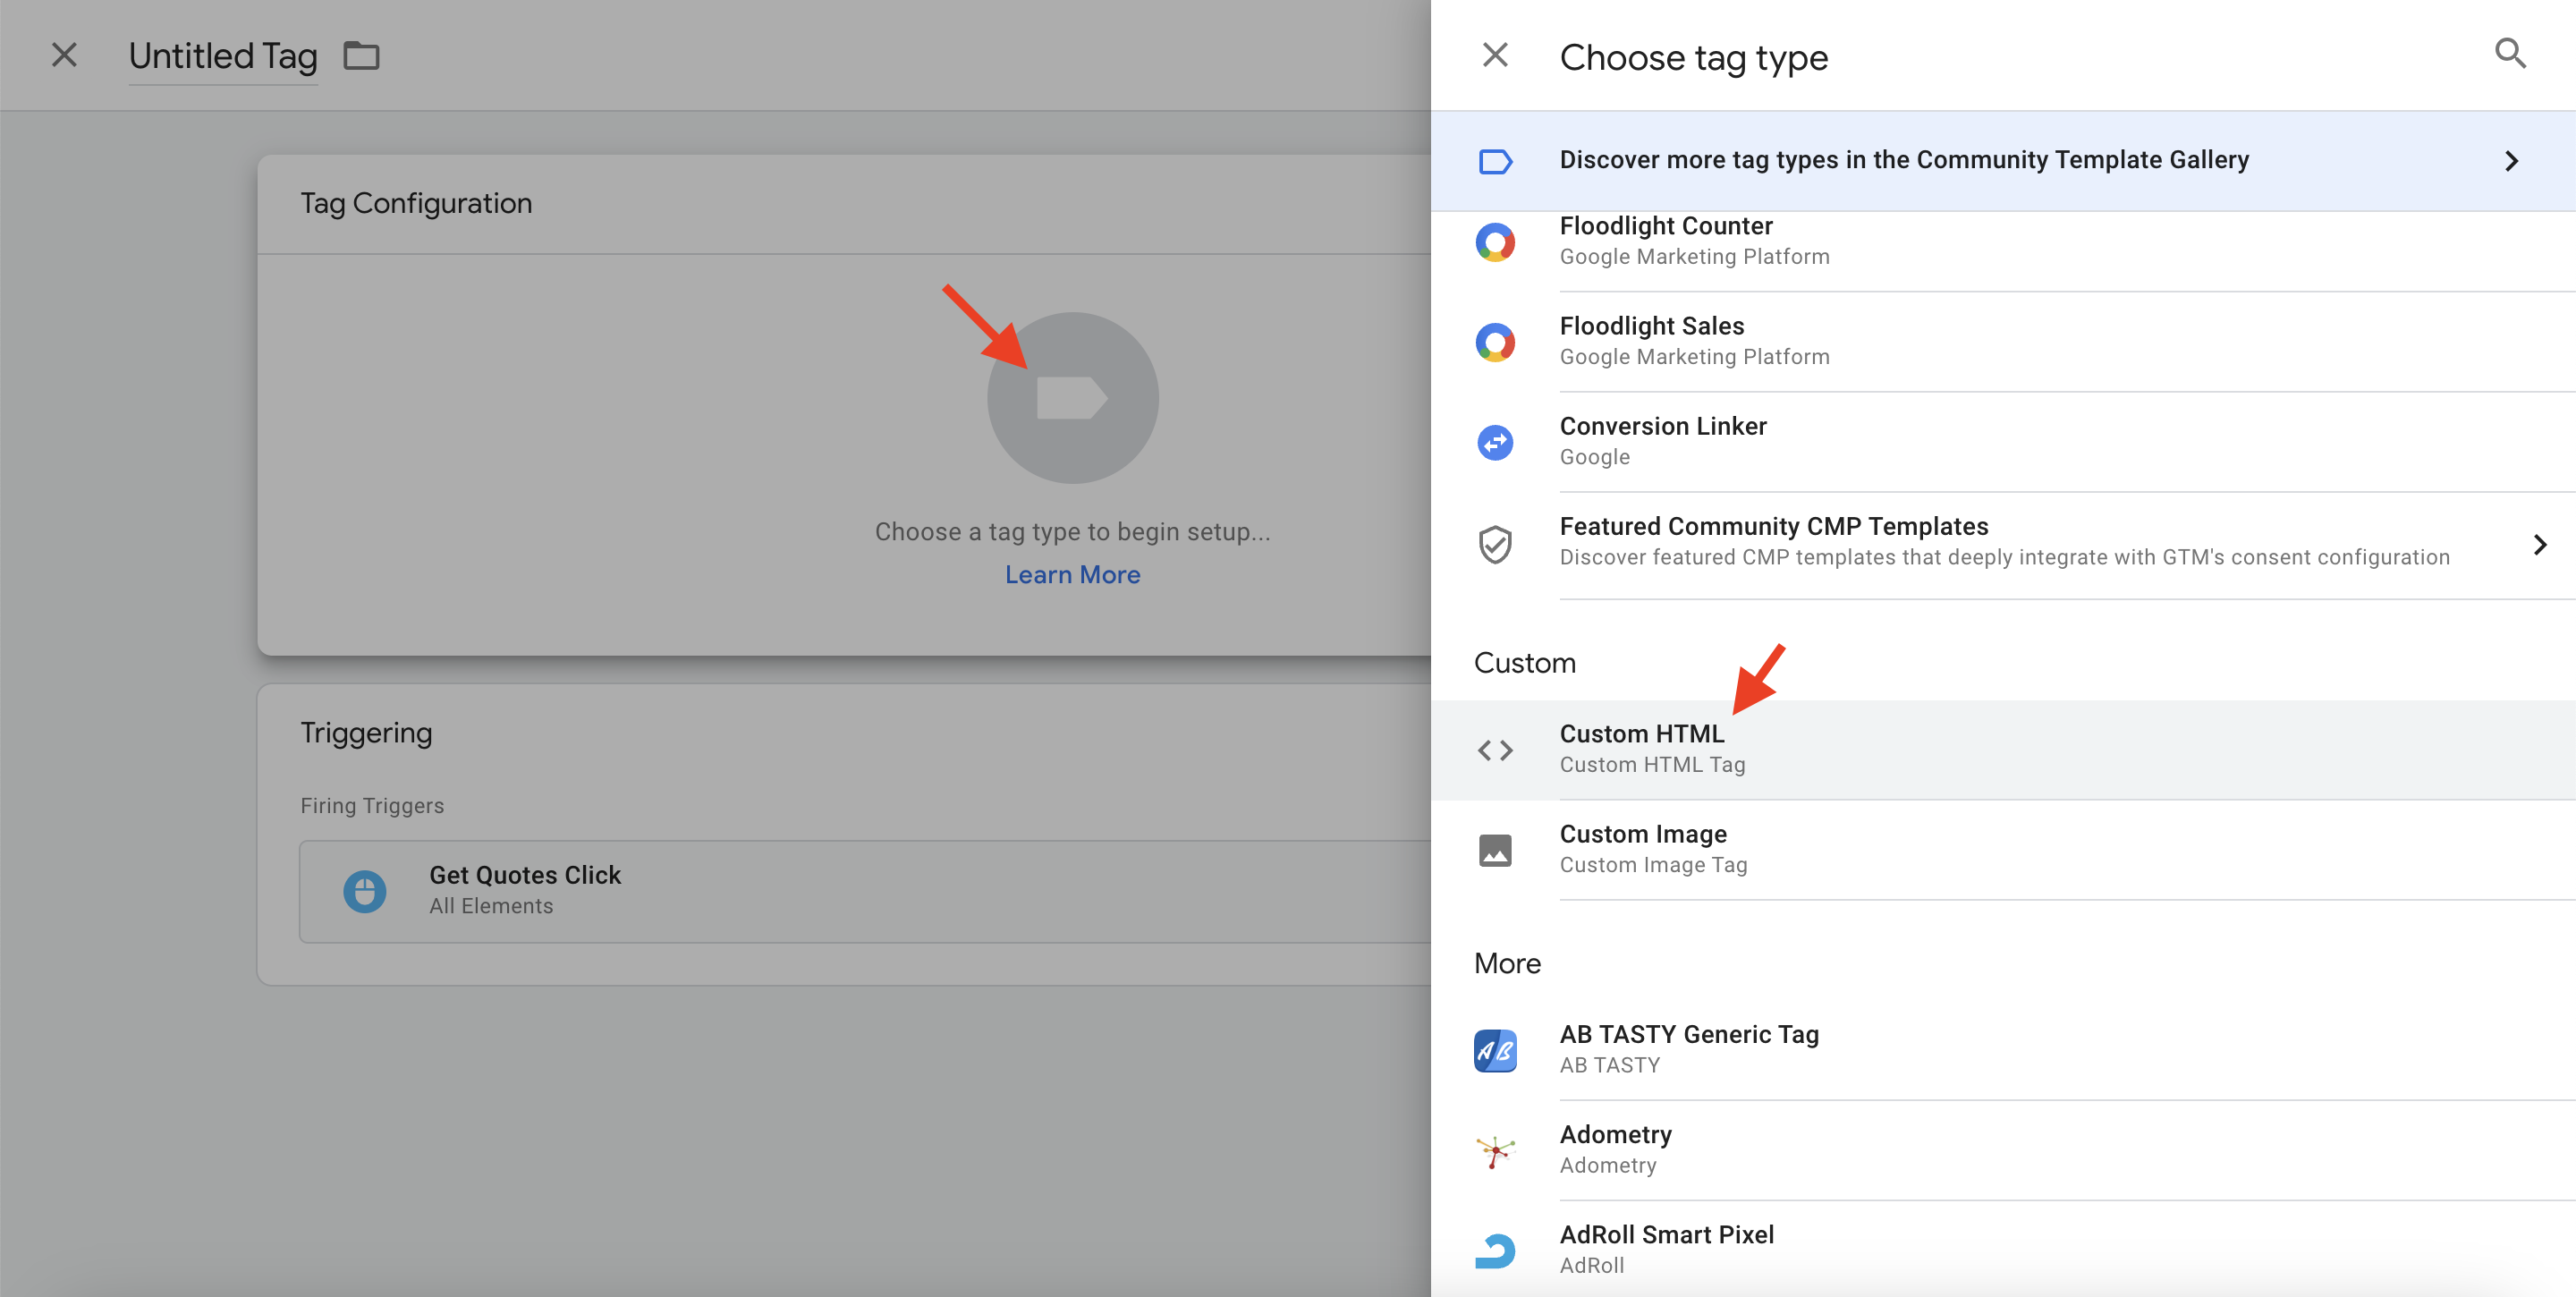
- Click on the Tag Configuration box and select Custom HTML
- Enter the following Javascript code
  <script>
    var _kmq = _kmq || [];
    _kmq.push(['record', 'Quote Clicked']);
  </script>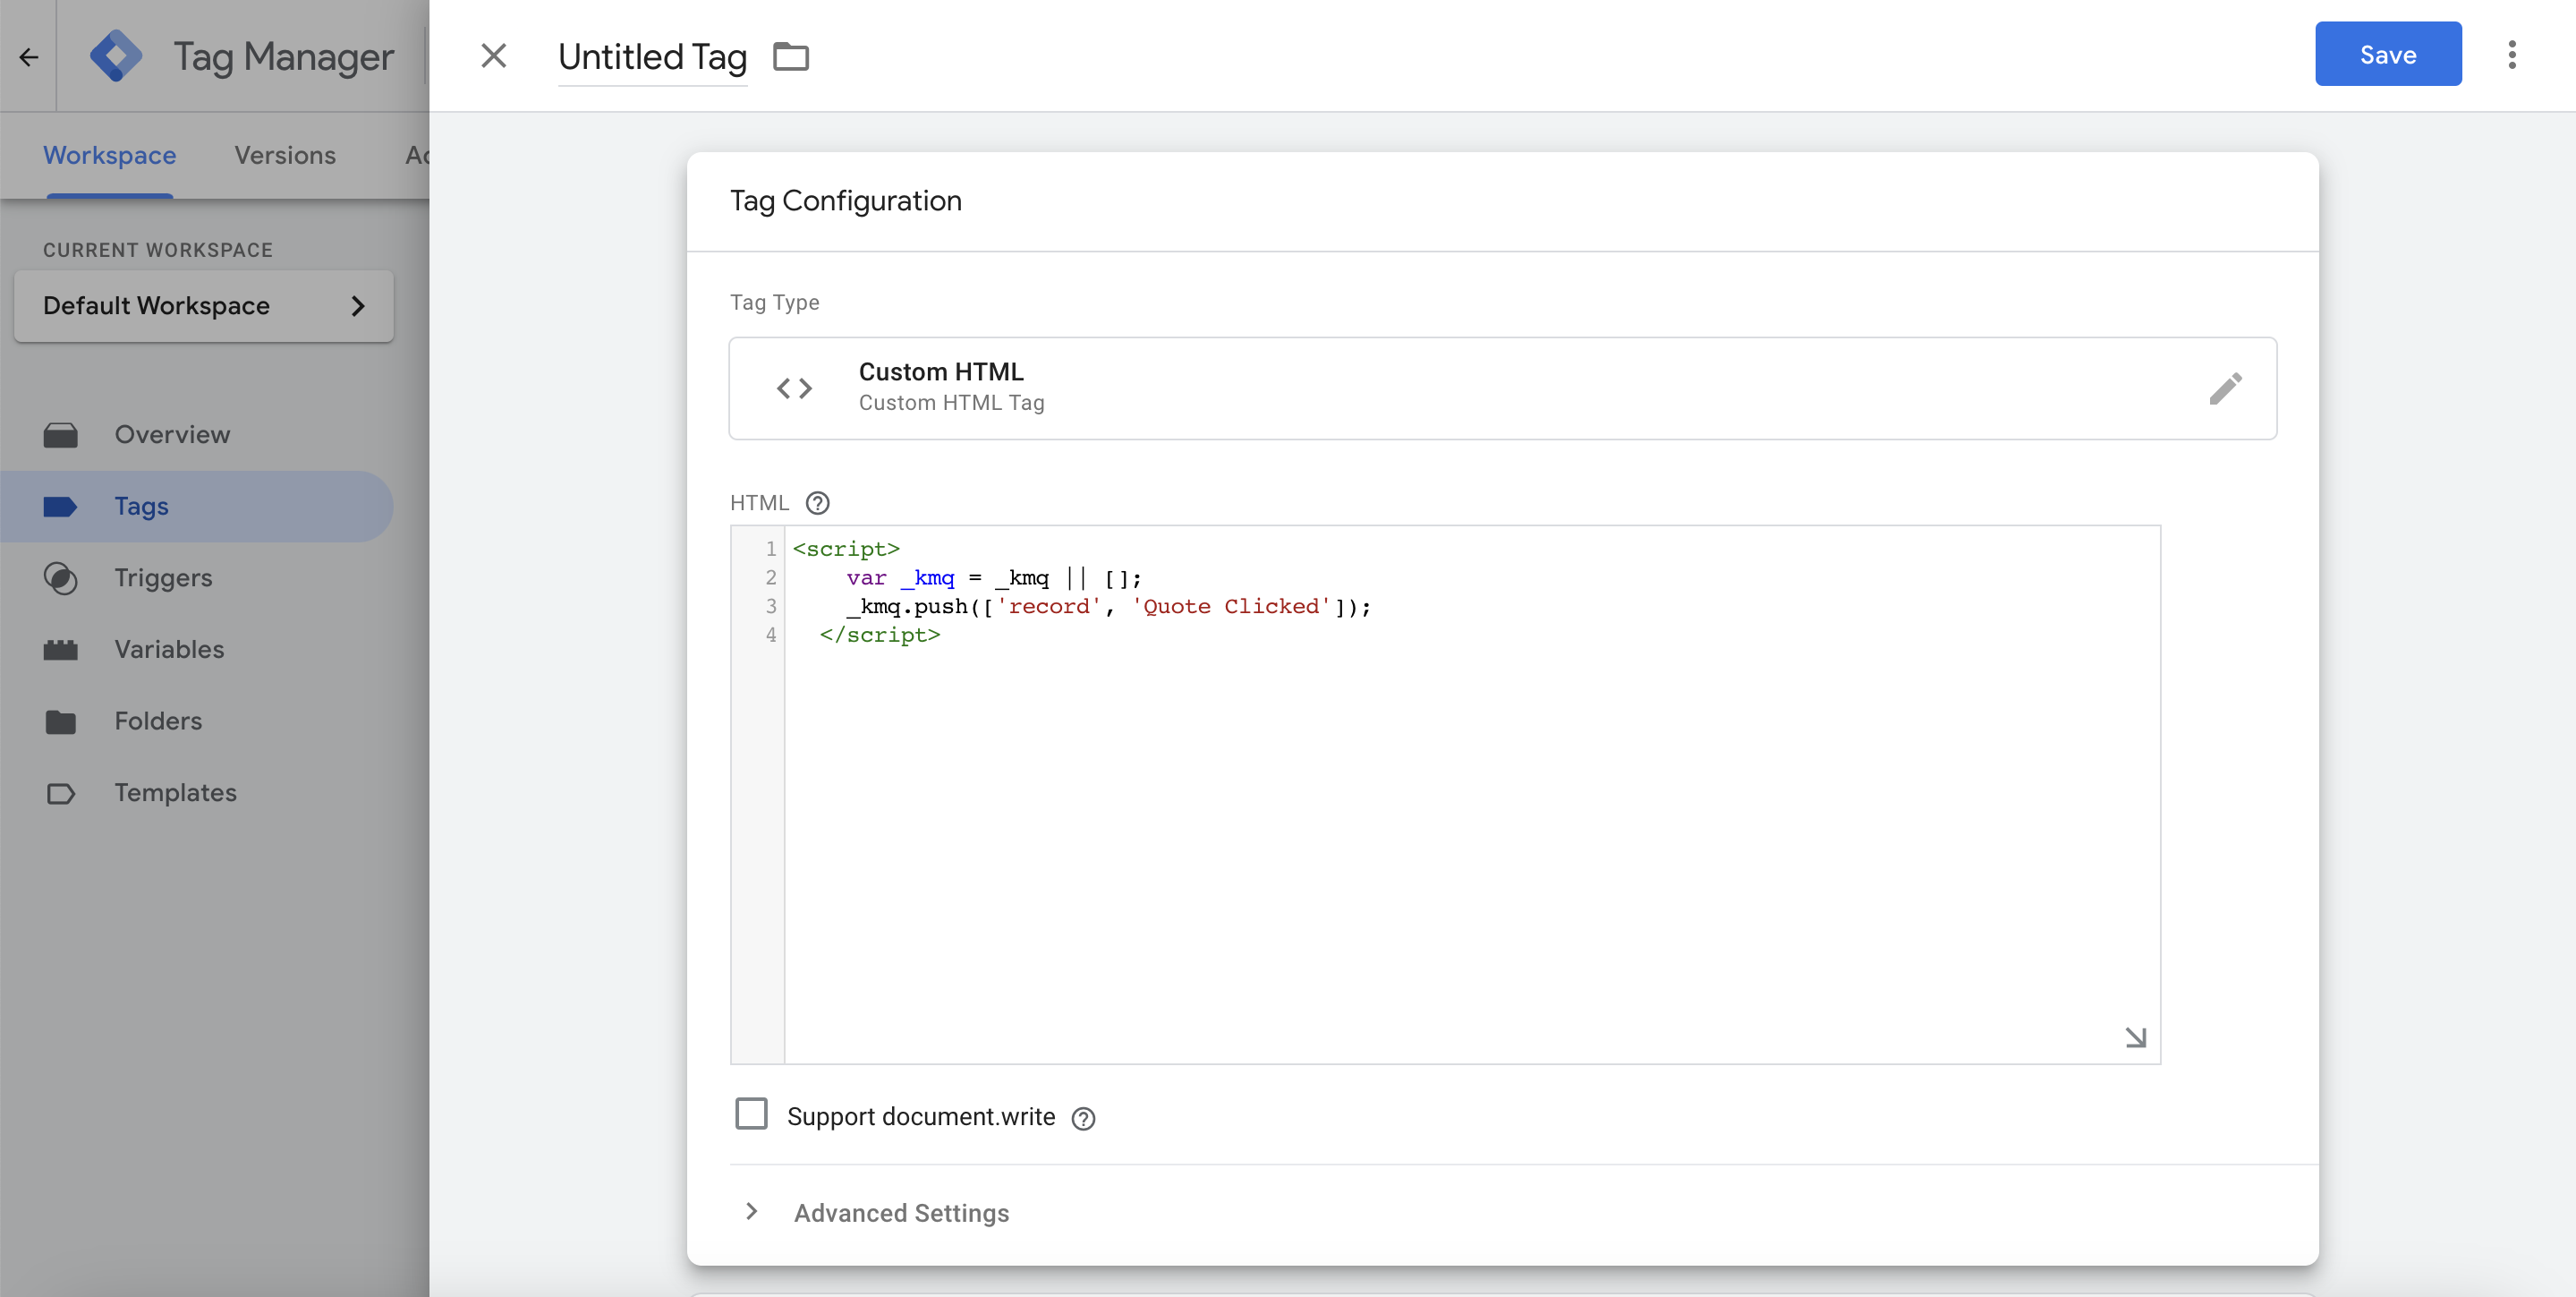
- We'll name this Tag Quotes Clicked and save
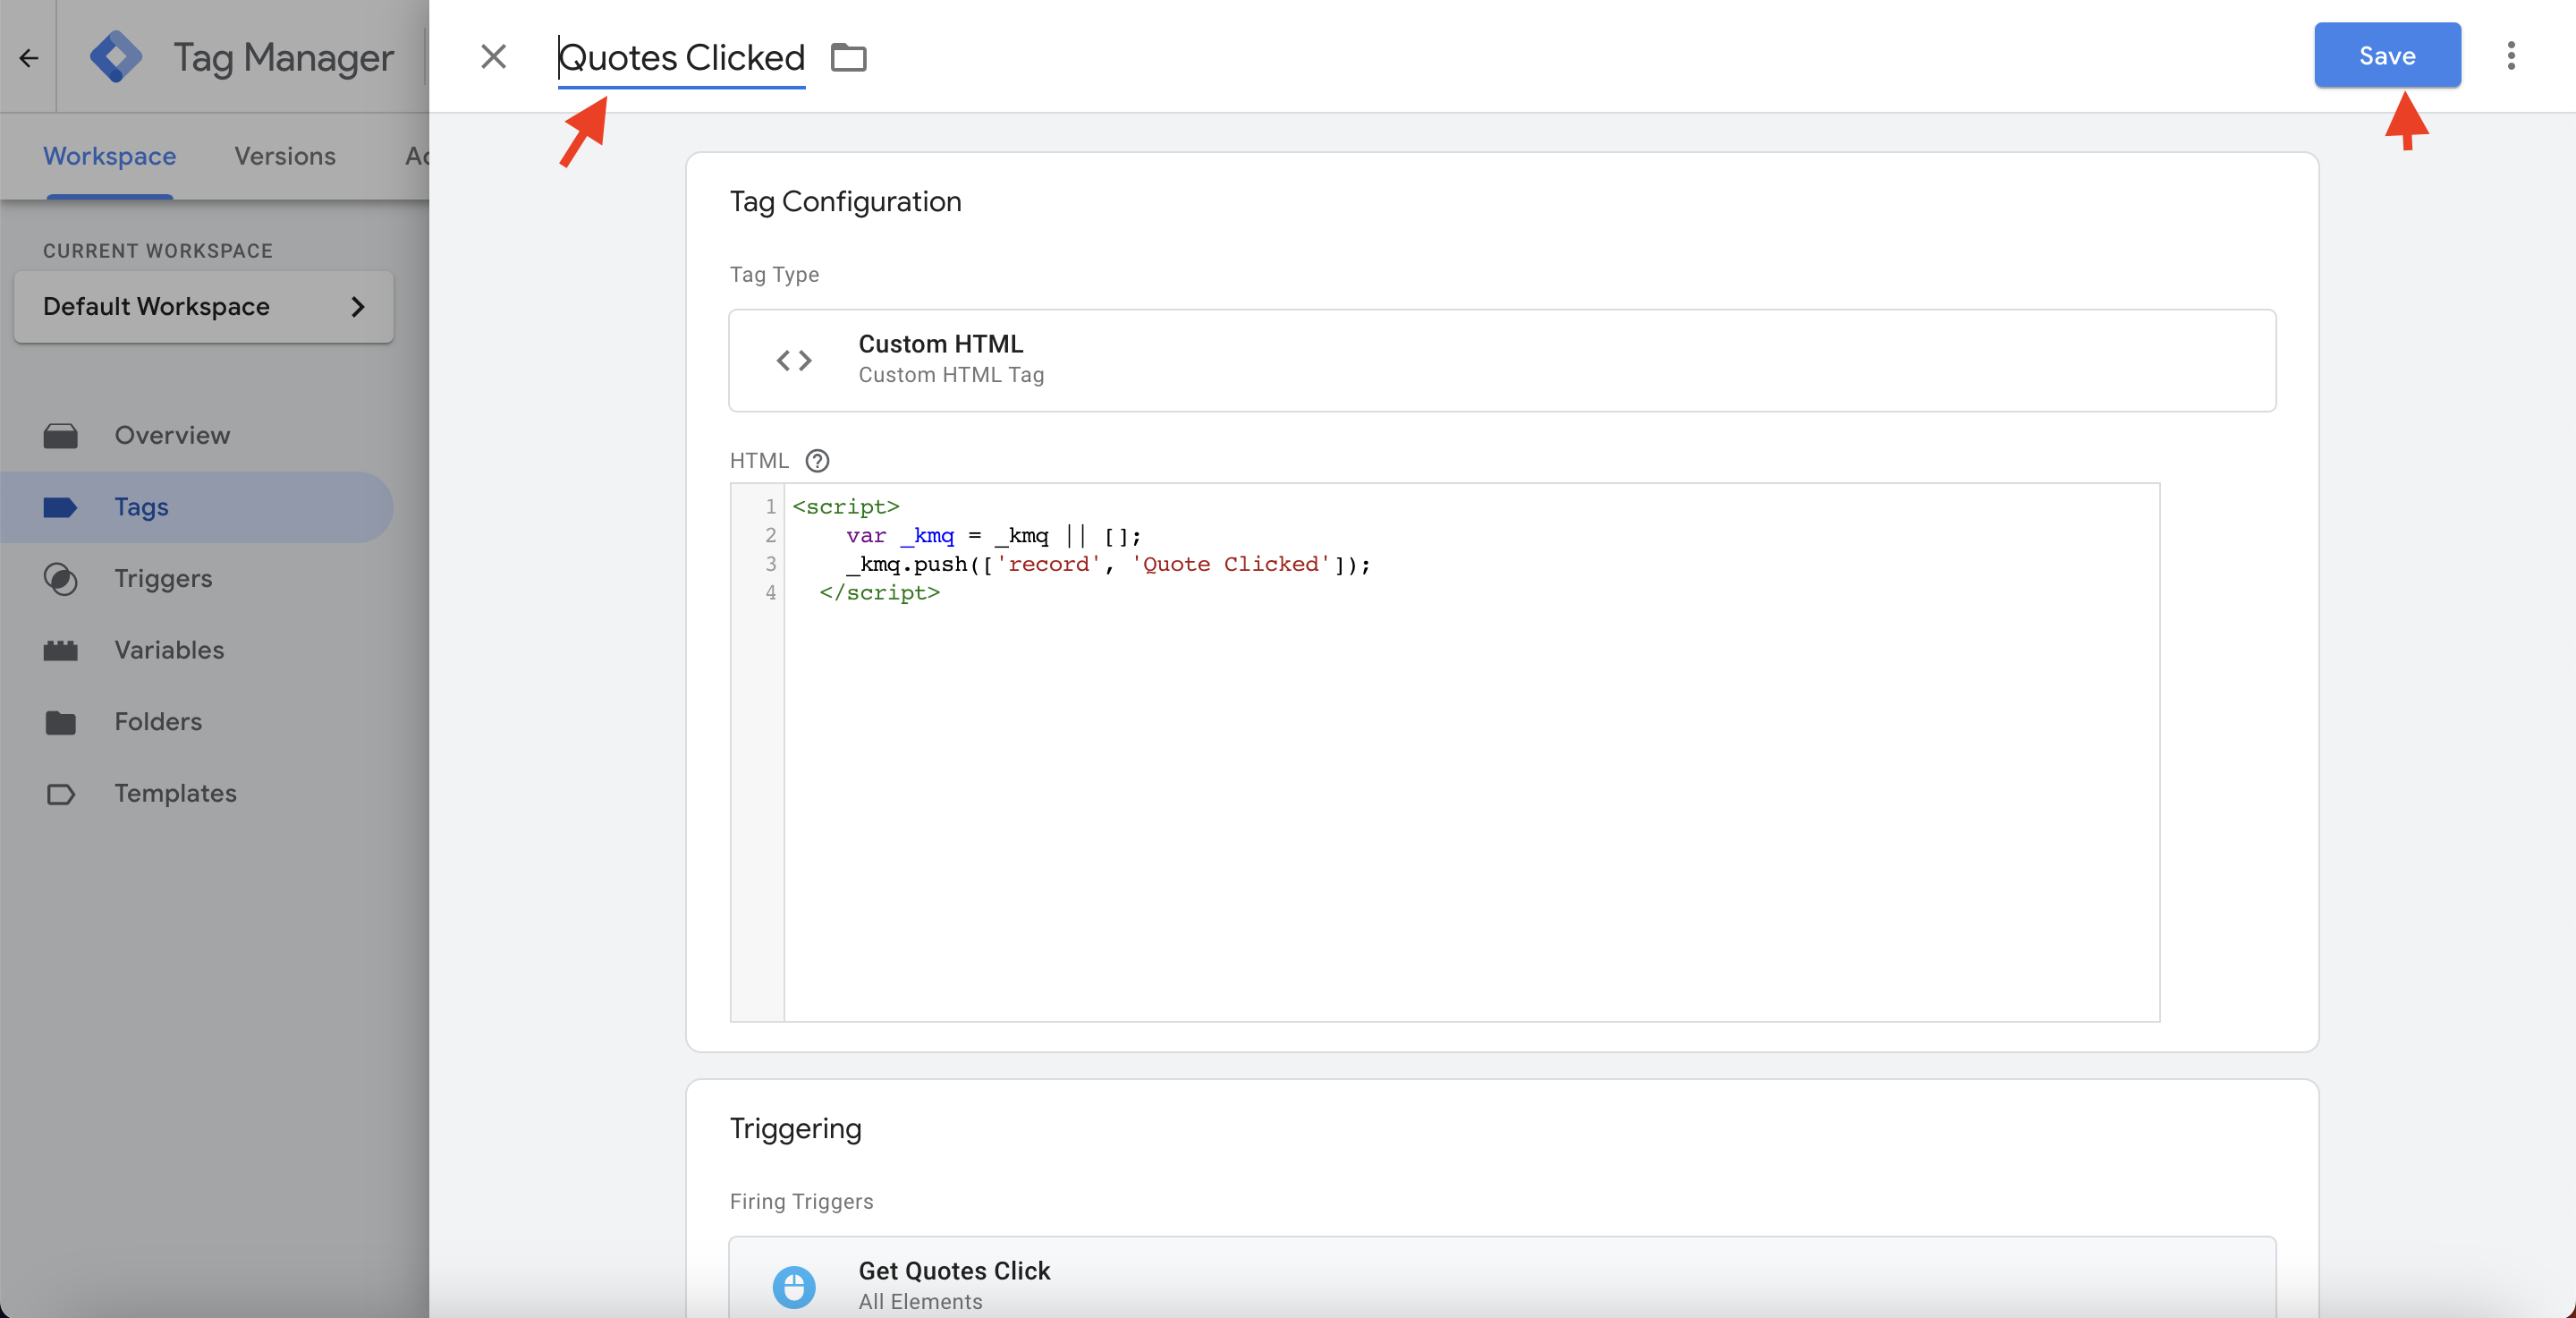
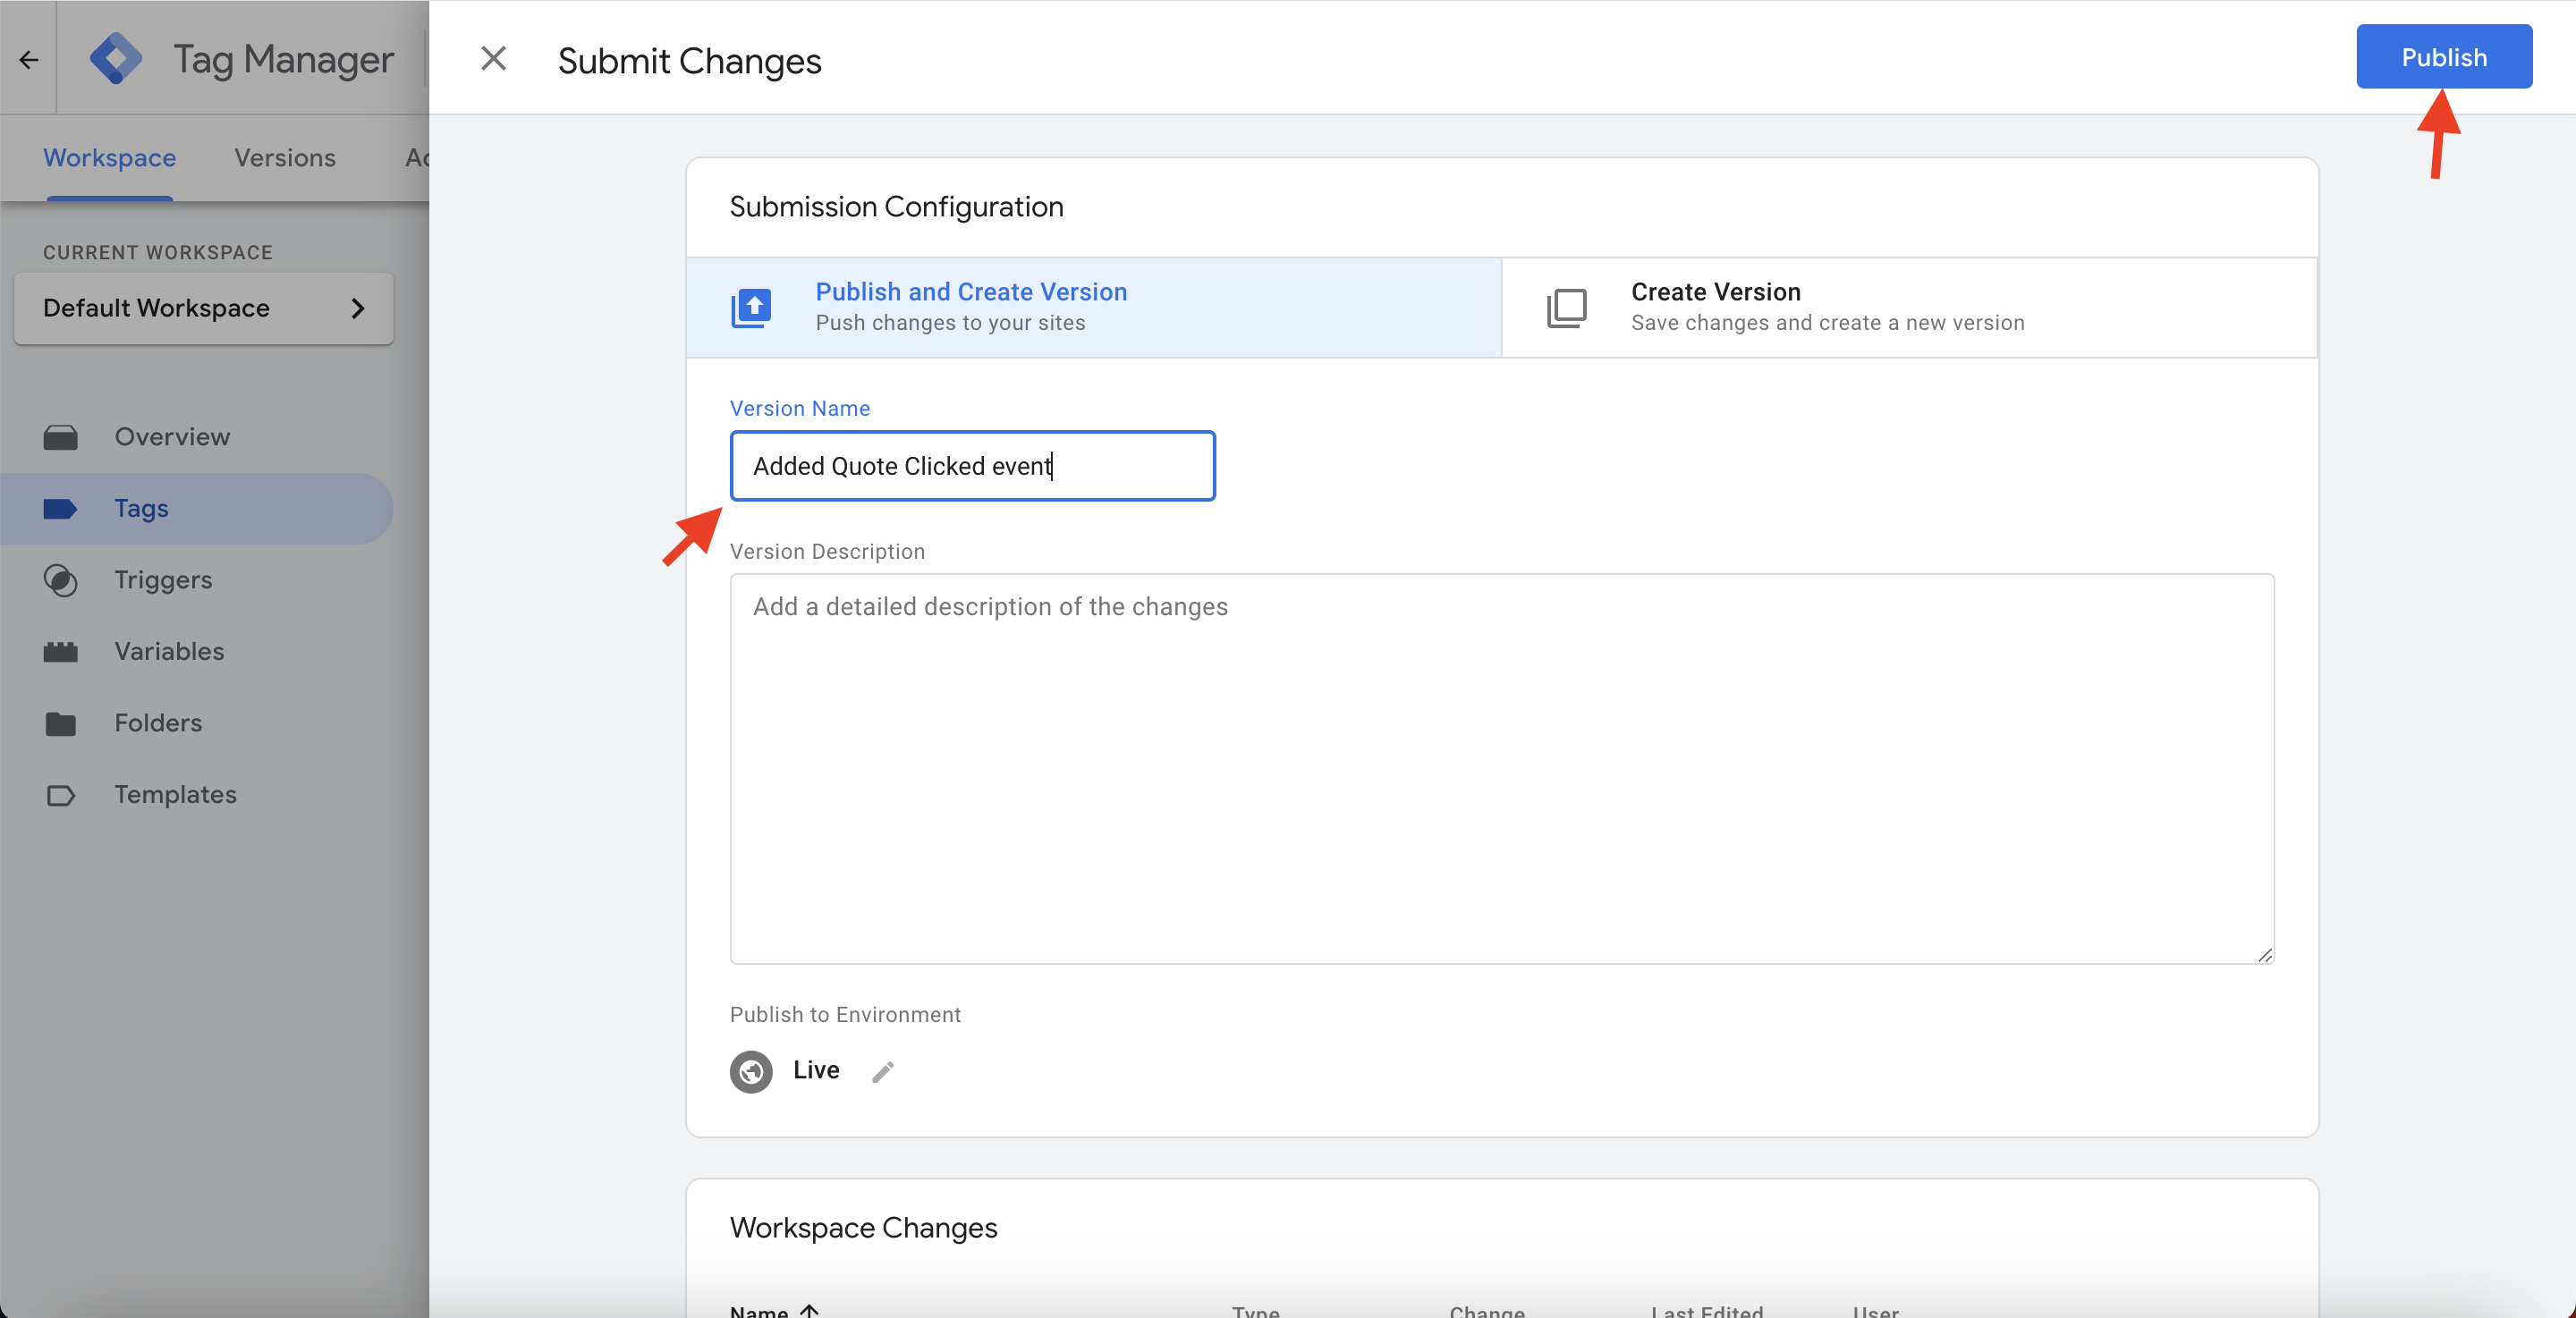
- Publish the Container to make the Tag and Trigger live
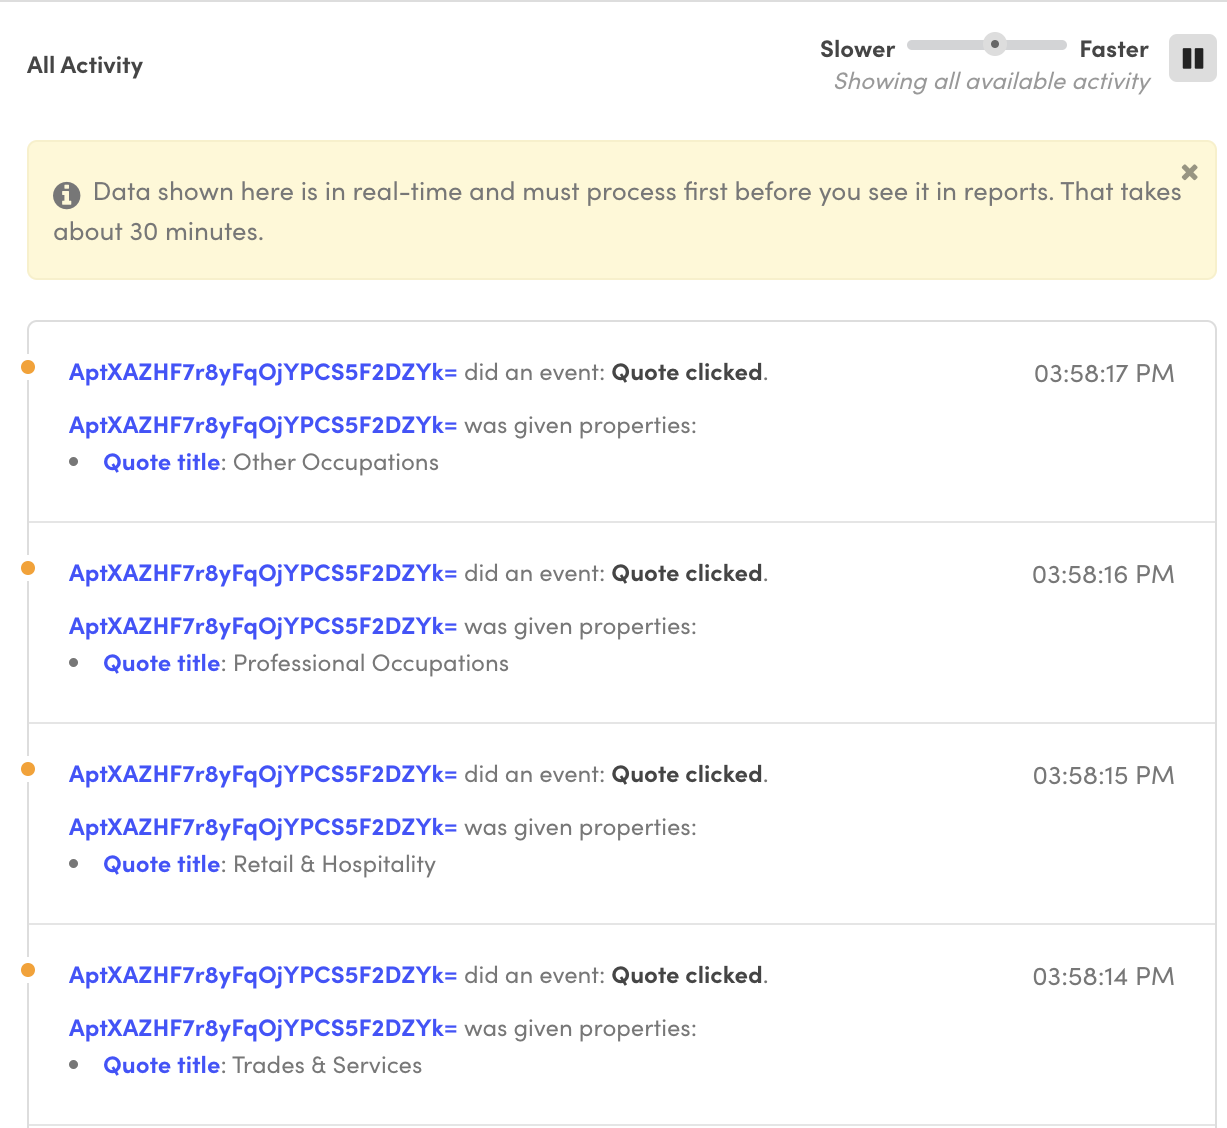
Testing the tag
In our Kissmetrics Live View we should be able to see when any of the GET QUOTES links are clicked. It will read
User did an event: quote clicked.

KM Live View
Along with the Live View, it also helps to have a Developer Tools => Network tab open, so you сan simultaneously see the requests being sent to our server. The requests in the Network tab serve as a 100% proof that we received the data.
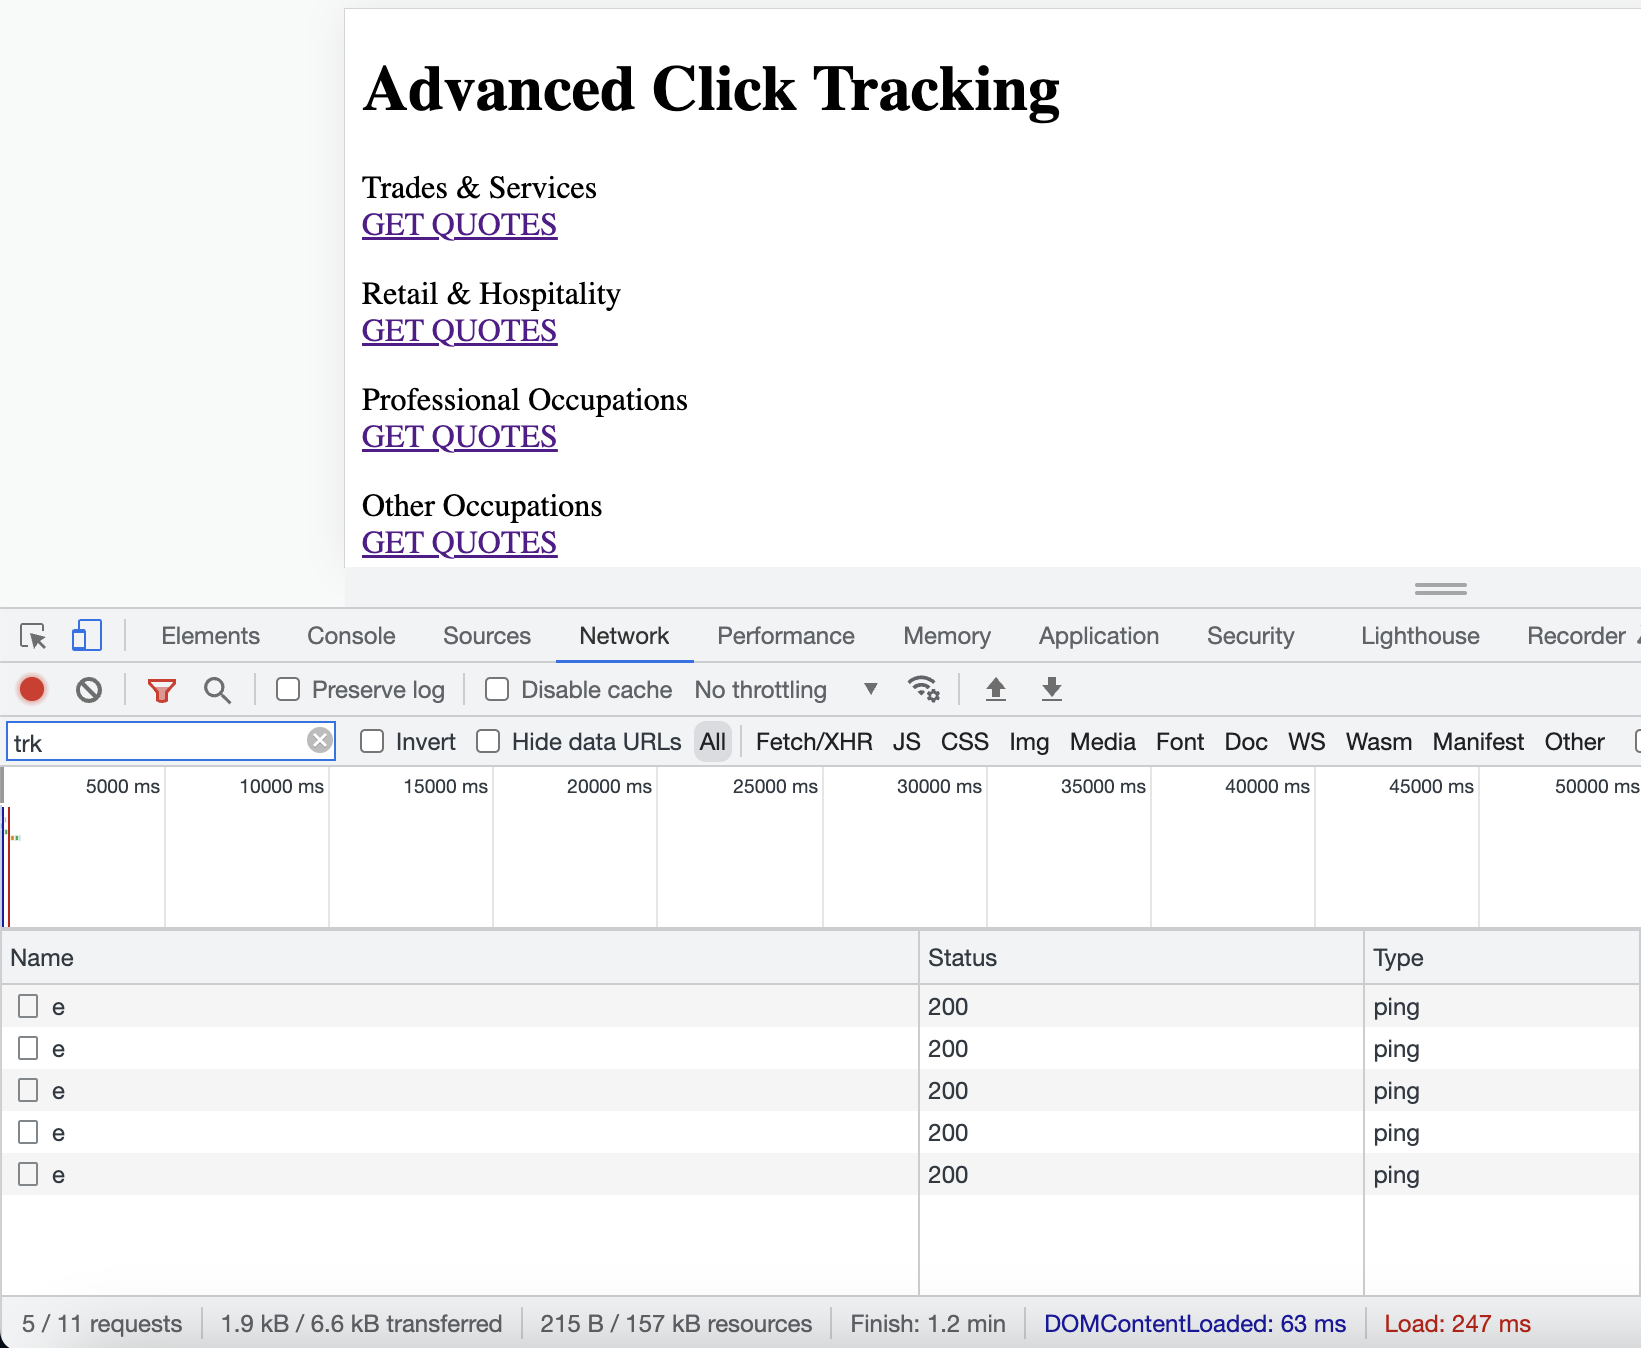
This test lets us know the Trigger and Tag are both working, however, our event is not very descriptive as it does not tell us which specific link was clicked.
In our HTML we can see that each tile has a main title div which has different text depending on the tile:
<div class="main_title">Let's assign this text to the Quote Clicked event to help us differentiate.
Ideally our Live View would show:
User did an event: Quote Clicked.
User was given Properties:
Quote title:clicked title
Using dataLayer
Google Tag Manager saves events in your app using the dataLayer. The dataLayer has many uses. In our case we are going to use it to write code based on the clicked element.
Let's look at one of our HTML tiles.
<div class="tile">
<div class="tile_content">
<div class="main_icon"></div>
<div class="main_title">Trades & Services</div>
</div>
<div class="tile_content">
<a href="#popup1"> <div class="get_quote_button">GET QUOTES</div></a>
</div>
</div>When we click on the first Get Quotes link the last element in our dataLayer is
<div class="get_quote_button">GET QUOTES</div>From here we'll need to traverse up 3 parentNodes to get to
<div class="tile">If we were to use .innerText on this node we get "Trades & Services↵GET QUOTES"
What we really want is just Trades & Services so we'll have to traverse some childNodes.
In this case, it would output Trades & Services
dataLayer[dataLayer.length - 1]["gtm.element"].parentNode.parentNode.parentNode.childNodes[1].innerTextAdd the Property to the GTM Tag
Lets go back to our Get Quotes Click tag in GTM. We'll change our HTML to the following:
<script>
  var clicked = dataLayer[dataLayer.length - 1]["gtm.element"]
  var title = clicked.parentNode.parentNode.parentNode.childNodes[1].innerText;
  var _kmq = _kmq || []
  _kmq.push(['record', 'Quote Clicked',{'Quote title':title}]);
</script>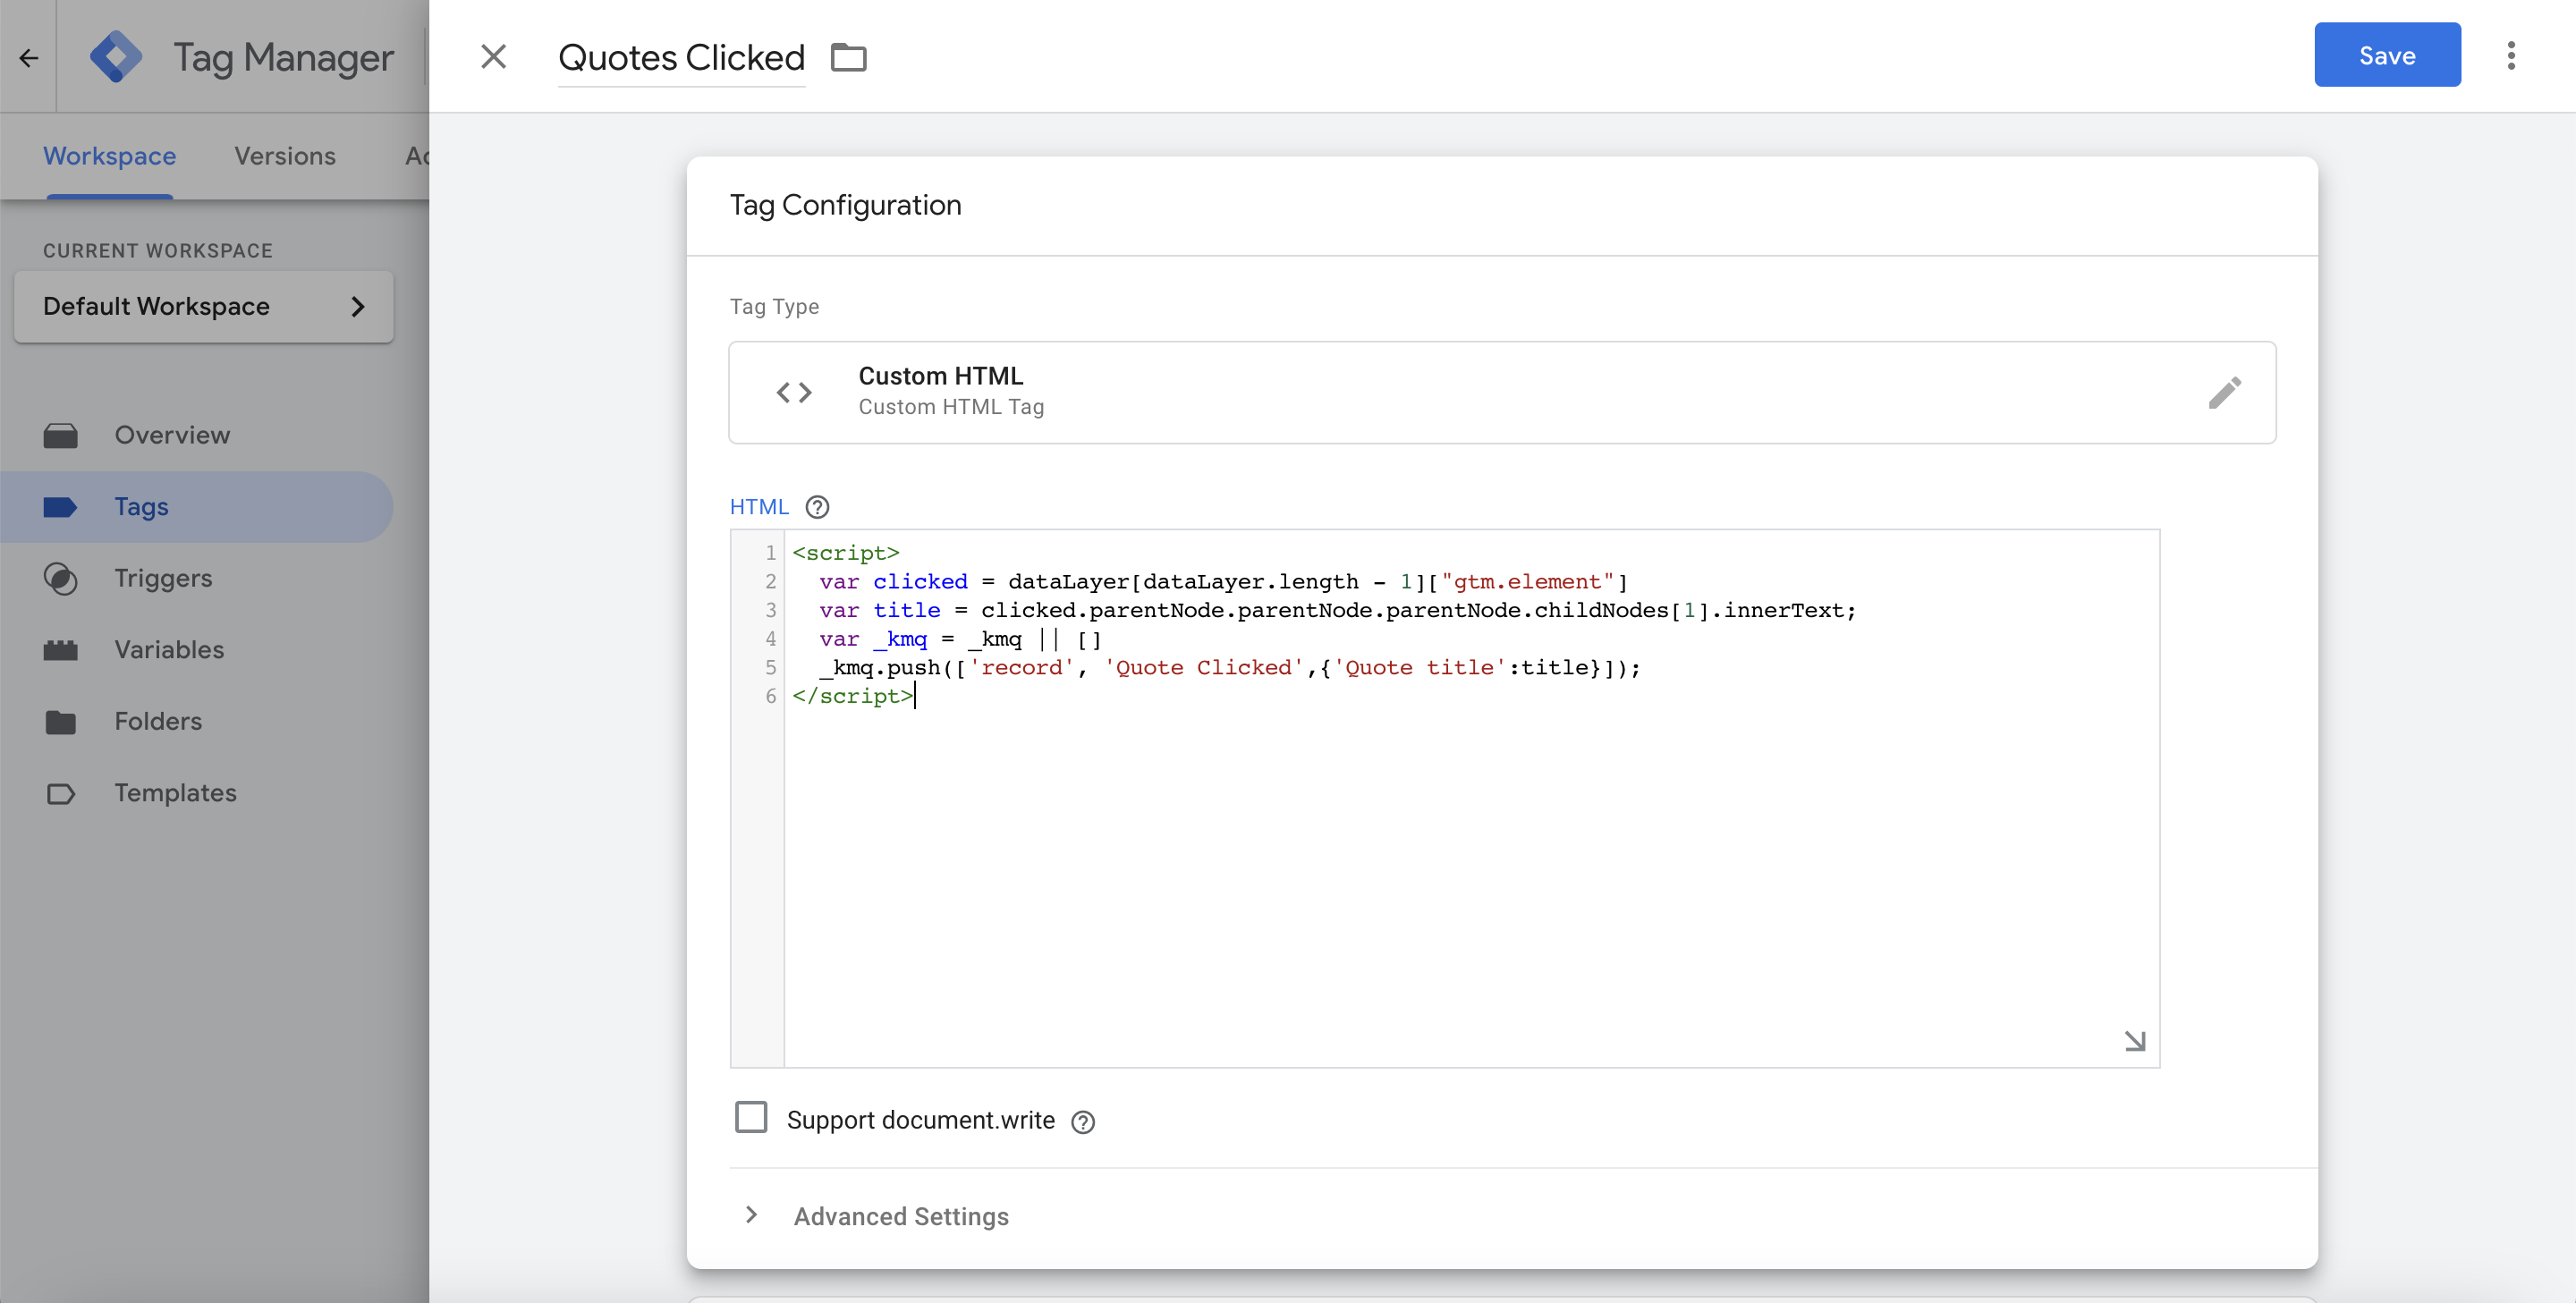
Make sure to Save the Tag and Publish the container.
Now whenever a GET QUOTES link is clicked our event in Kissmetrics will show the title the link resides in as a property.
Updated about 1 year ago