
Tracking Page Views Using Google Tag Manager and a Single Page App
Setup requirements:
For this tutorial we are assuming you have:
- Kissmetrics and Google Tag Manager Javascript snippets installed
- Fundamental knowledge of Javascript and HTML elements
- Basic understanding of Google Tag Manager
Goal:We are going to go through the process of setting up a Page View event that will fire whenever a new page loads. This event will capture the page URL as a property.
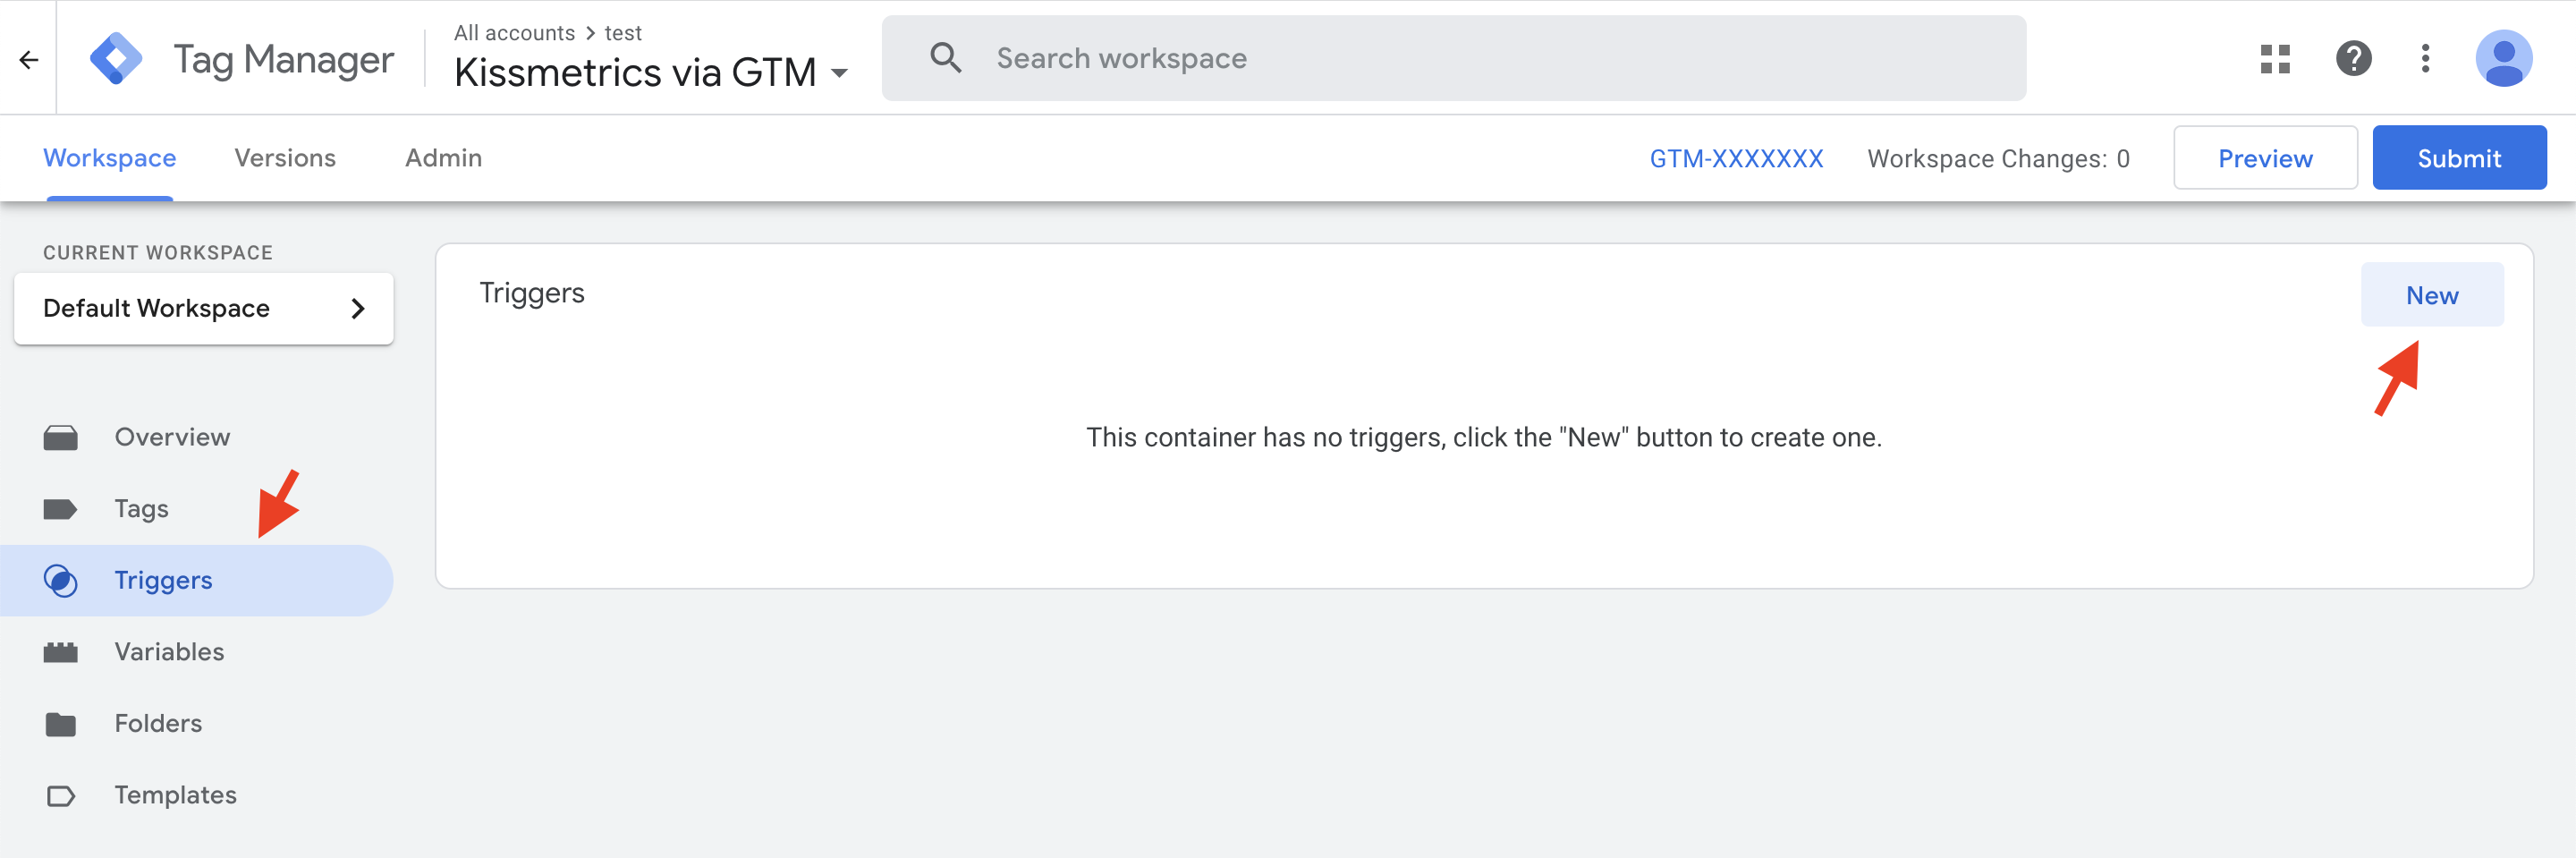
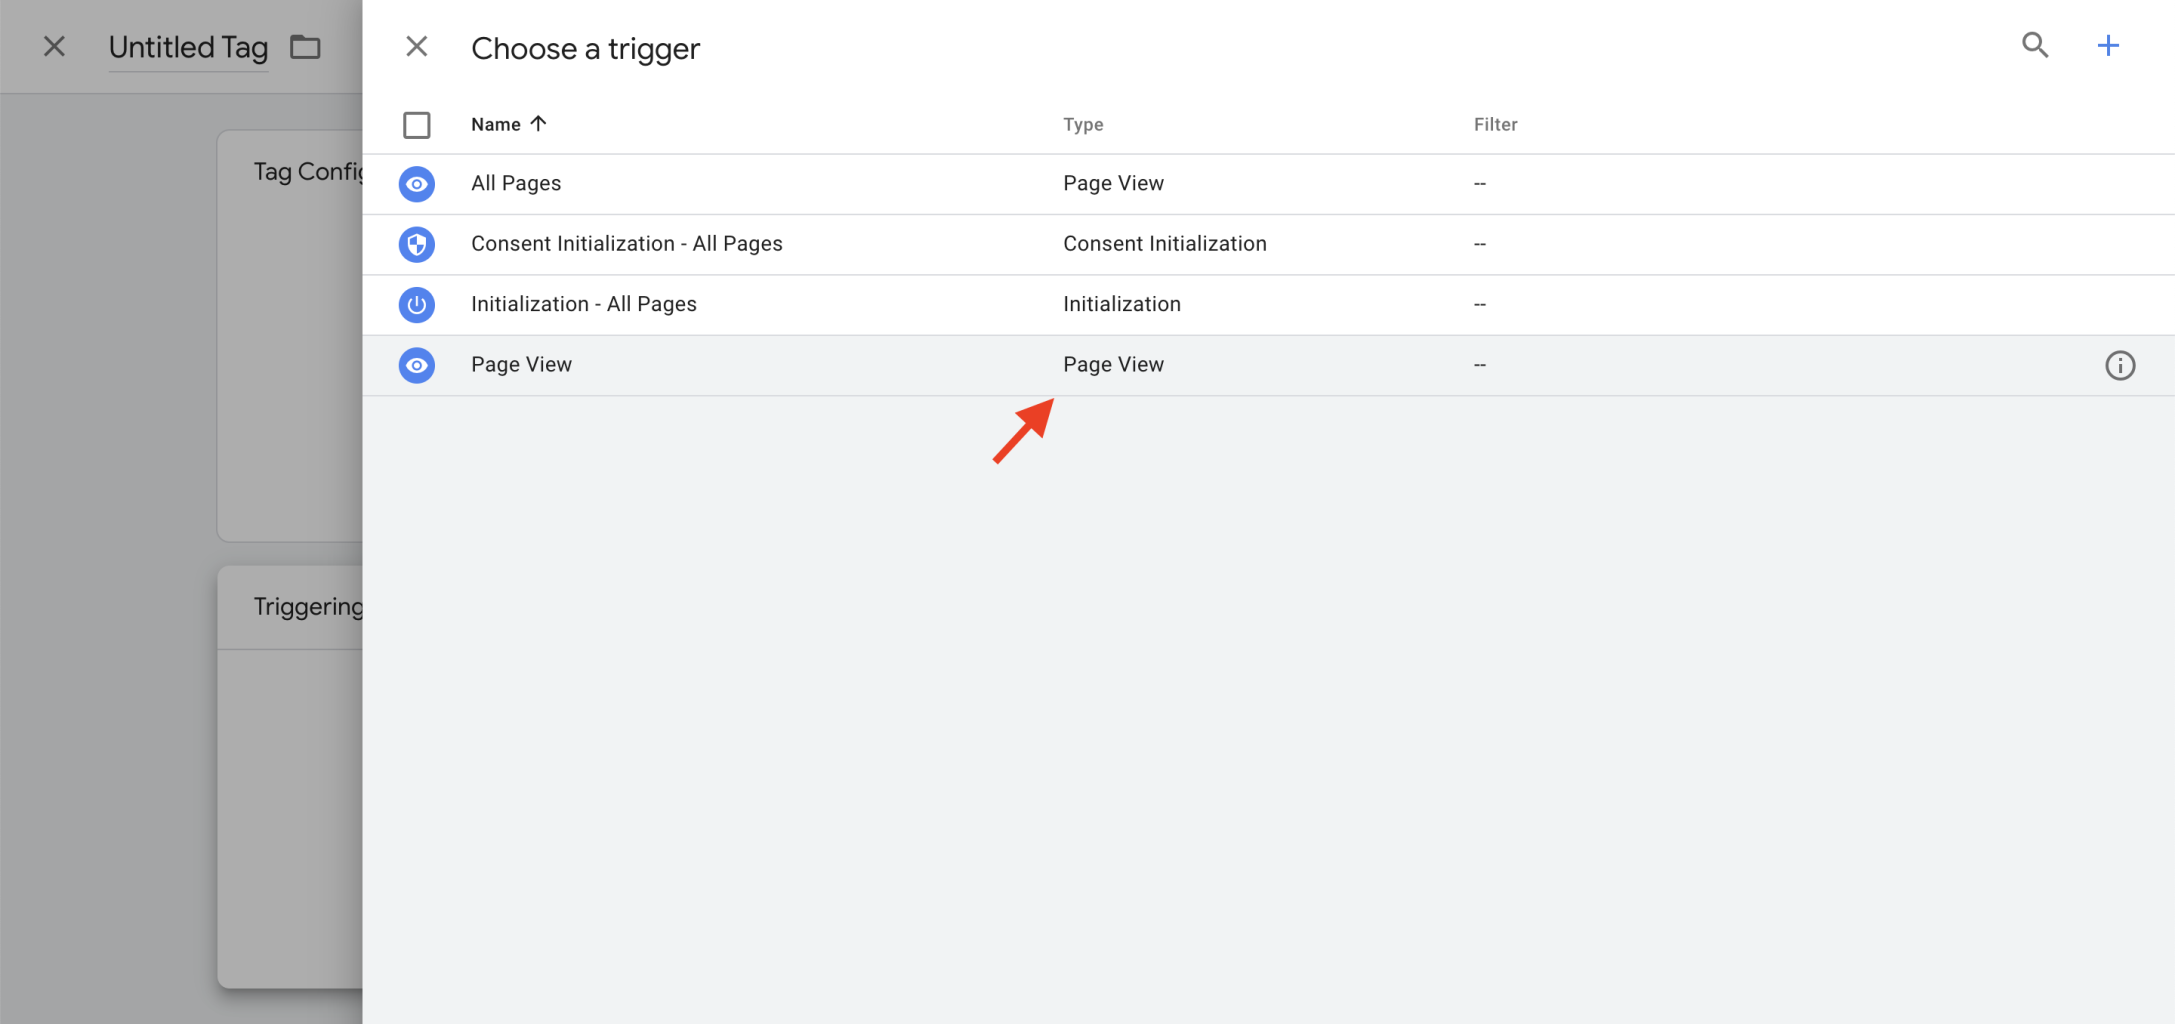
Step 1: Create the Trigger
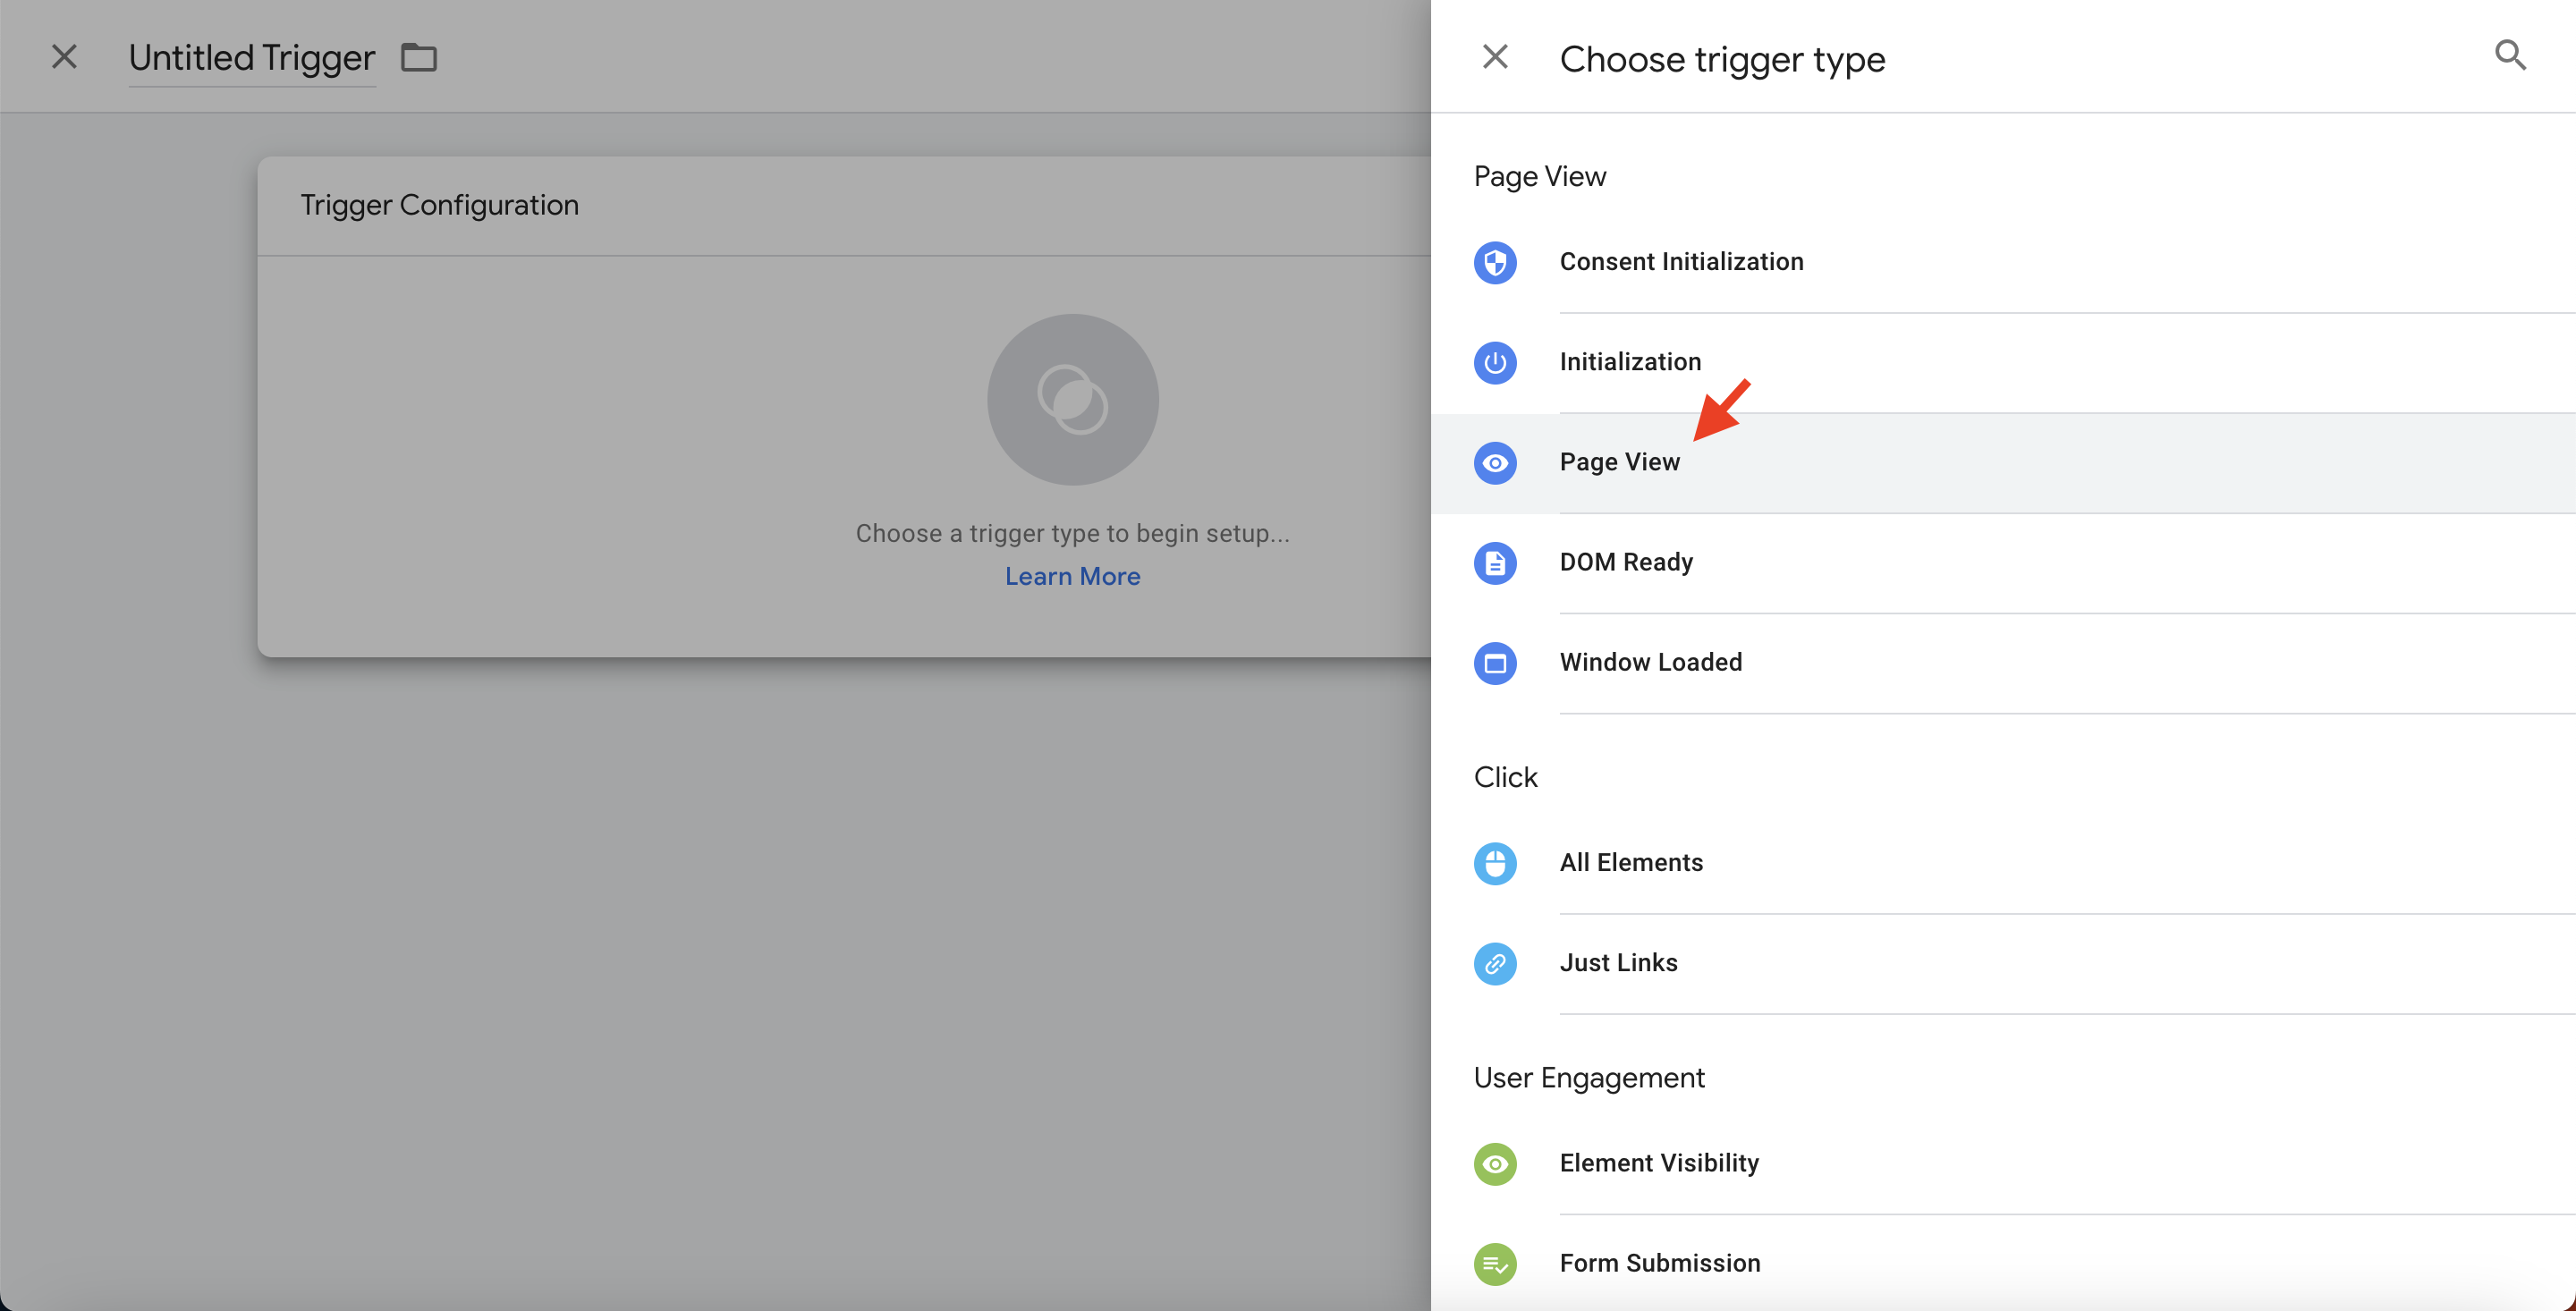
- Navigate to your GTM's container and create a new Trigger;
- Select the Page View Trigger Type;
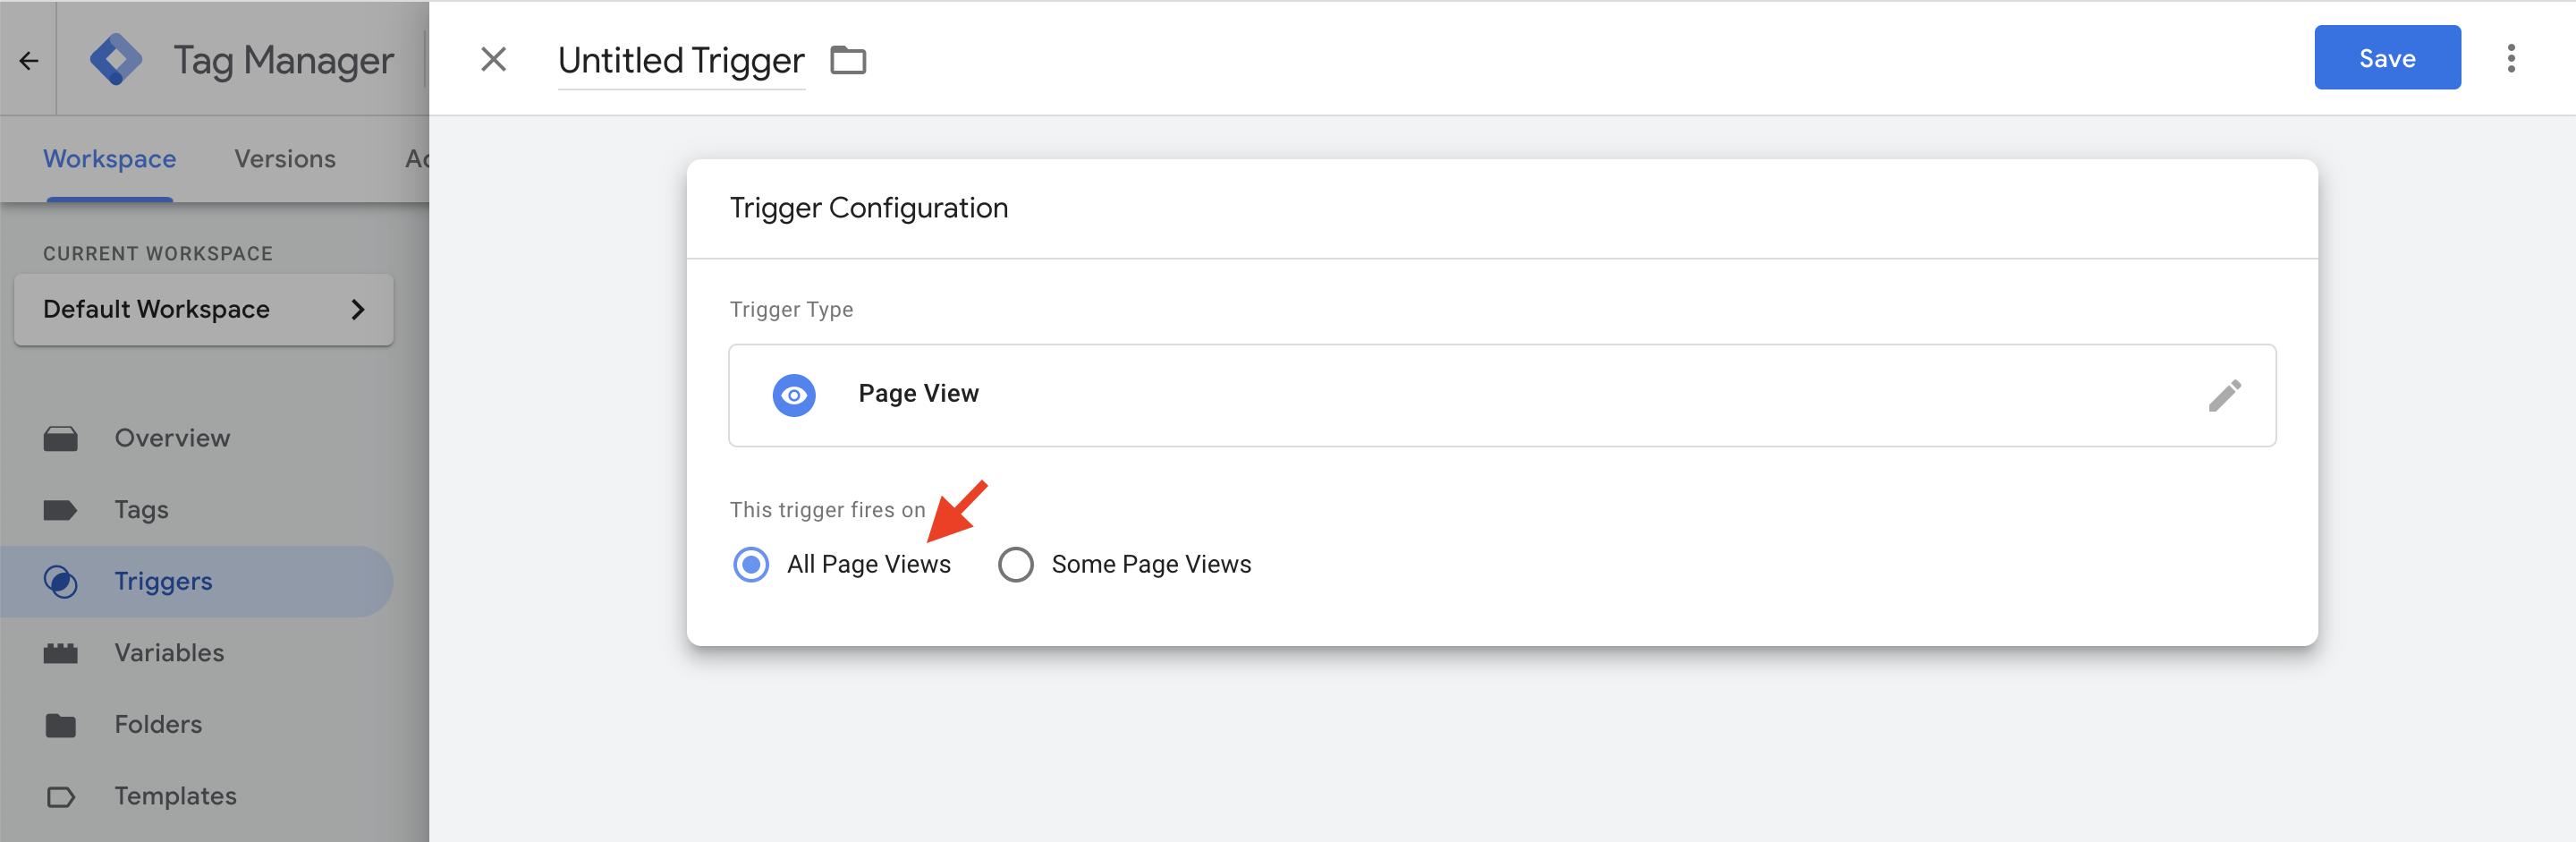
- Set the trigger to fire on All Page Views;
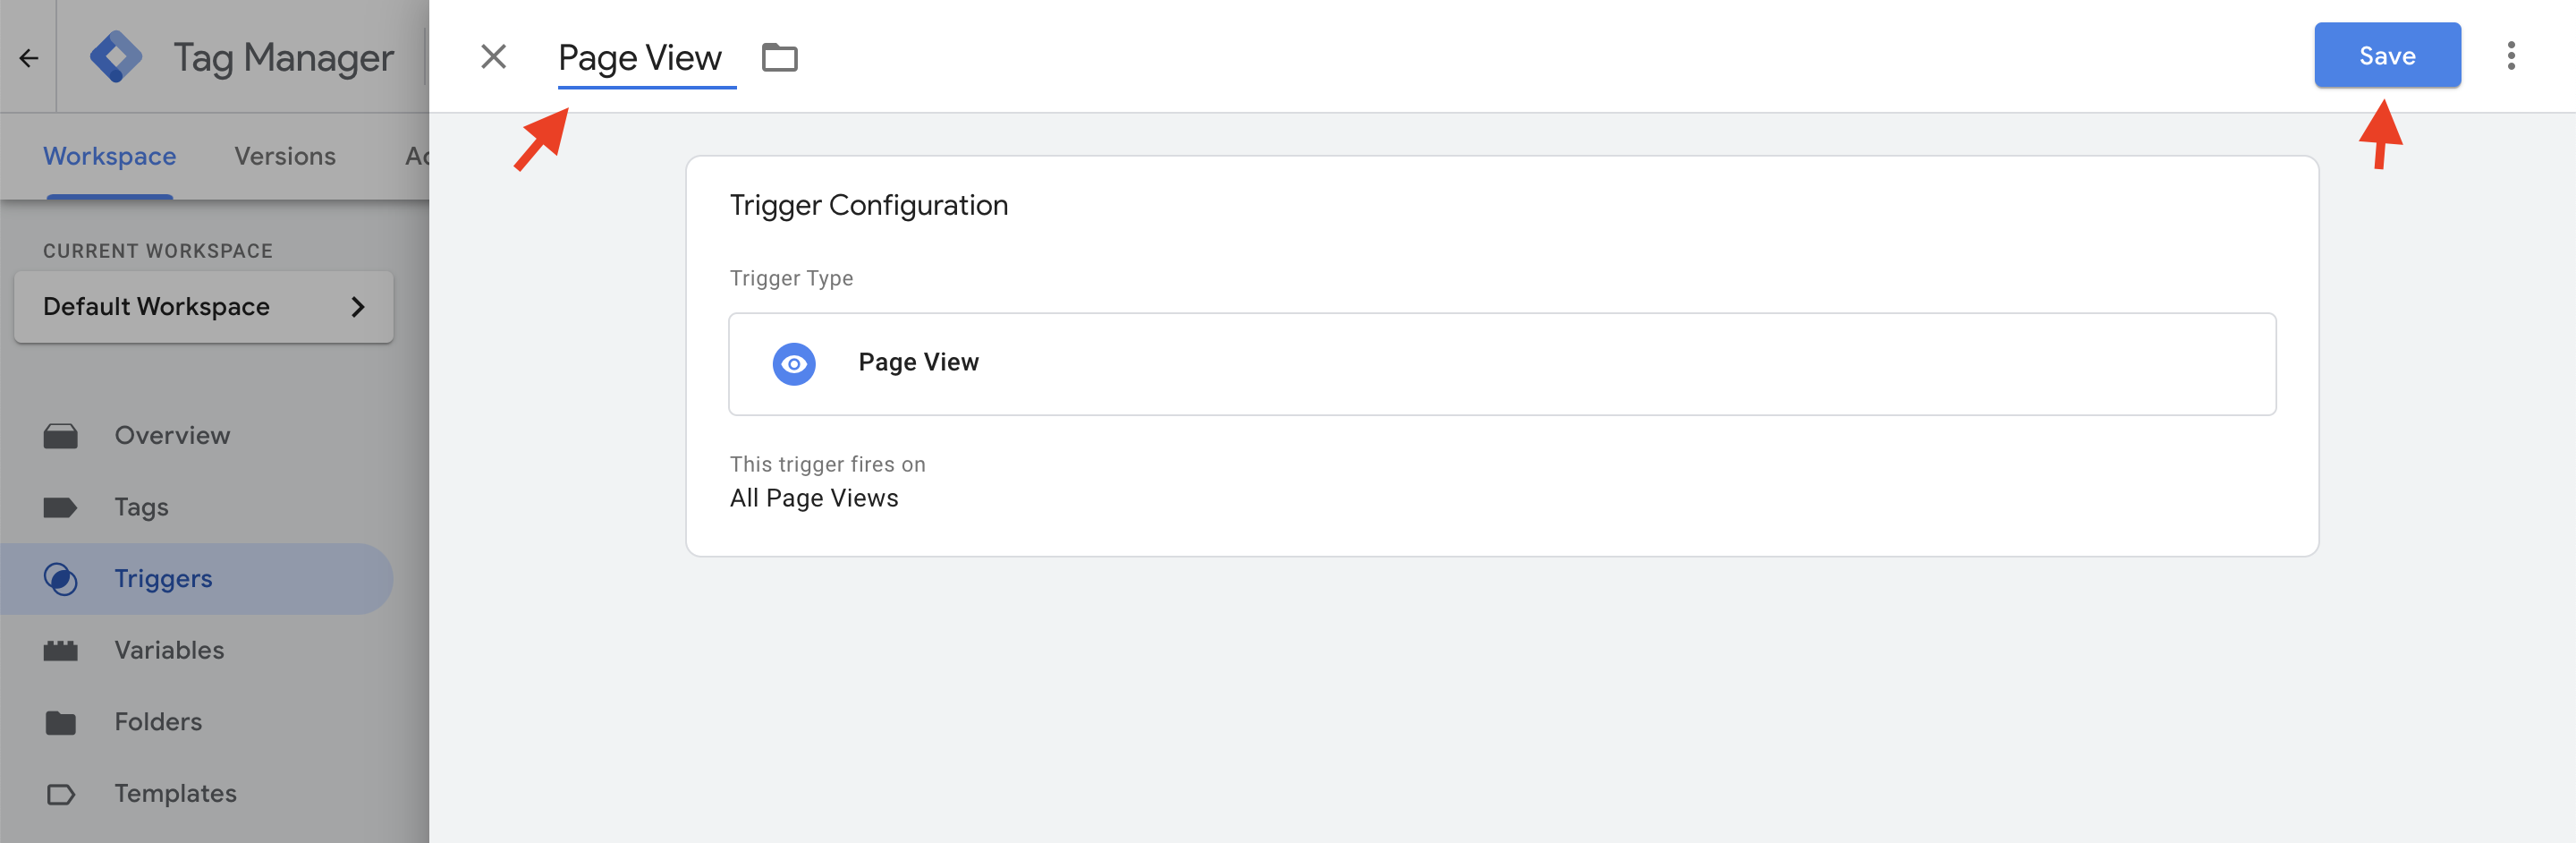
- Name the trigger Page View and save it.
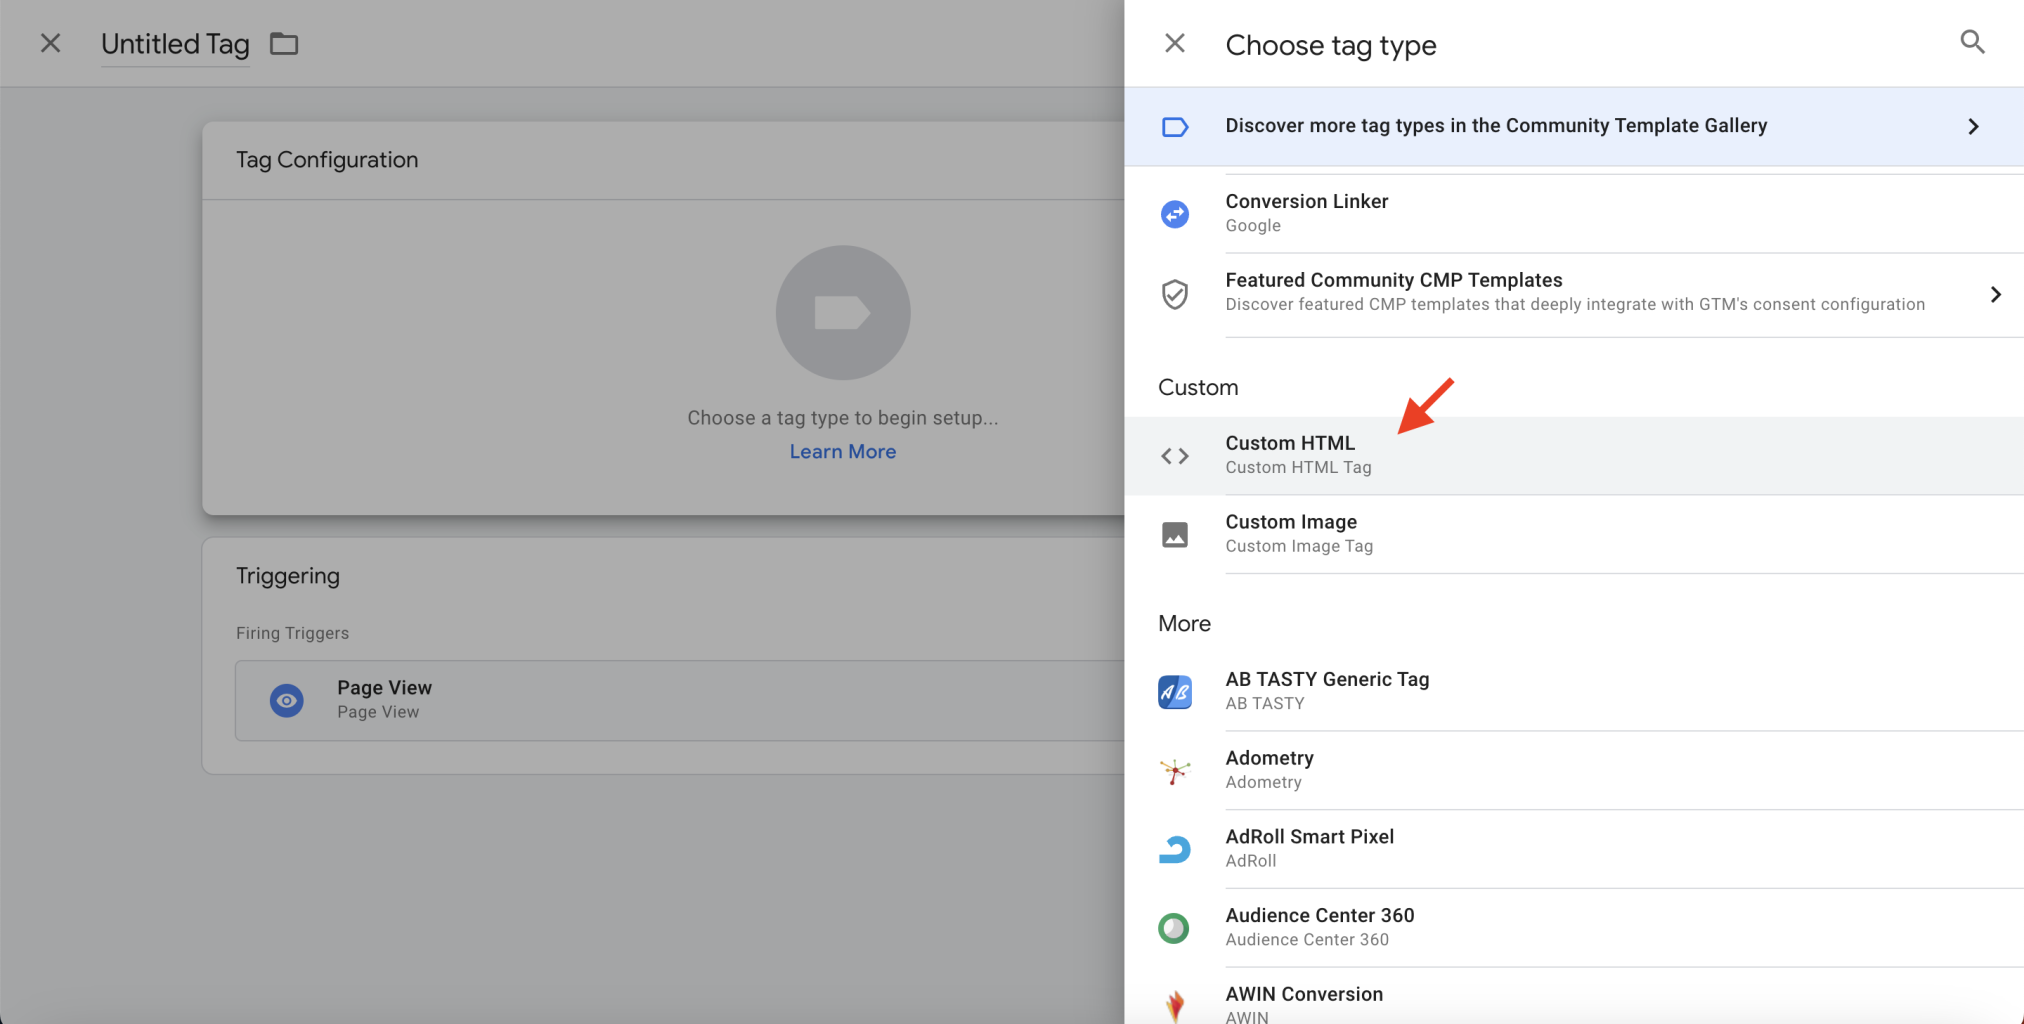
Step 2: Create the Tag
Now we need to make the Tag that will use the Page View trigger we just created.
- Select the Tags category and create a new Tag

- Click on the Triggering box and select Page View
- Click on the Tag Configuration box and select Custom HTML
- Enter the following Javascript
  <script>
    var _kmq = _kmq || [];
    _kmq.push(["record", "Page Viewed", {"Viewed Page" : "Homepage"}])
  </script>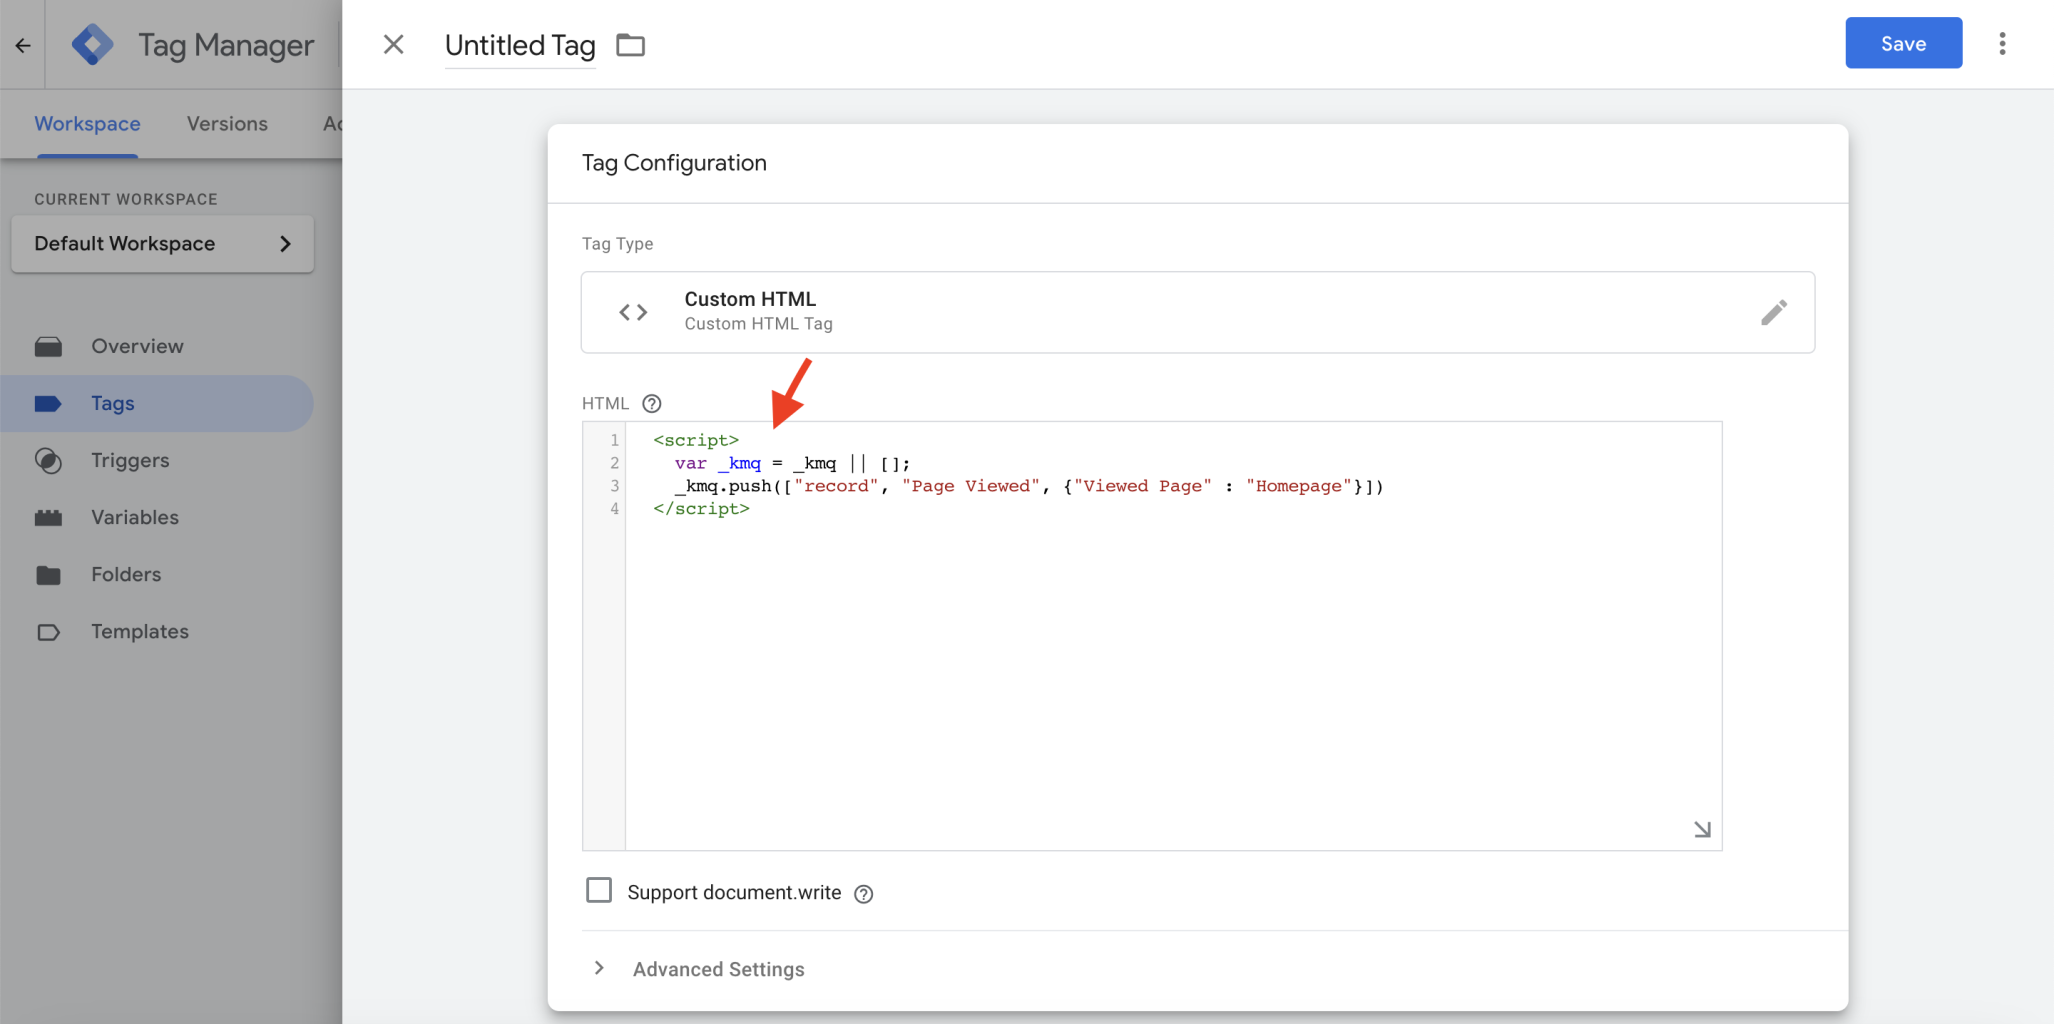
- We'll name this Tag Page Views and save it
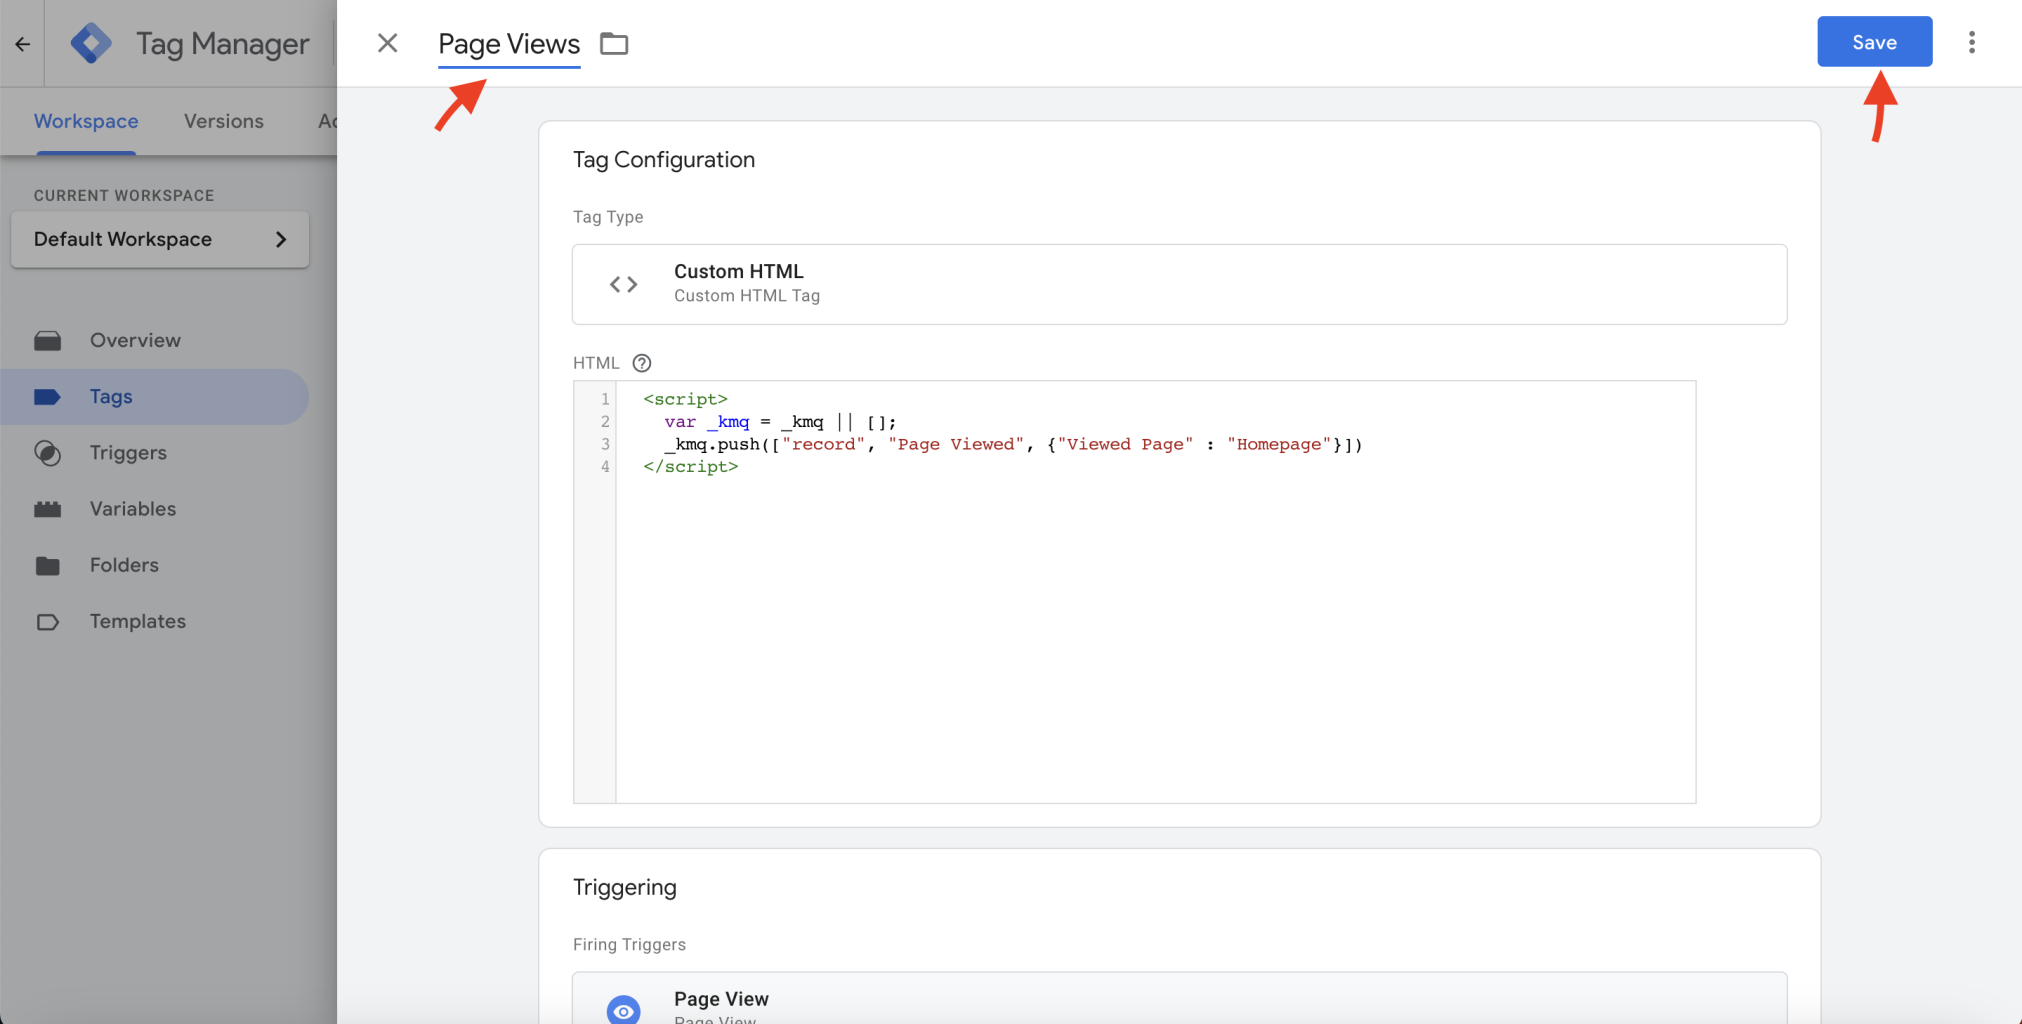
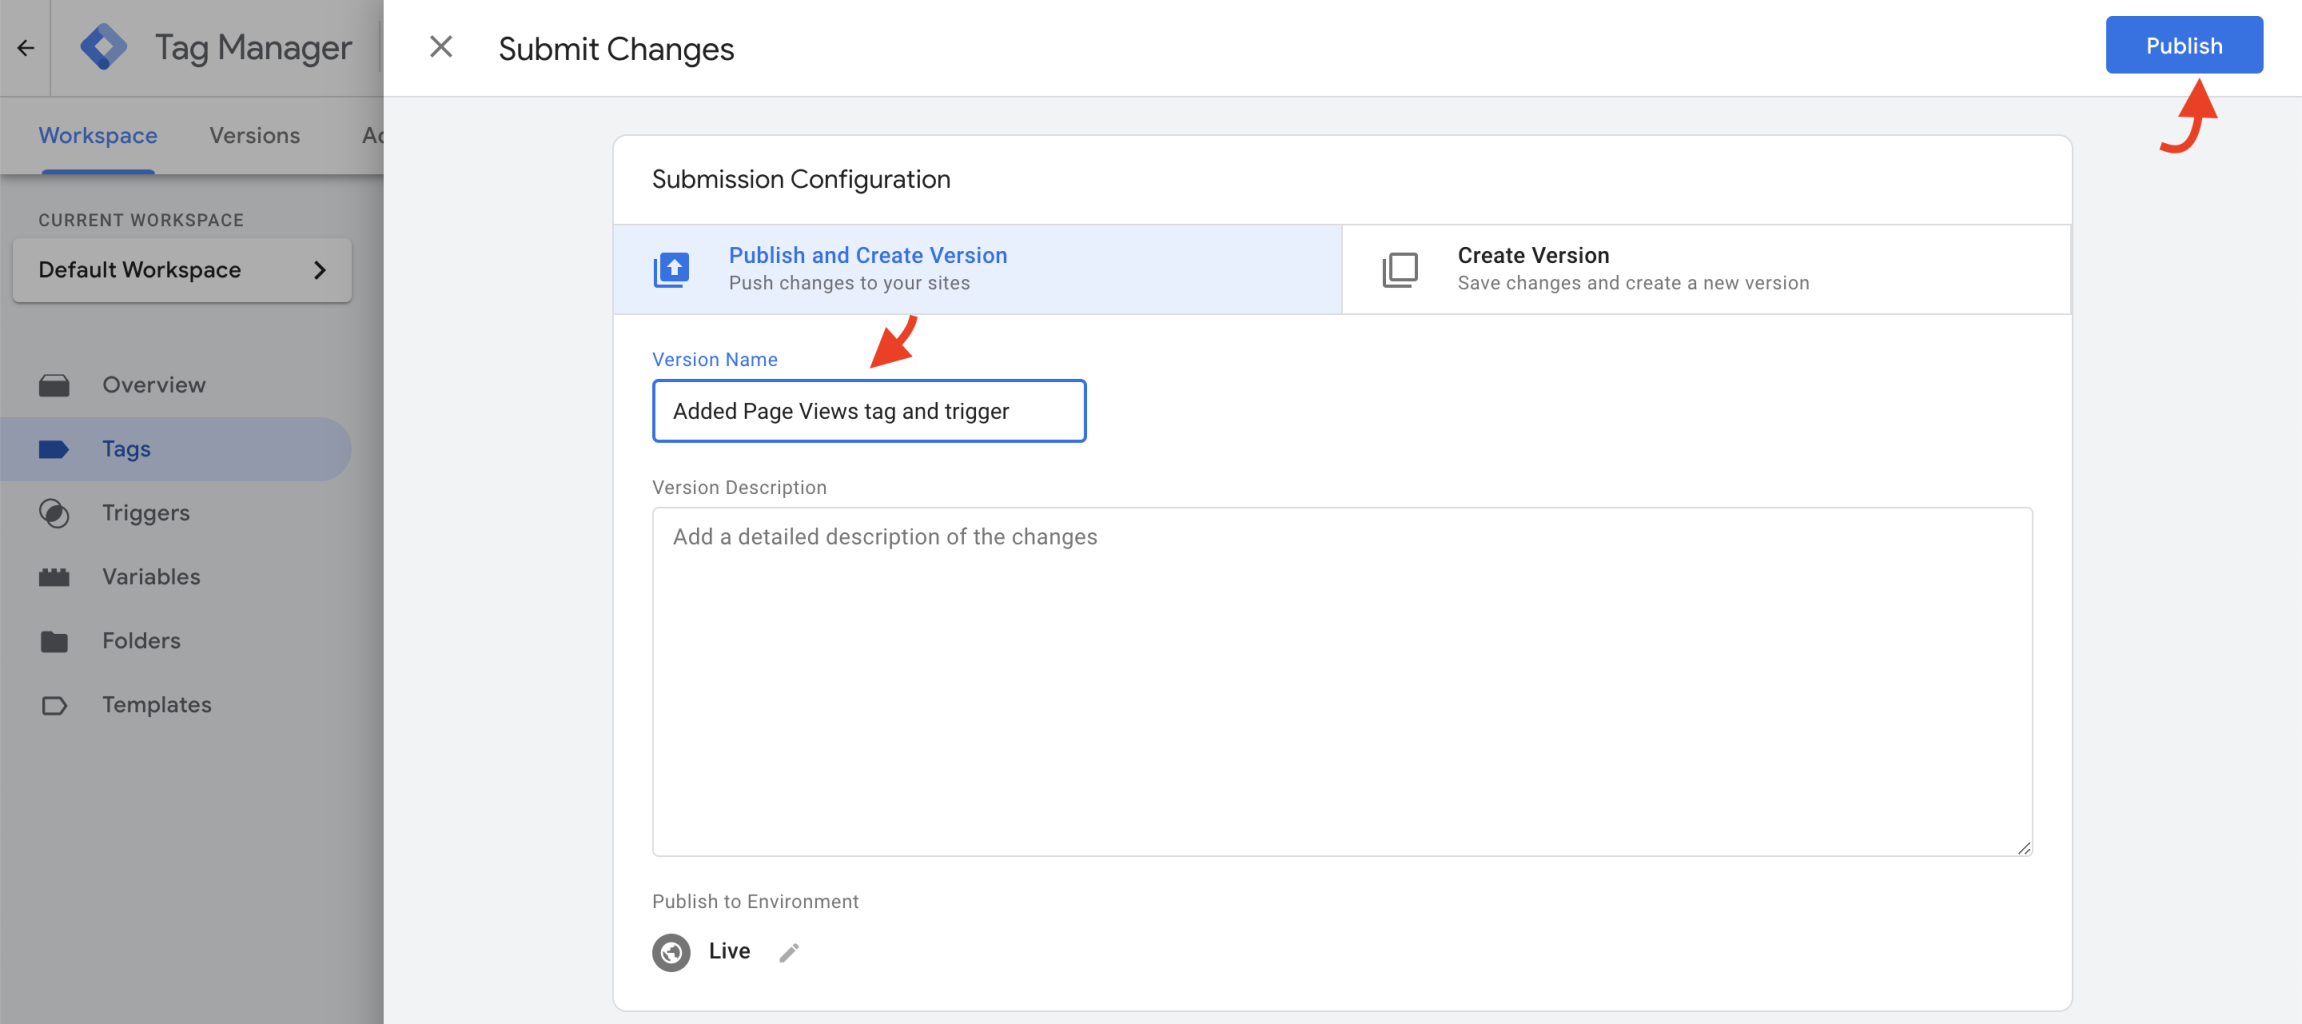
- Publish the Container to make the Tag and Trigger live
Step 3: View the Tag in Kissmetrics
In our Kissmetrics Live View we should be able to see an event fire whenever we load a page.

This lets us know the Trigger and Tag are both working, however, we need to change our Viewed Page to match the URL of the page we are viewing.
Step 4: Add Unique URL to Page View
Back in our Page Views tag, let's declare a variable that captures the current URL and put that into our properties. We'll do this by changing our custom HTML code to:
  <script>
    var url = window.location.href
    var _kmq = _kmq || [];
    _kmq.push(["record", "Page Viewed", {"Viewed Page" : url}])
  </script>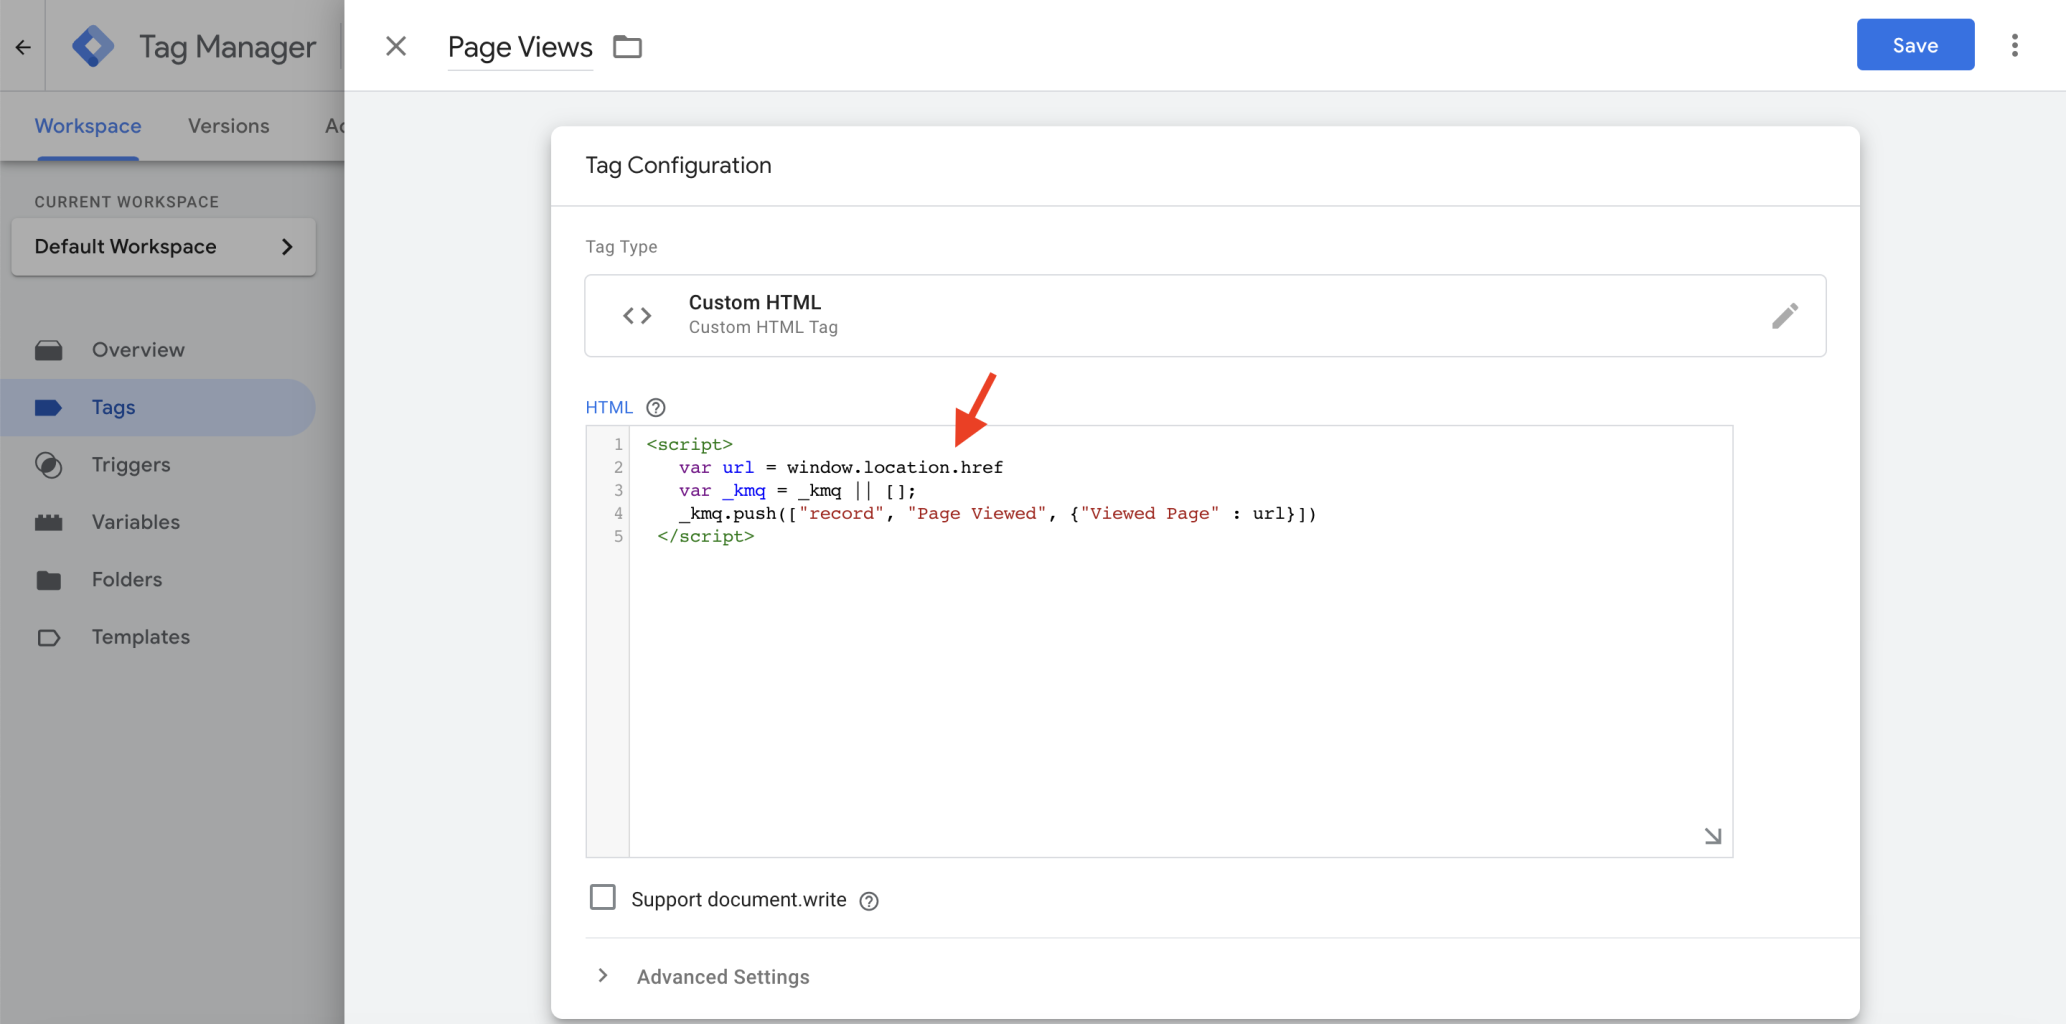
Make sure to save and publish this change. Now the events in Kissmetrics will pass the page URL where "Homepage" was before.

Updated about 1 year ago