Recurring CSV Import
This guide explains how to create an Amazon Web Services S3 bucket, name your CSV files, and point your Kissmetrics account to the appropriate bucket.
Creating an S3 Bucket
1. Sign in to (or sign up for) Amazon Web Services

If you already have an existing Amazon Web Services account, navigate to aws.amazon.com and sign in. If this is your first time going to AWS, you can go through a quick process of signing up for an account. It’s free to get started.
Not sure if you have an existing AWS account? Contact the developer who initially setup Kissmetrics for you and ask if there is an existing AWS account. If no one has ever heard of an AWS account, you can most likely go ahead and create one.
2. Create an S3 Bucket
You will be directed to the AWS dashboard after signing in or signing up. You’ll be working with S3:
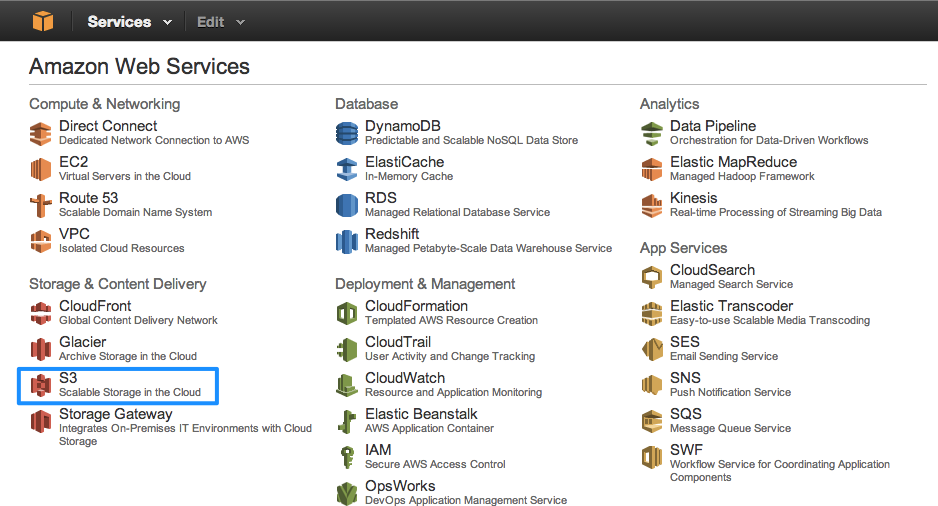
Click the blue “Create Bucket” button and name your bucket. You may already have a bucket configured for our Data Export tool. It is a good idea to use a separate bucket only for importing CSV files.
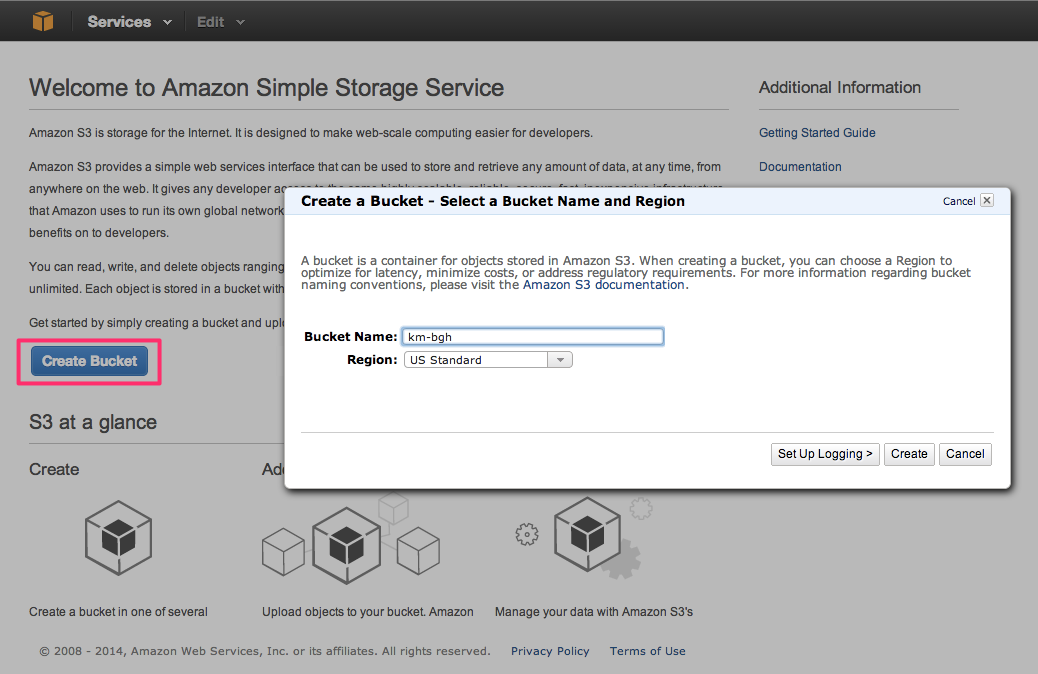
You will refer to this bucket name later.
Click “Create” to continue.
3. Give Kissmetrics permission to access the bucket.
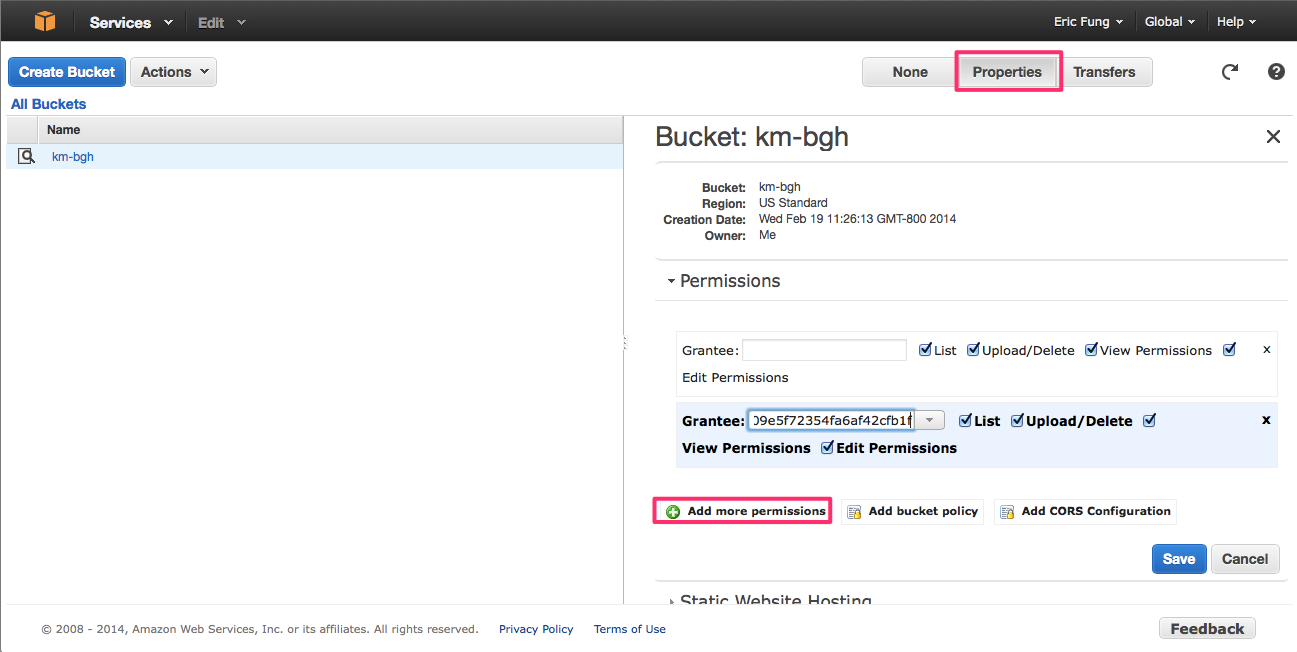
Now that you’ve created the bucket, you need to give Kissmetrics permissions to access it.
Click “Properties” towards the top right of the screen to expand the Properties of your bucket. You’ll notice it will list who has permissions on the bottom of the screen.
The grantee ID of the Kissmetrics user is:
6acb81d7742ac437833f51ecb2a40c74cd831ce26909e5f72354fa6af42cfb1f
Please include all permissions (List, Upload/Delete, View Permissions) for this user.
4. Give Kissmetrics permissions to edit the files
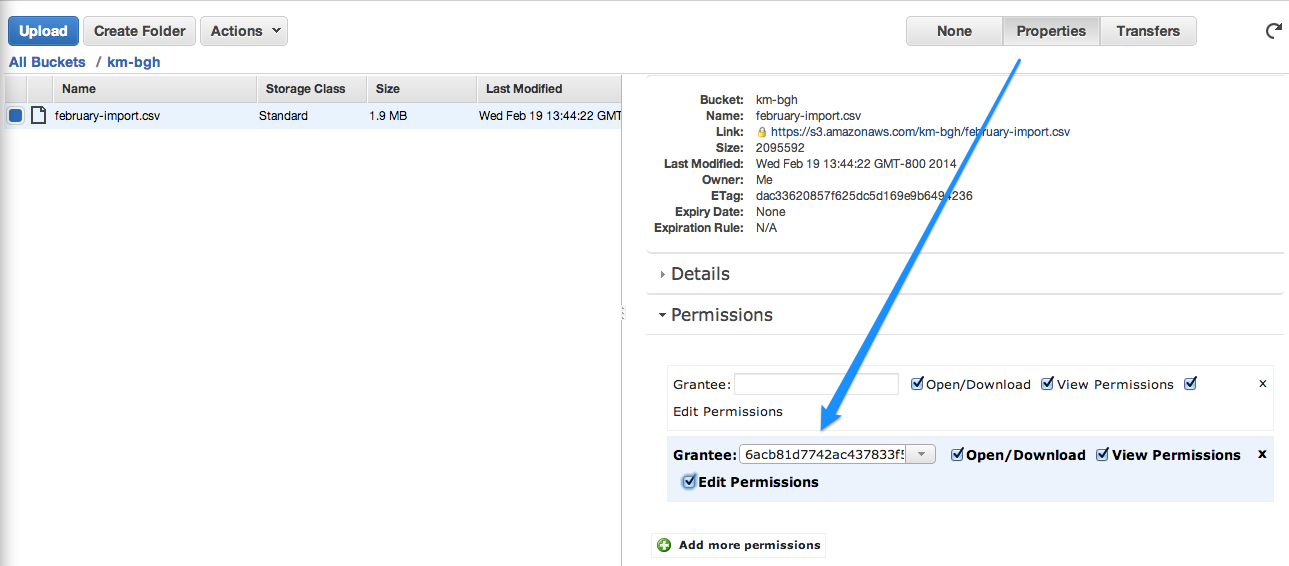
You’ve provided Kissmetrics access to the bucket, but we also need permission to read and modify the files. Select the .csv file, Click “Properties”, and add permissions for the user
6acb81d7742ac437833f51ecb2a40c74cd831ce26909e5f72354fa6af42cfb1f
(The section below has information about how your files should be named.)
Your bucket is now configured!
Linking Your KM Site to the Bucket
1. Navigate to the Upload Area
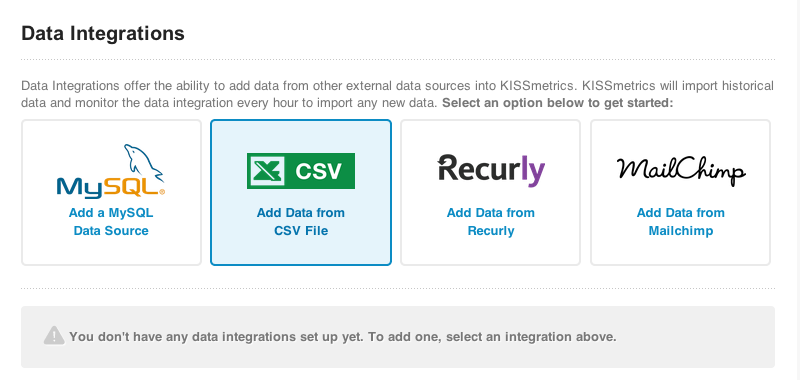
The CSV Upload Area is located under your site’s External Data Sources. You can reach it by doing the following:
- Navigate to the Data Integrations under Site Settings.
- Click Add Data from CSV File
2. Tell Us About Your Bucket
- Select “Recurring import from S3 bucket” as the Import Option.
- Enter in the name of the bucket, from Step 3 above.
- Enter in the base name of your csv files, explained below.
Naming Your CSV Files
Kissmetrics will use a base filename to create a search pattern, finding and processing all files that match that pattern. We will process them in alphanumeric order.
For example, if you use the base filename accounts.csv, Kissmetrics will look for files that match accounts*.csv. Sample naming conventions include:
- accounts.unix_timestamp.csv
- accounts-YYYYMMDDHHIISS.csv
This lets us look for all CSV files that start with accounts, starting with the one that comes first chronologically (because we are processing the files alphanumerically).
Currently, the import processes a single file every hour, so it makes sense to generate new CSV files once an hour, or less frequently then that.
Note:At setup time, at least one valid file must be located in your bucket.
3. Preview and Confirm
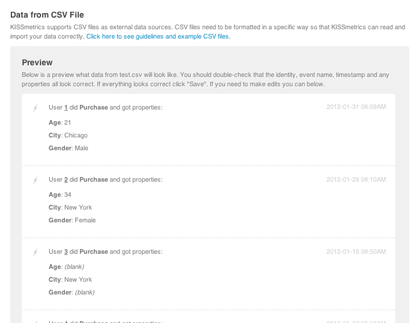
If all goes well, we’ll show you a preview of the events and properties to be imported. Review the results and confirm the import when you are ready.
Processing Schedule
Currently, we scan for unprocessed files every hour. If we find any available files, we will process them 1 file at a time per hour. If your file is large, and it takes our servers longer than 5 minutes to process a single file, we will resume processing on that file during the next hour.
CSV files that have been processed will be moved to a folder within your bucket:
completed_imports/YEAR/MONTH/DAY/ORIGINAL_FILENAME.csv
Updated 8 months ago
