
Installing Kissmetrics through GTM
Google Tag Manager is a free tag management system. Rather than editing site code every time you want to add HTML/JavaScript snippets, you can install the Tag Manager script once and make updates from within Google.
The concept is similar to creating events with our Event Manager , where you install our main piece of JavaScript once and manage your events within Kissmetrics.
In case you have an existing GTM implementation, please skip tostep 3.
Step 1: Get Started
Set up your account at the Google Tag Manager website. You’ll be asked to create a "container", which is a collection of tags for a website. Then you’ll get these pieces of code with the instructions for instalment:
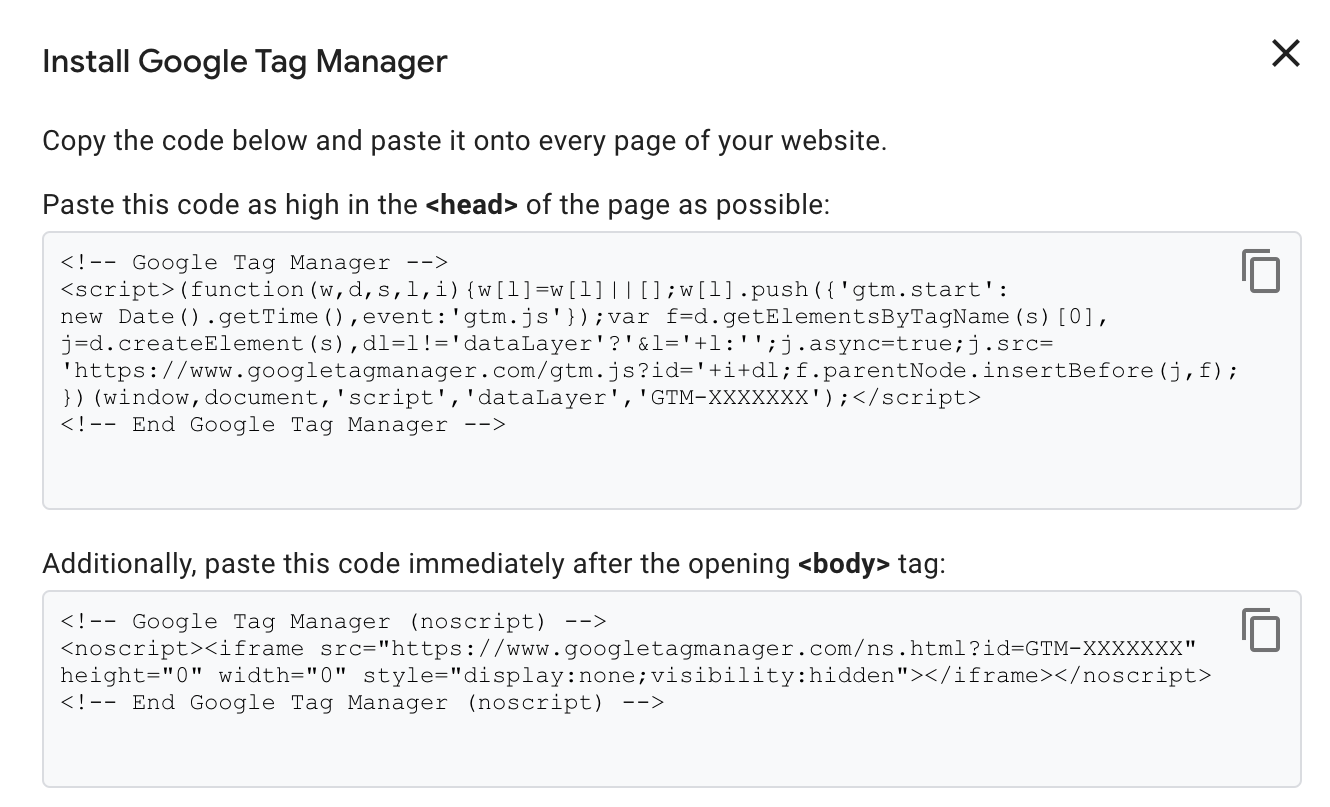
GTM snippets
Step 2: Install the Google Tag Manager Code on your website
Make sure the provided Google Tag Manager scripts are placed on every page of your site.
For example, you can store the snippets in one file and add these files later on to the main header html or main route file that would load the snippet to all the pages of your website or web application.
Step 3: Back in Google Tag Manager, Set Up a Tag for the Kissmetrics JavaScript Snippet
Back in Google Tag Manager, you would need to create a "Custom HTML Tag", in order to add your Kissmetrics JavaScript Snippet.
- Start with adding a new Tag;
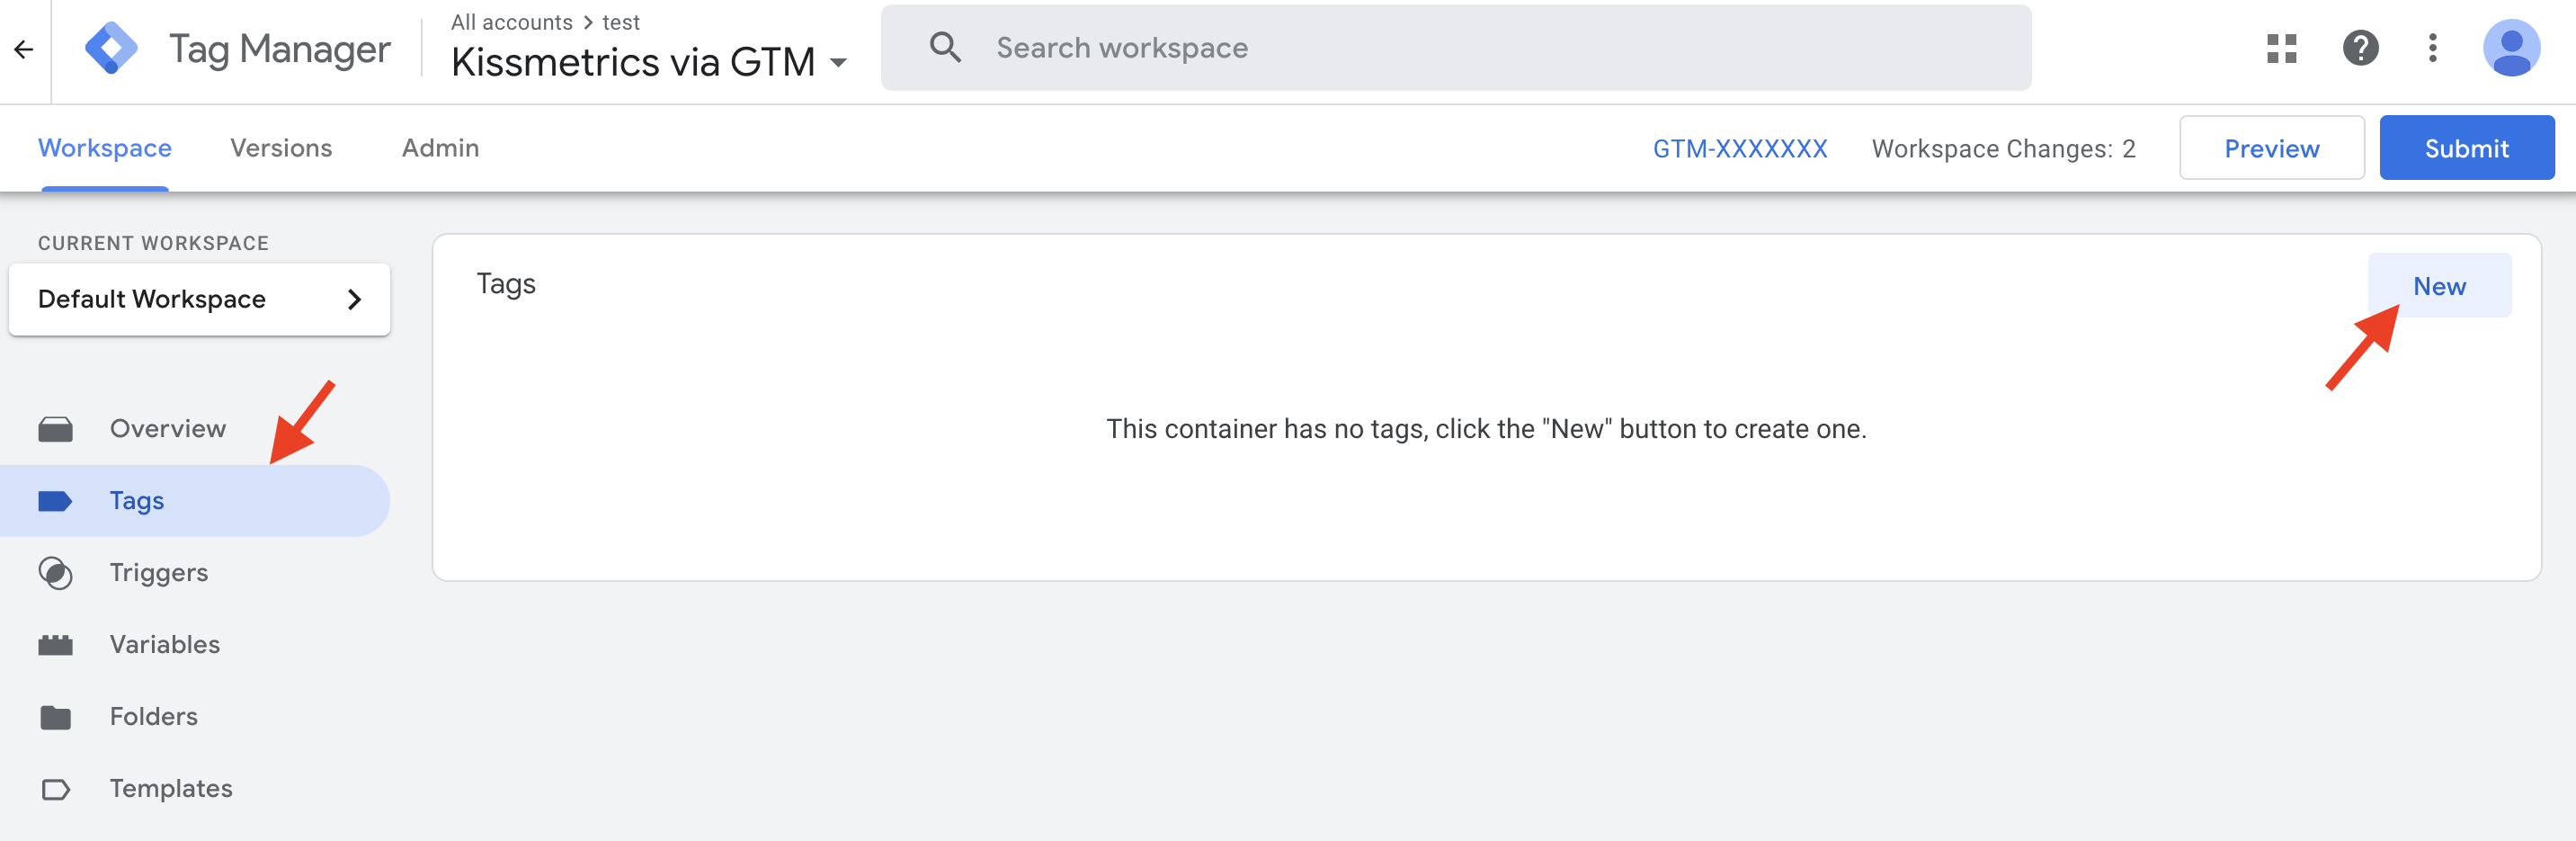
+New Tag
- Add your Tag Name and click to select the proper Tag Configuration;
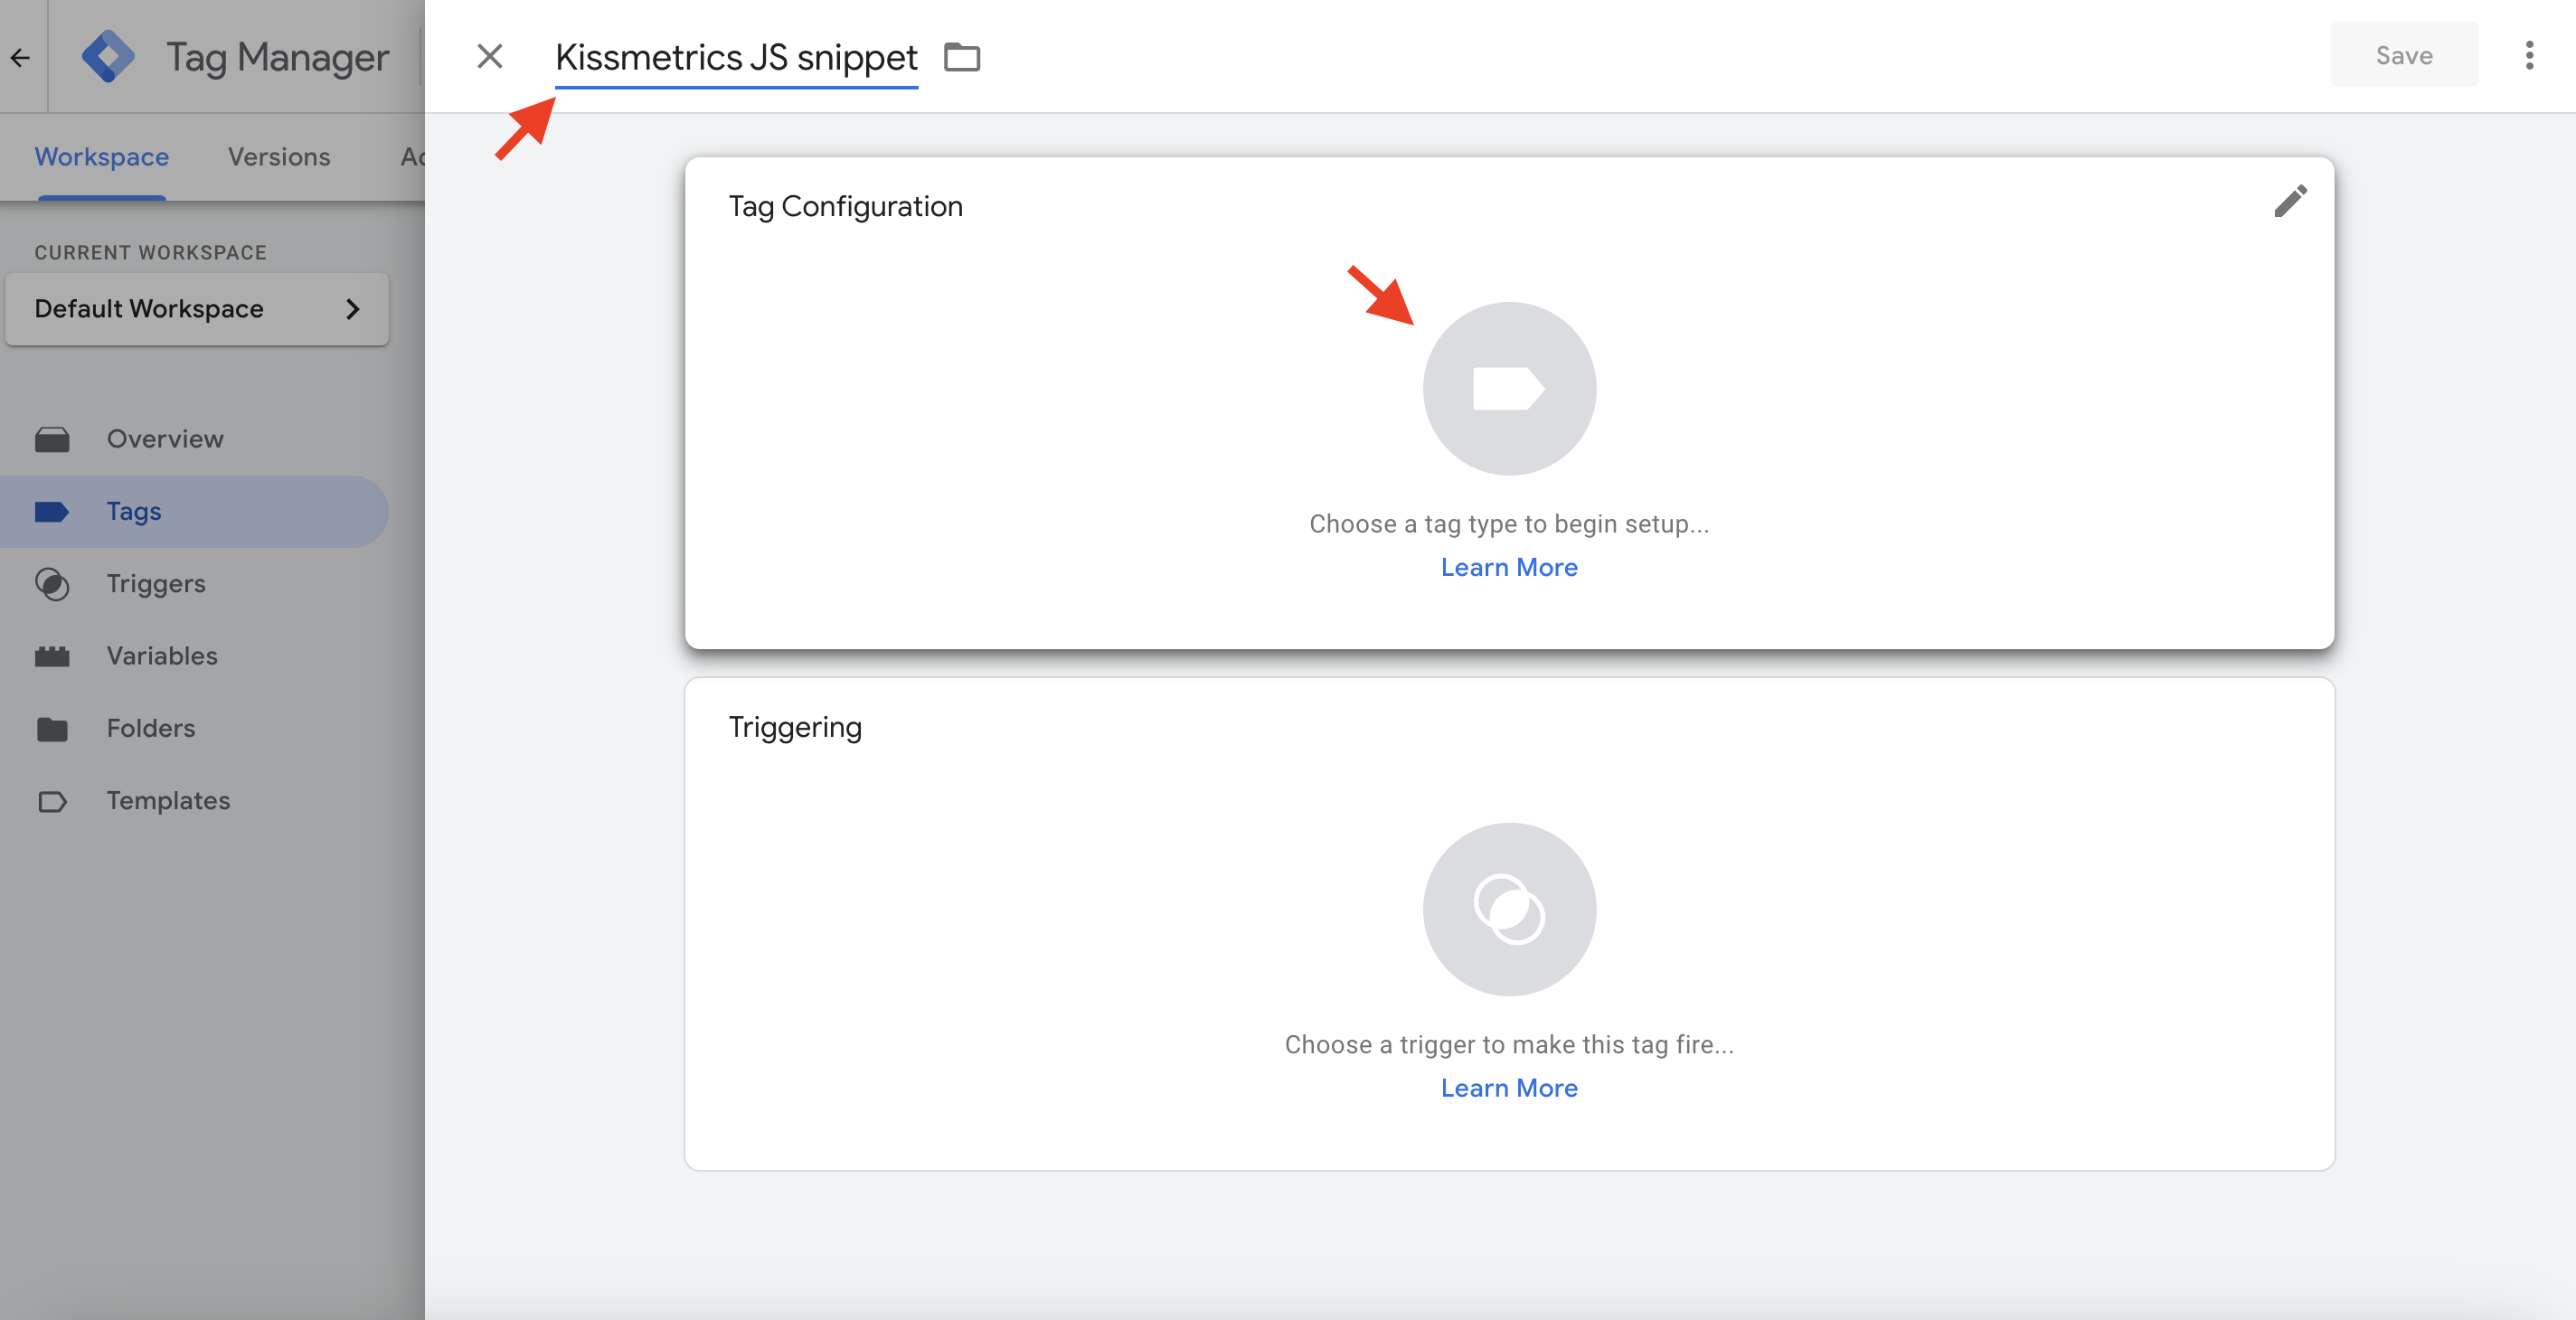
Tag Name + Tag Configuration
- Scroll down the tag configuration list and click to add "Custom HTML";
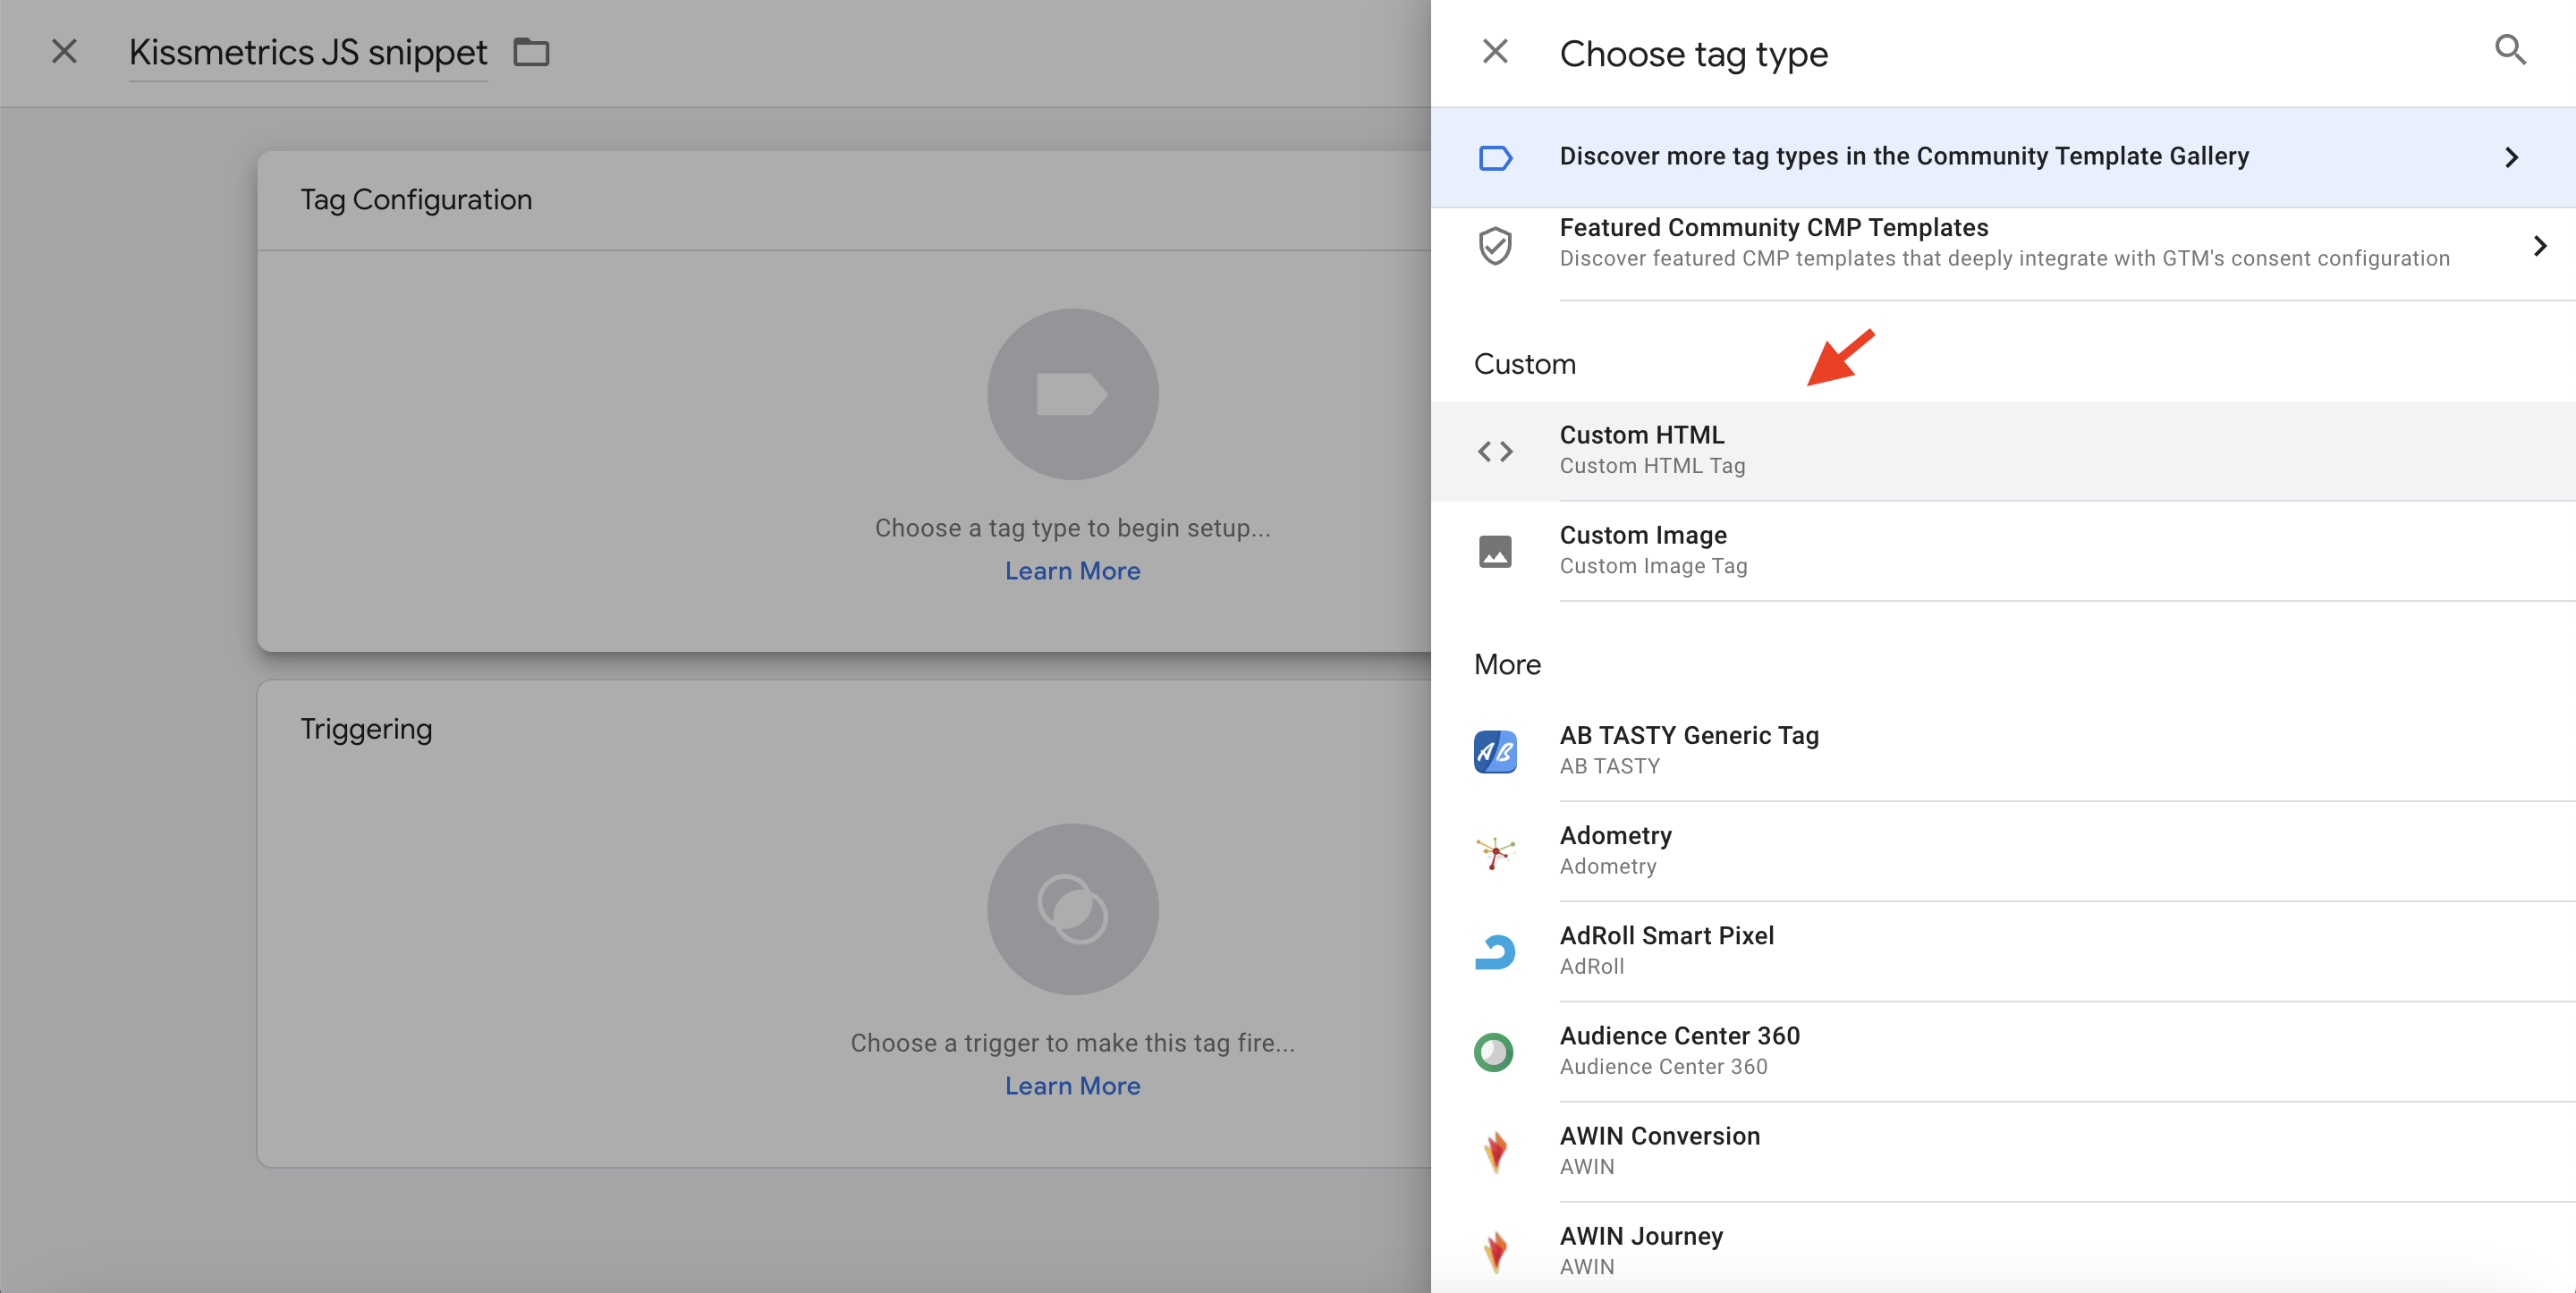
Custom HTML Tag Type
- In the new browser tab, please refer to your site’s Product settings page to obtain your Kissmetrics JavaScript snippet, which you’ll place in the "HTML" field;
- In the Google Tab Manager tab, paste the Kissmetrics JavaScript snippet;
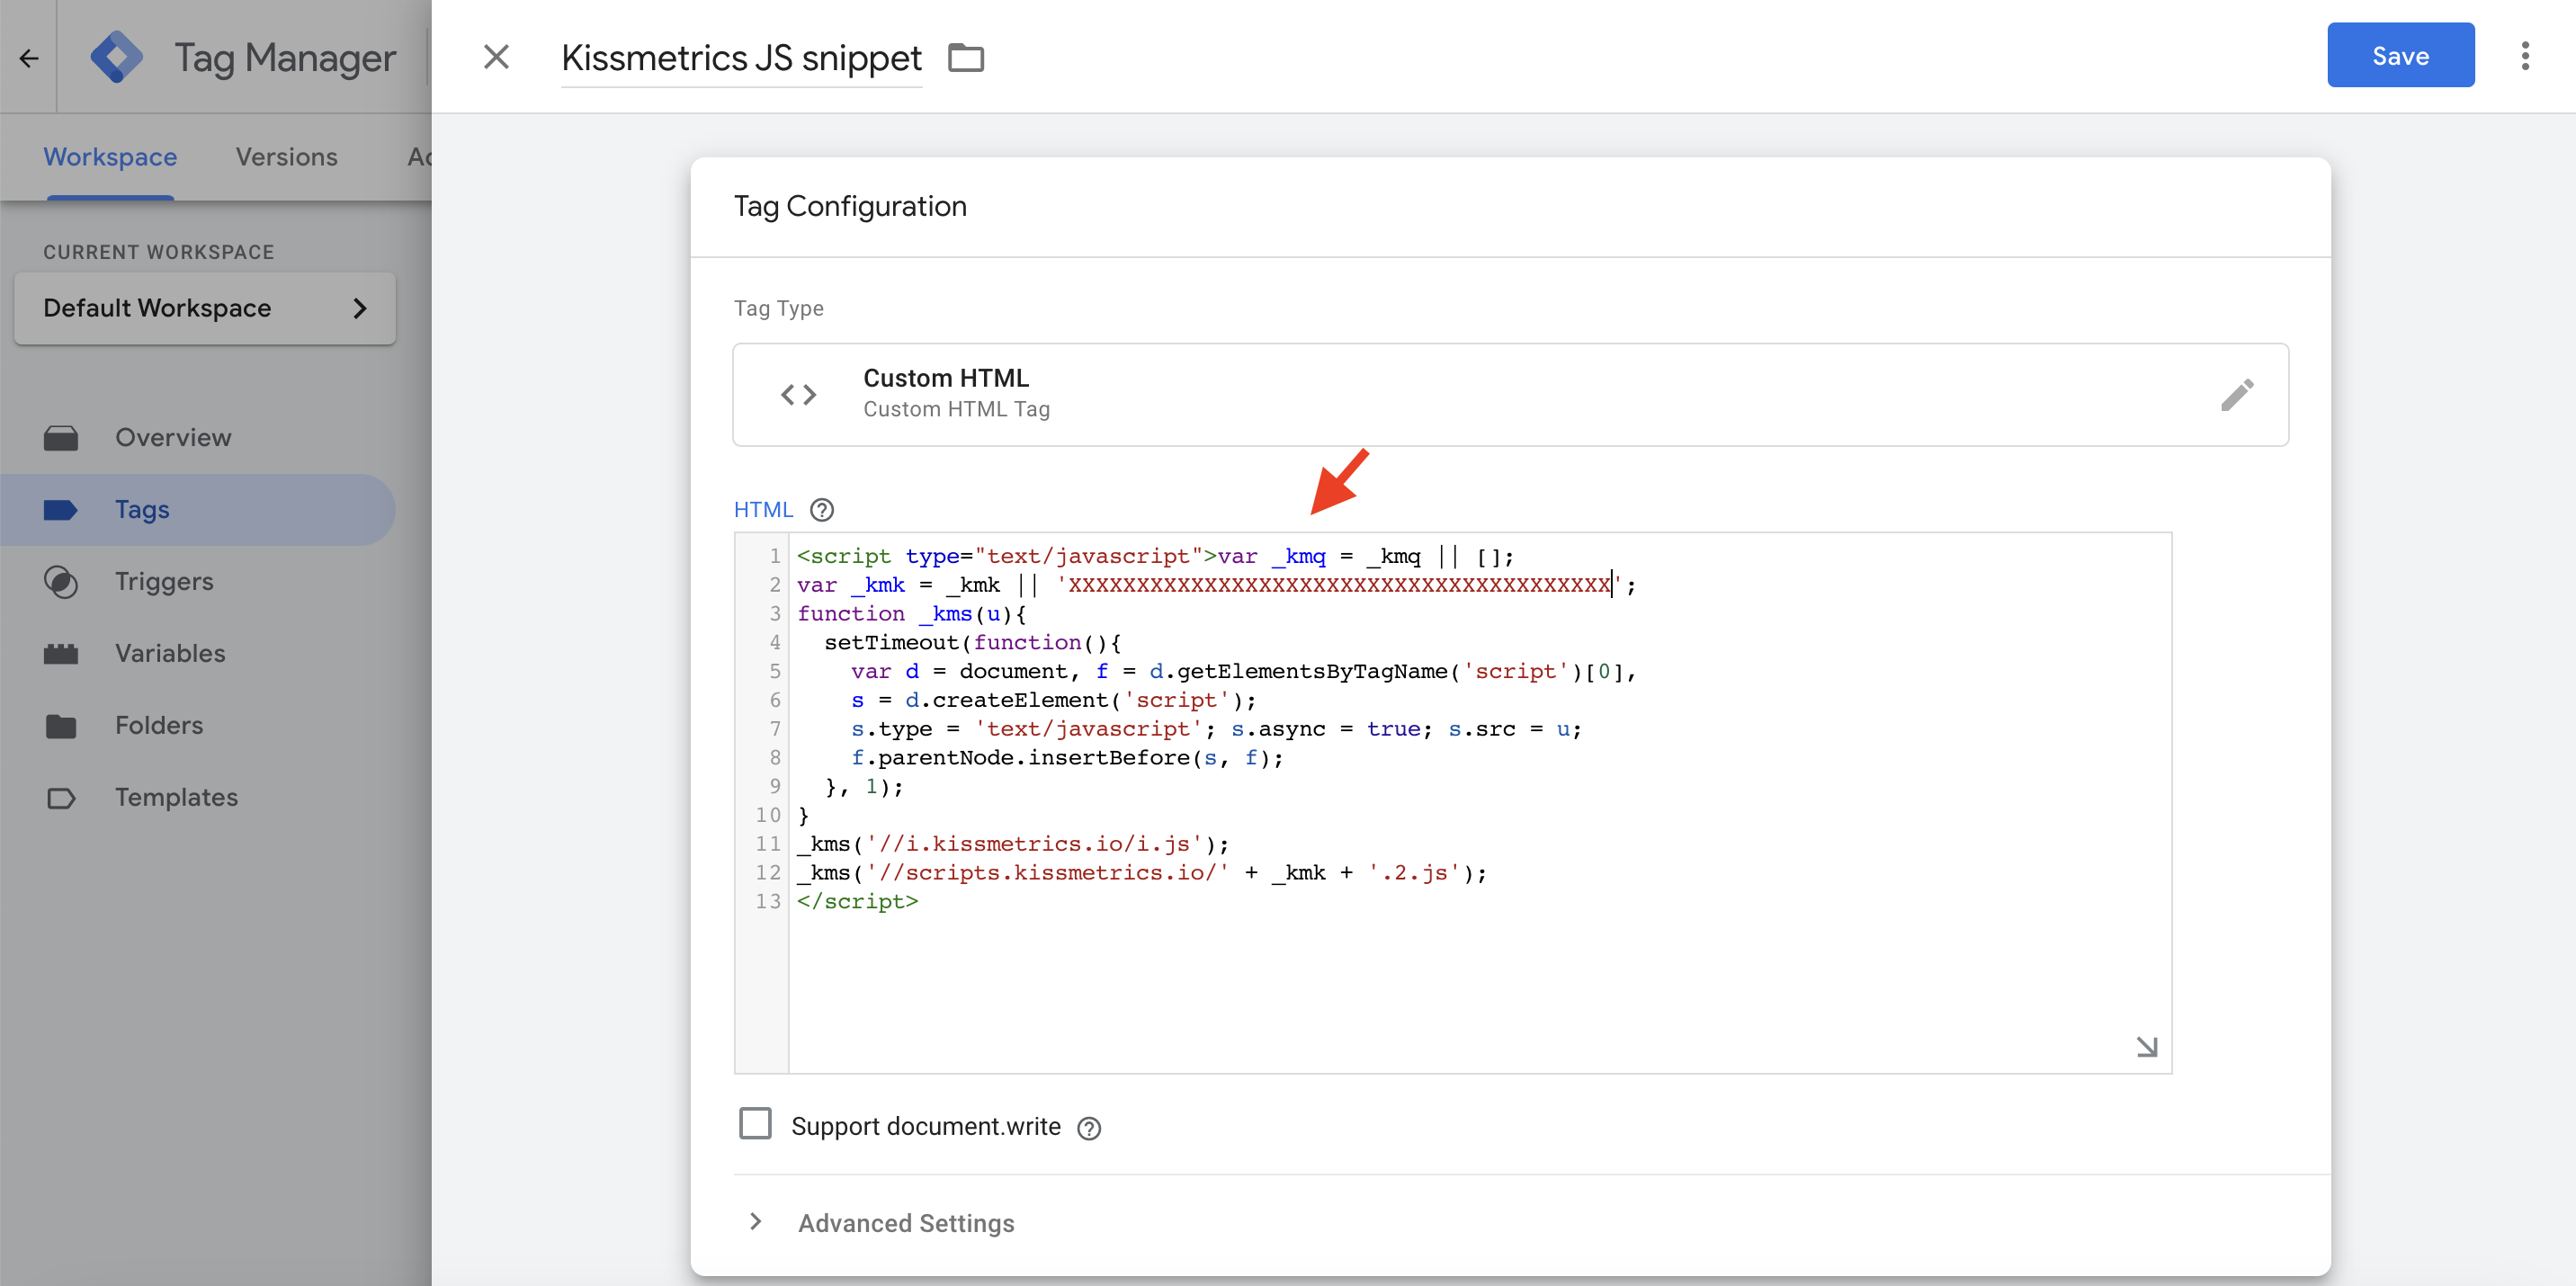
Kissmetrics JS Snippet
- From there, you need to add a Trigger that would specify the rules for the Tag to fire. For that, scroll down the above page and click on the Trigger section;
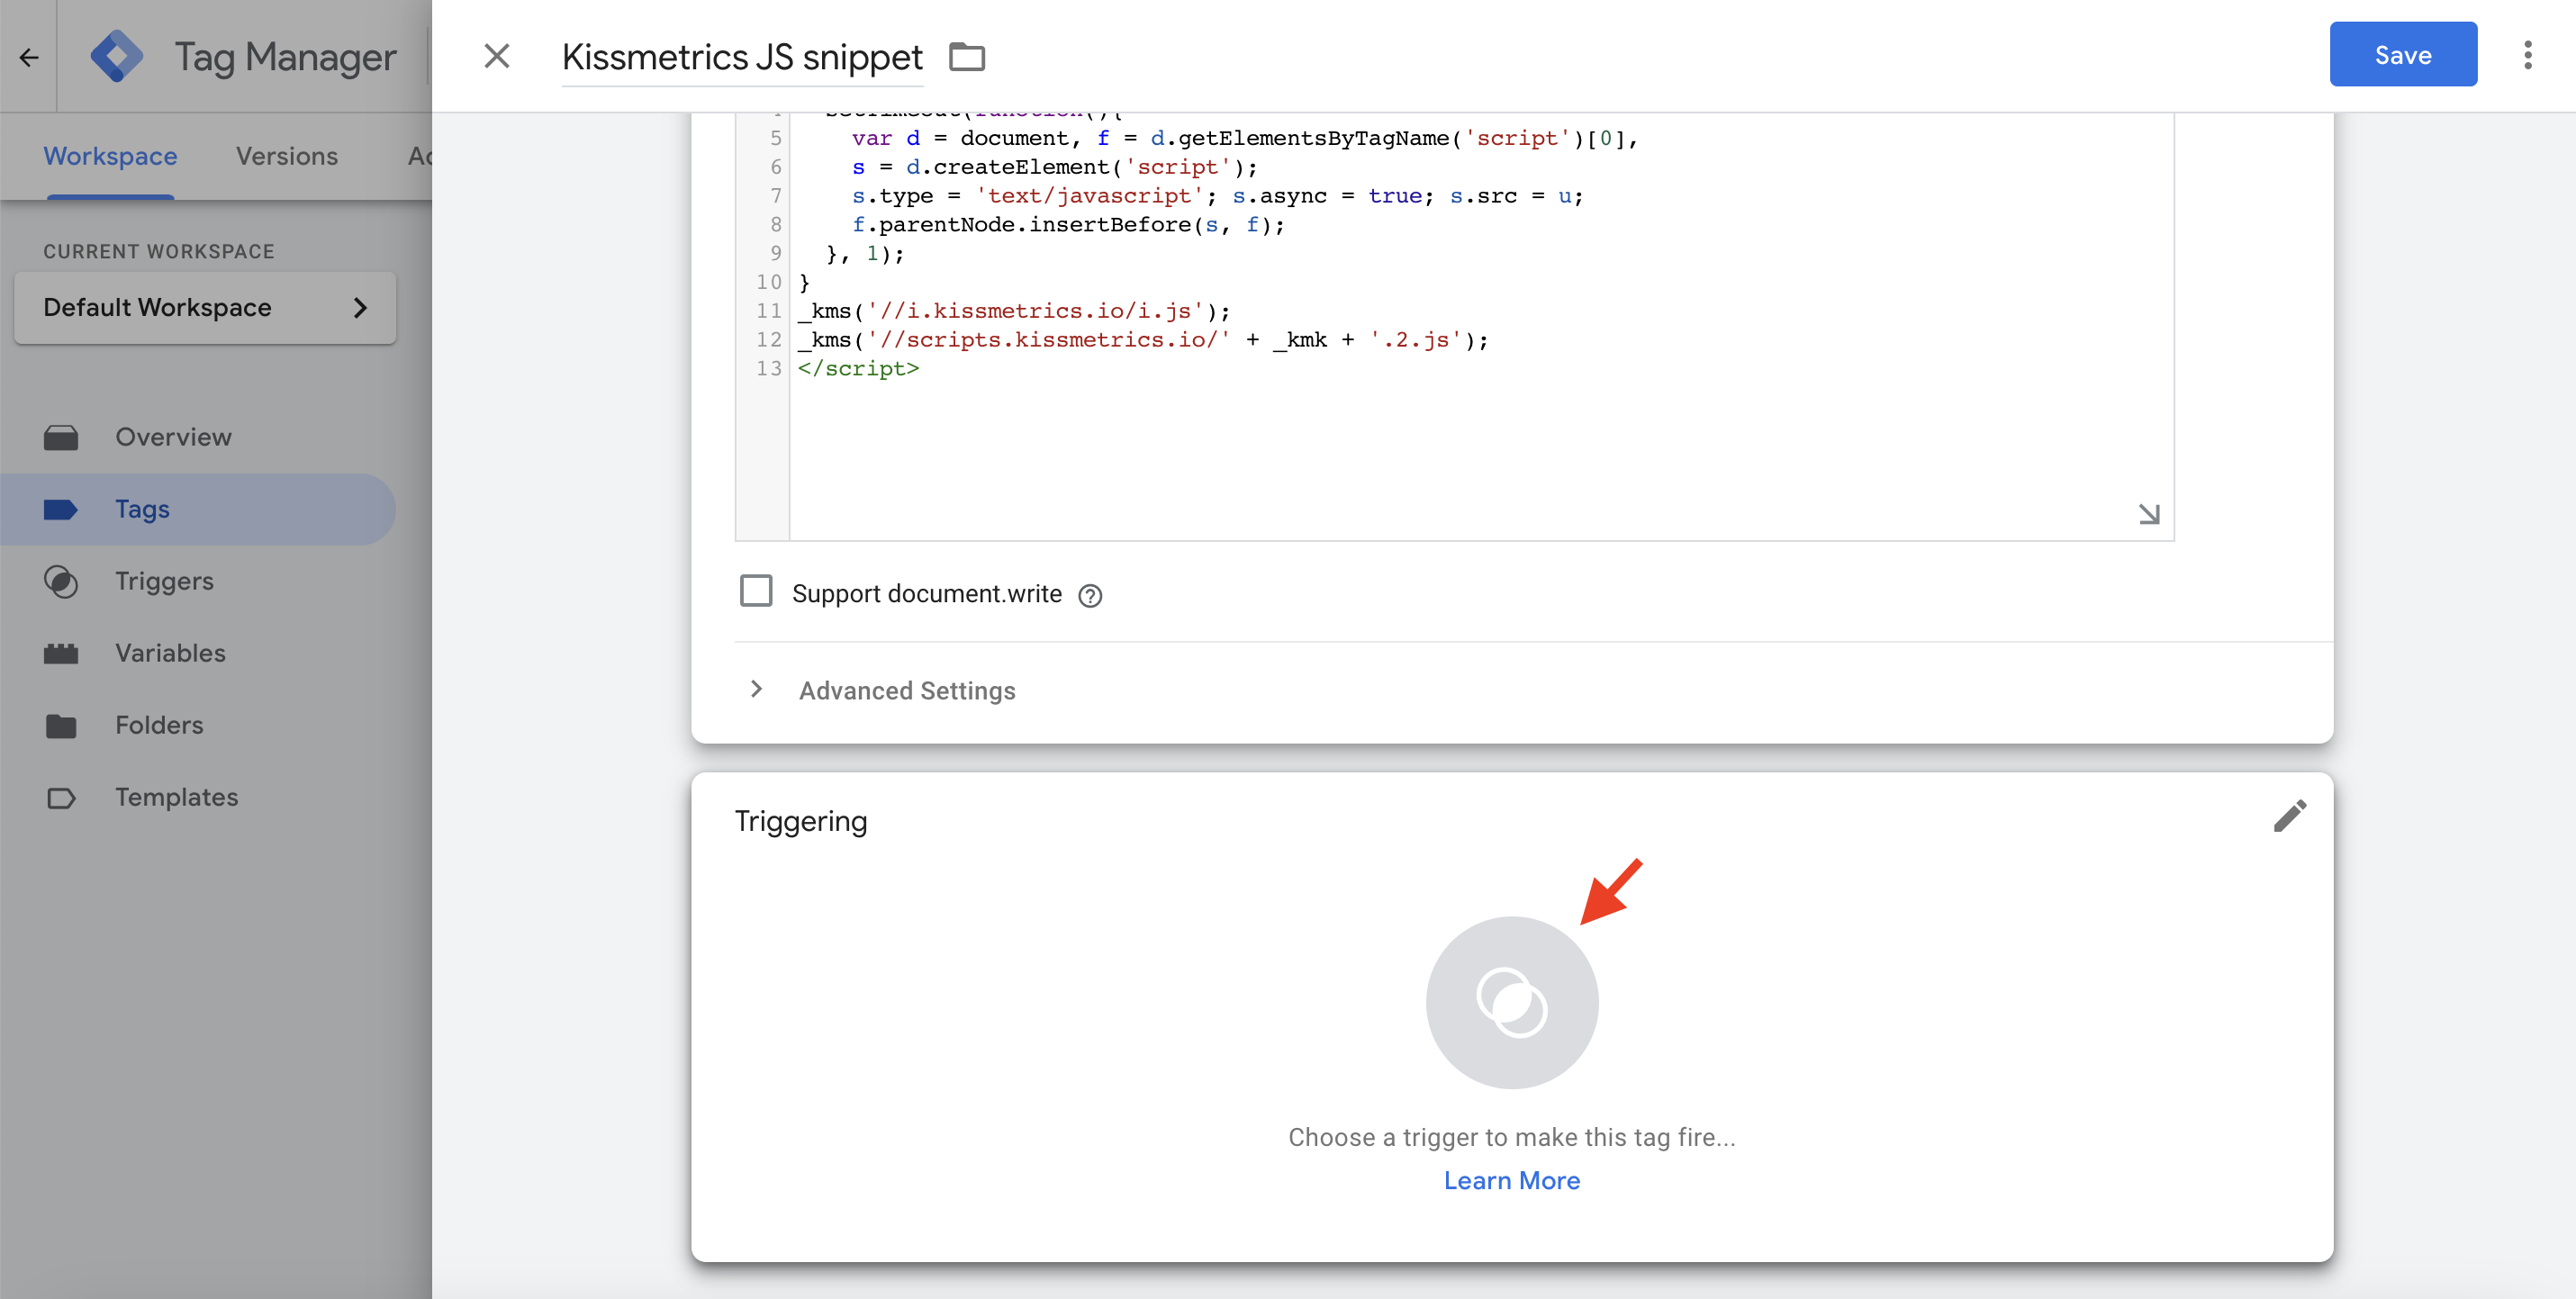
Adding New Trigger
- Inside the Trigger configuration, click to select All Pages, so that you can tell Google Tag Manager where to load our snippet on;
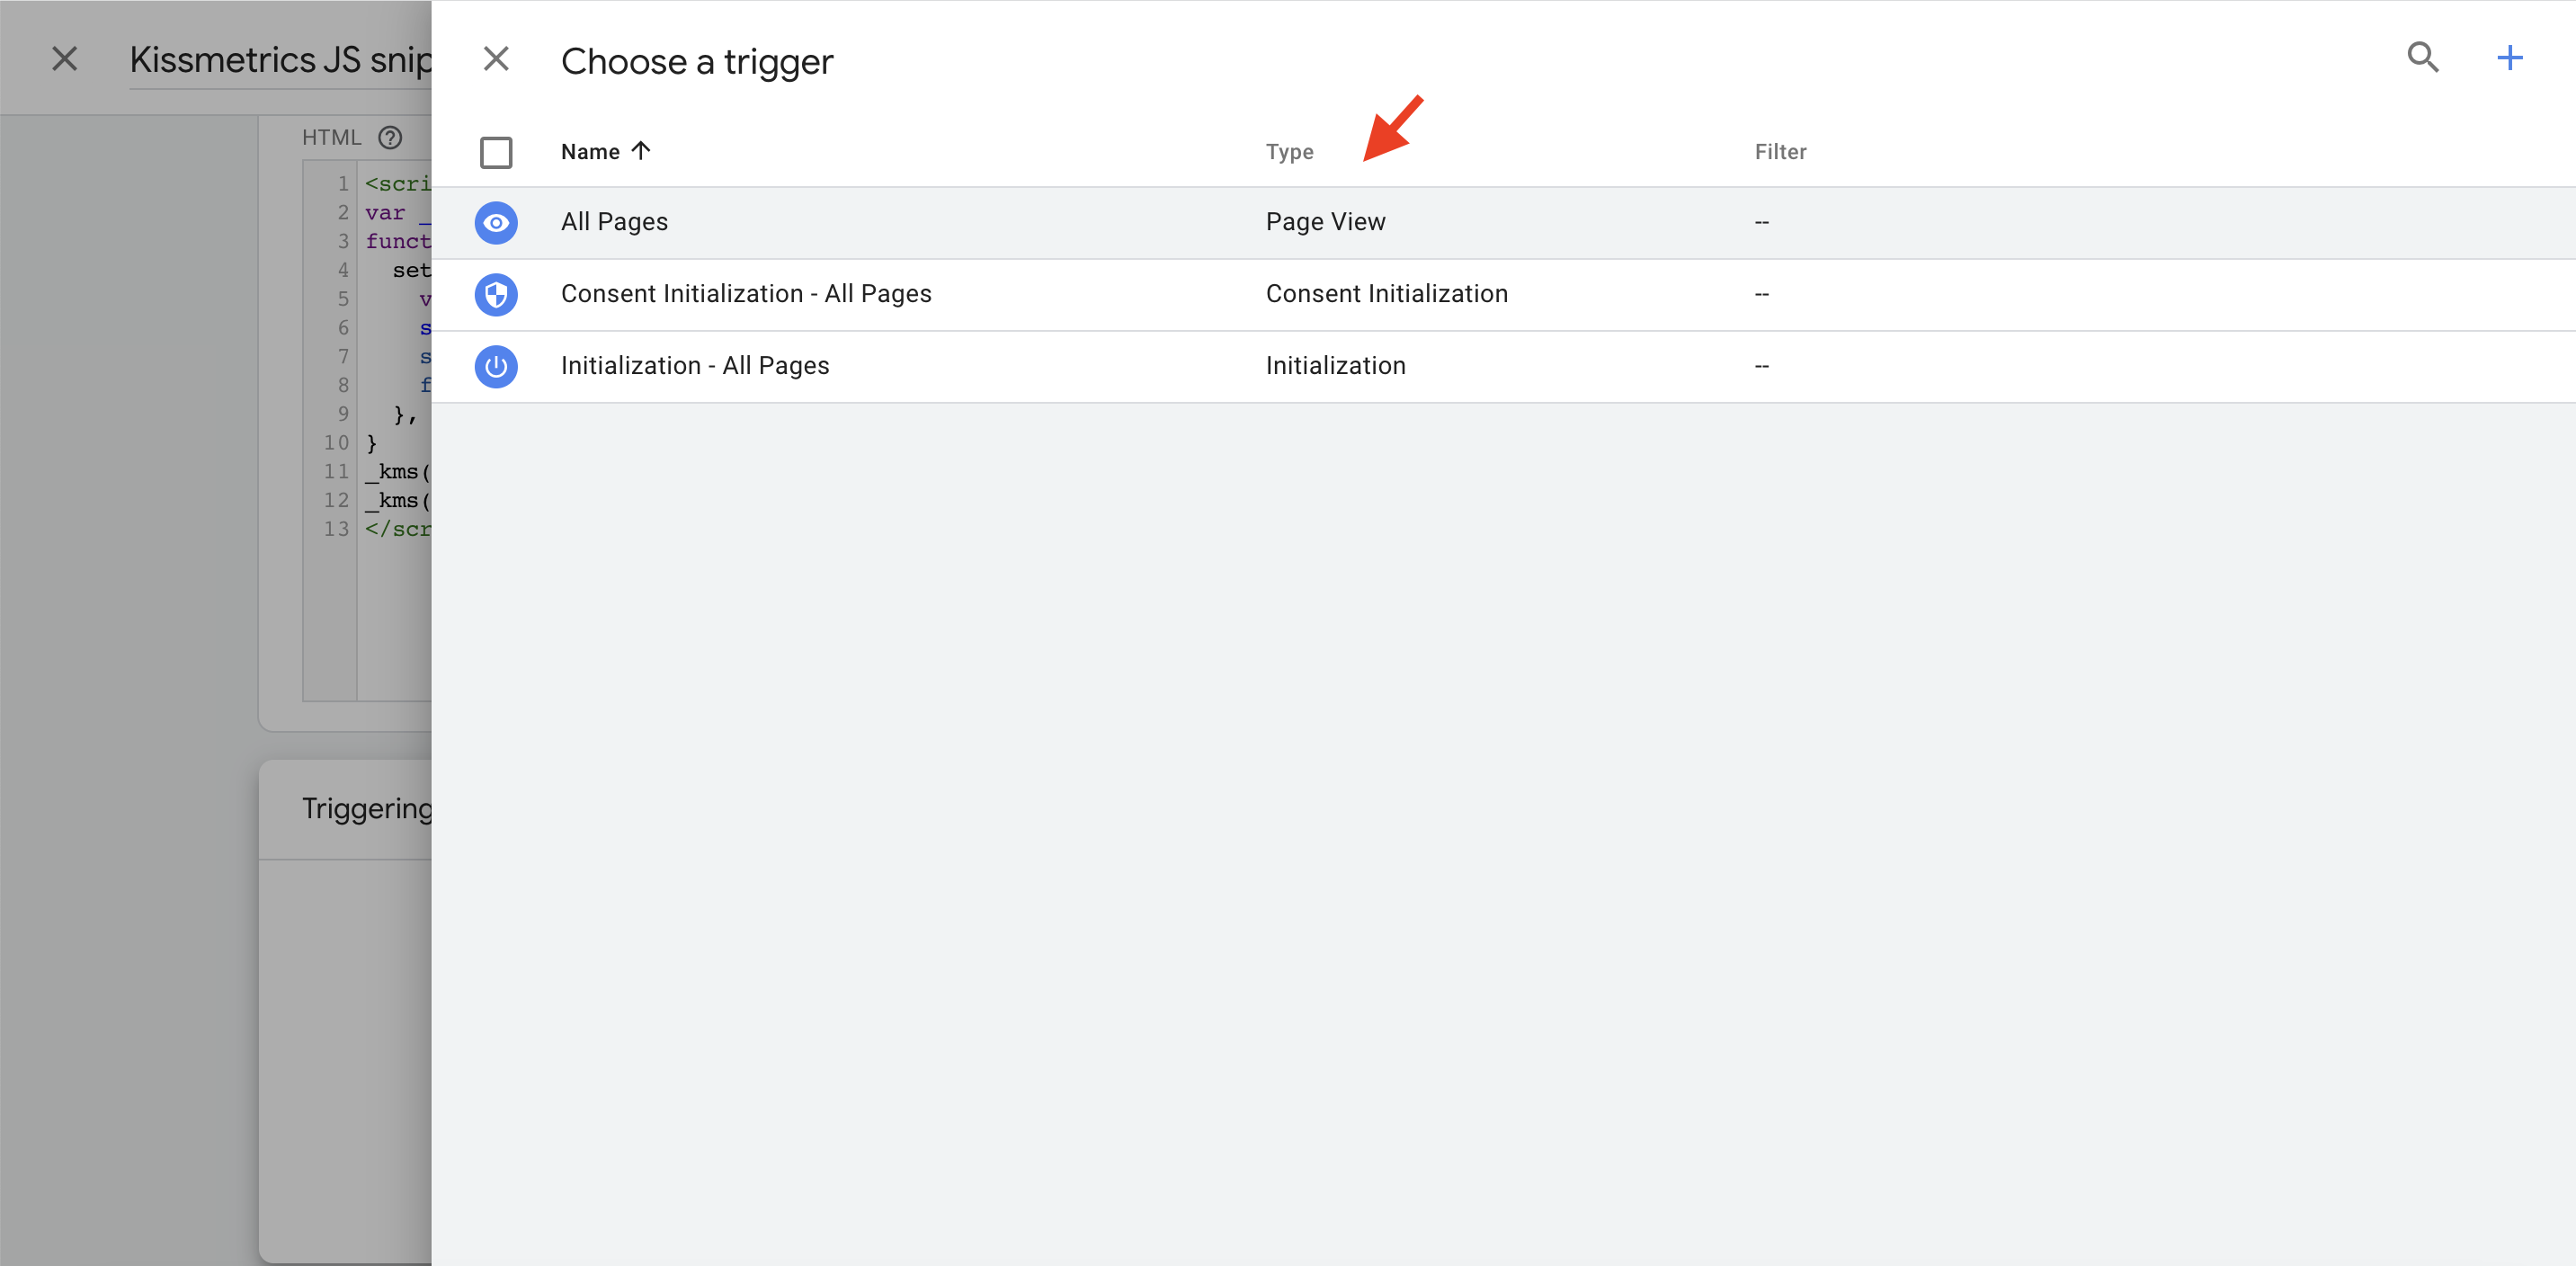
All Pages Trigger
- Save this tag.
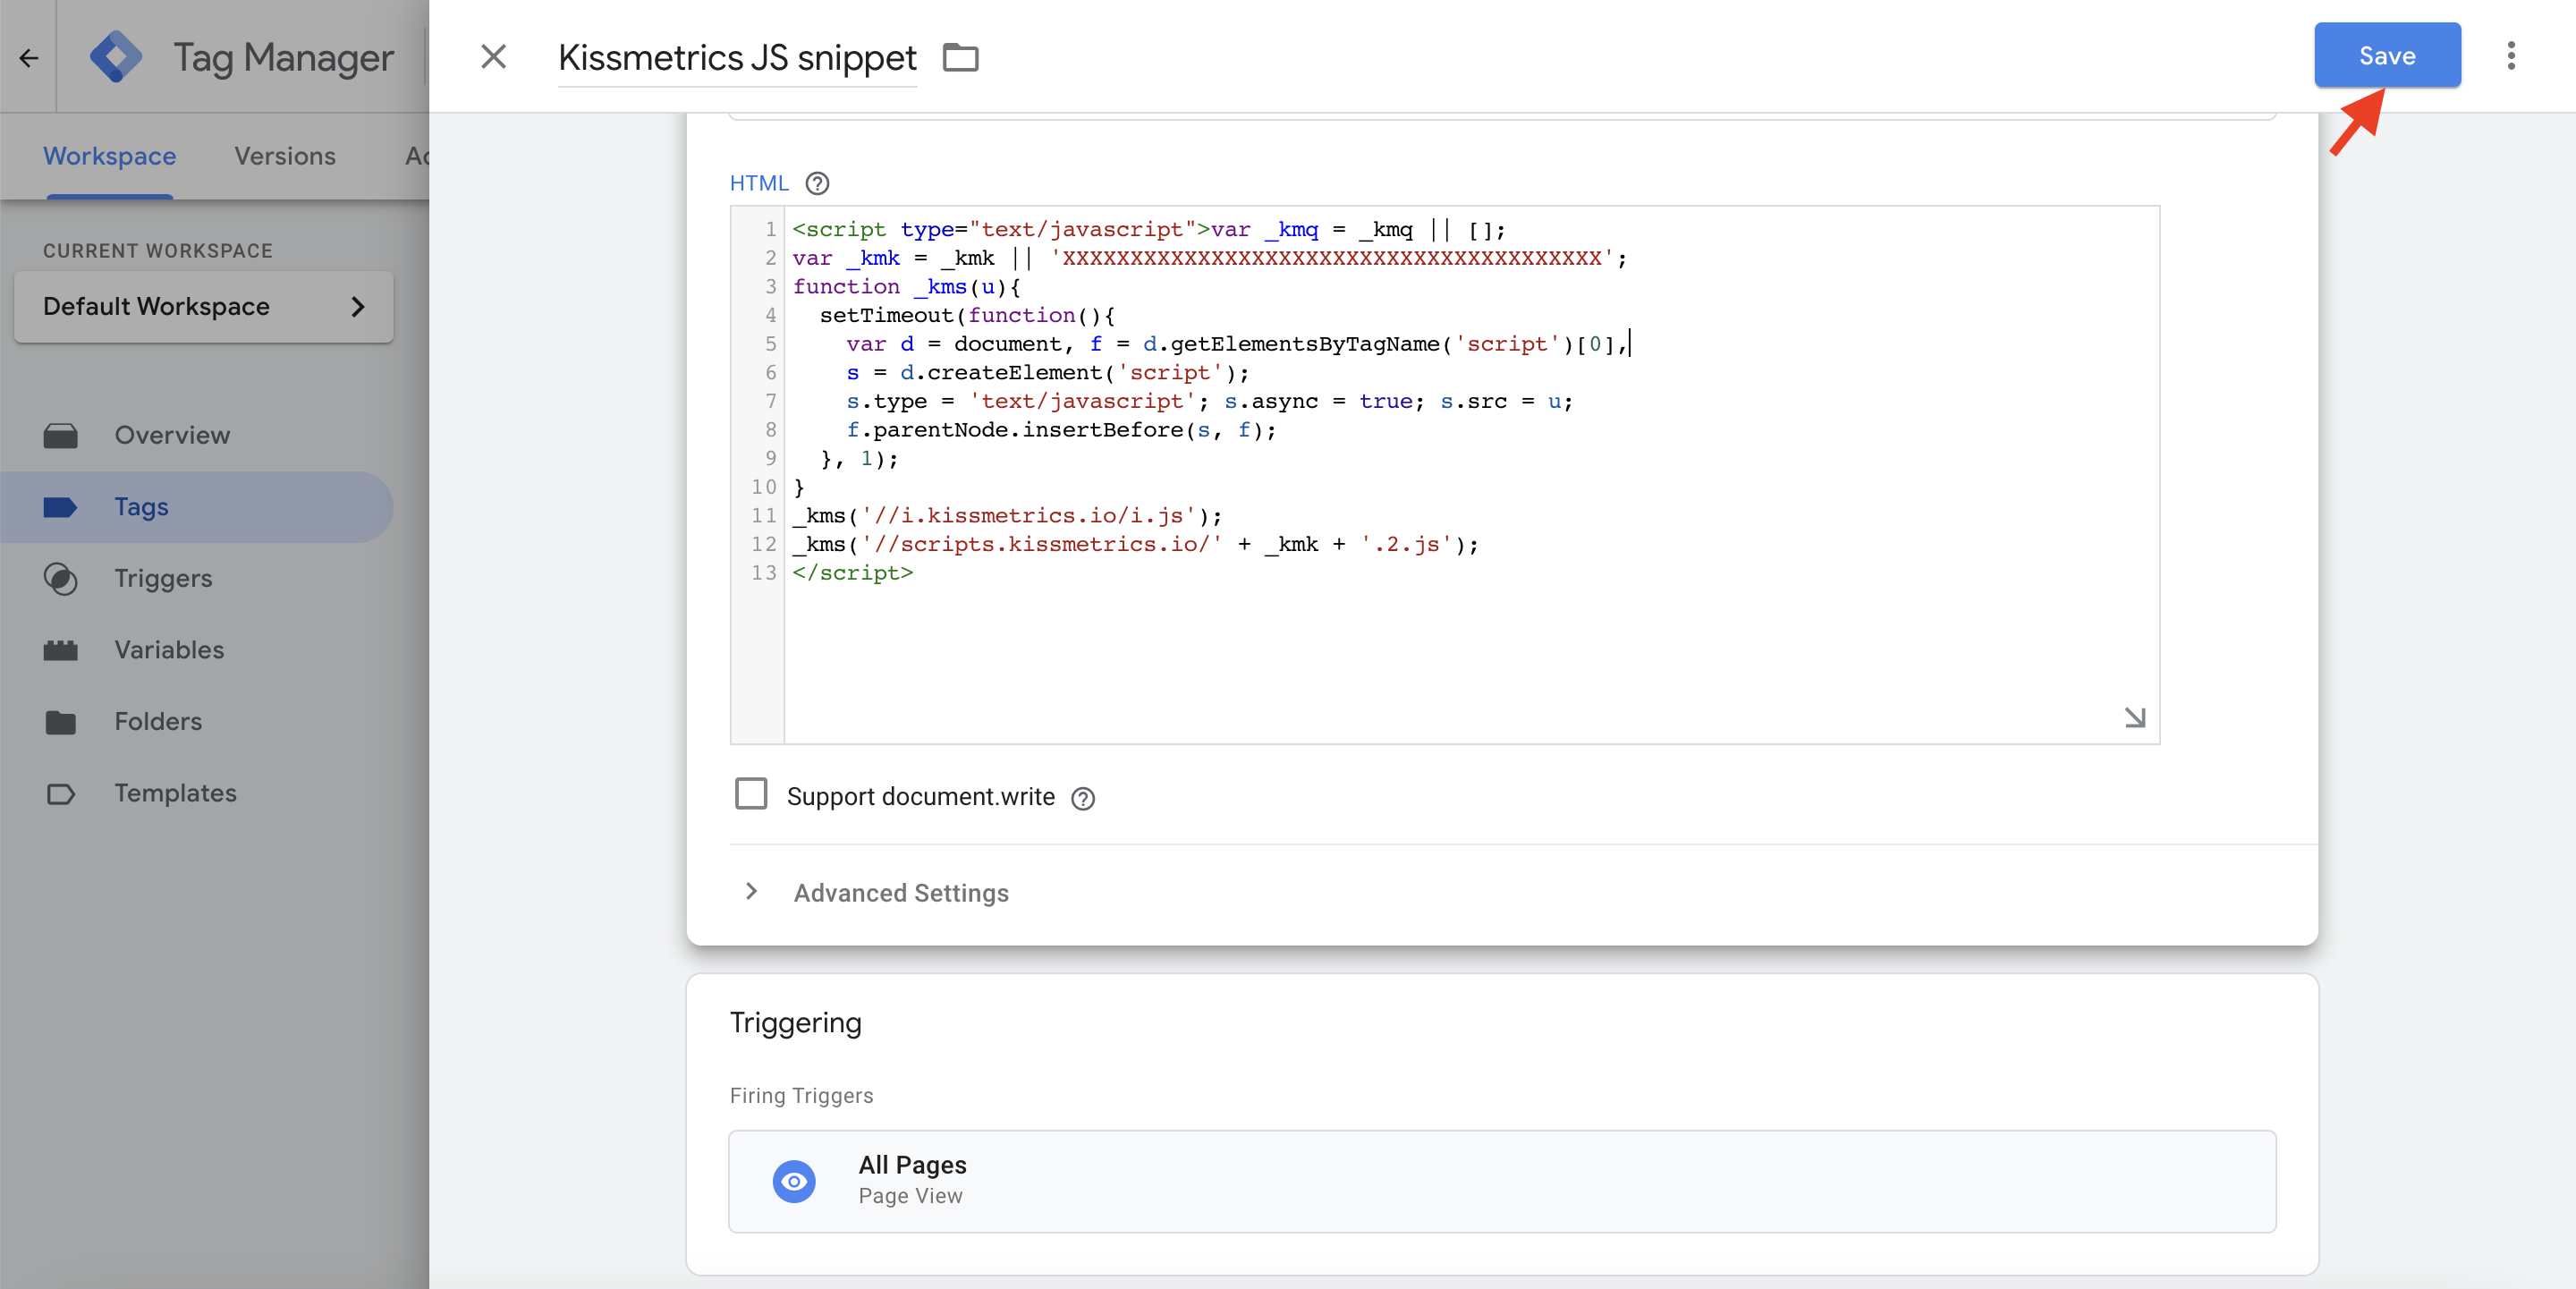
Saving the tag
Step 4: Add Additional JavaScript for Custom Events
If you’d like, you can define custom Kissmetrics events by adding more tags to the container. In the next example, we’ll create a trigger to record the "Viewed GTM page" event when people go to the URL path /gtm_testing.
- Add a new Custom HTML Tag;
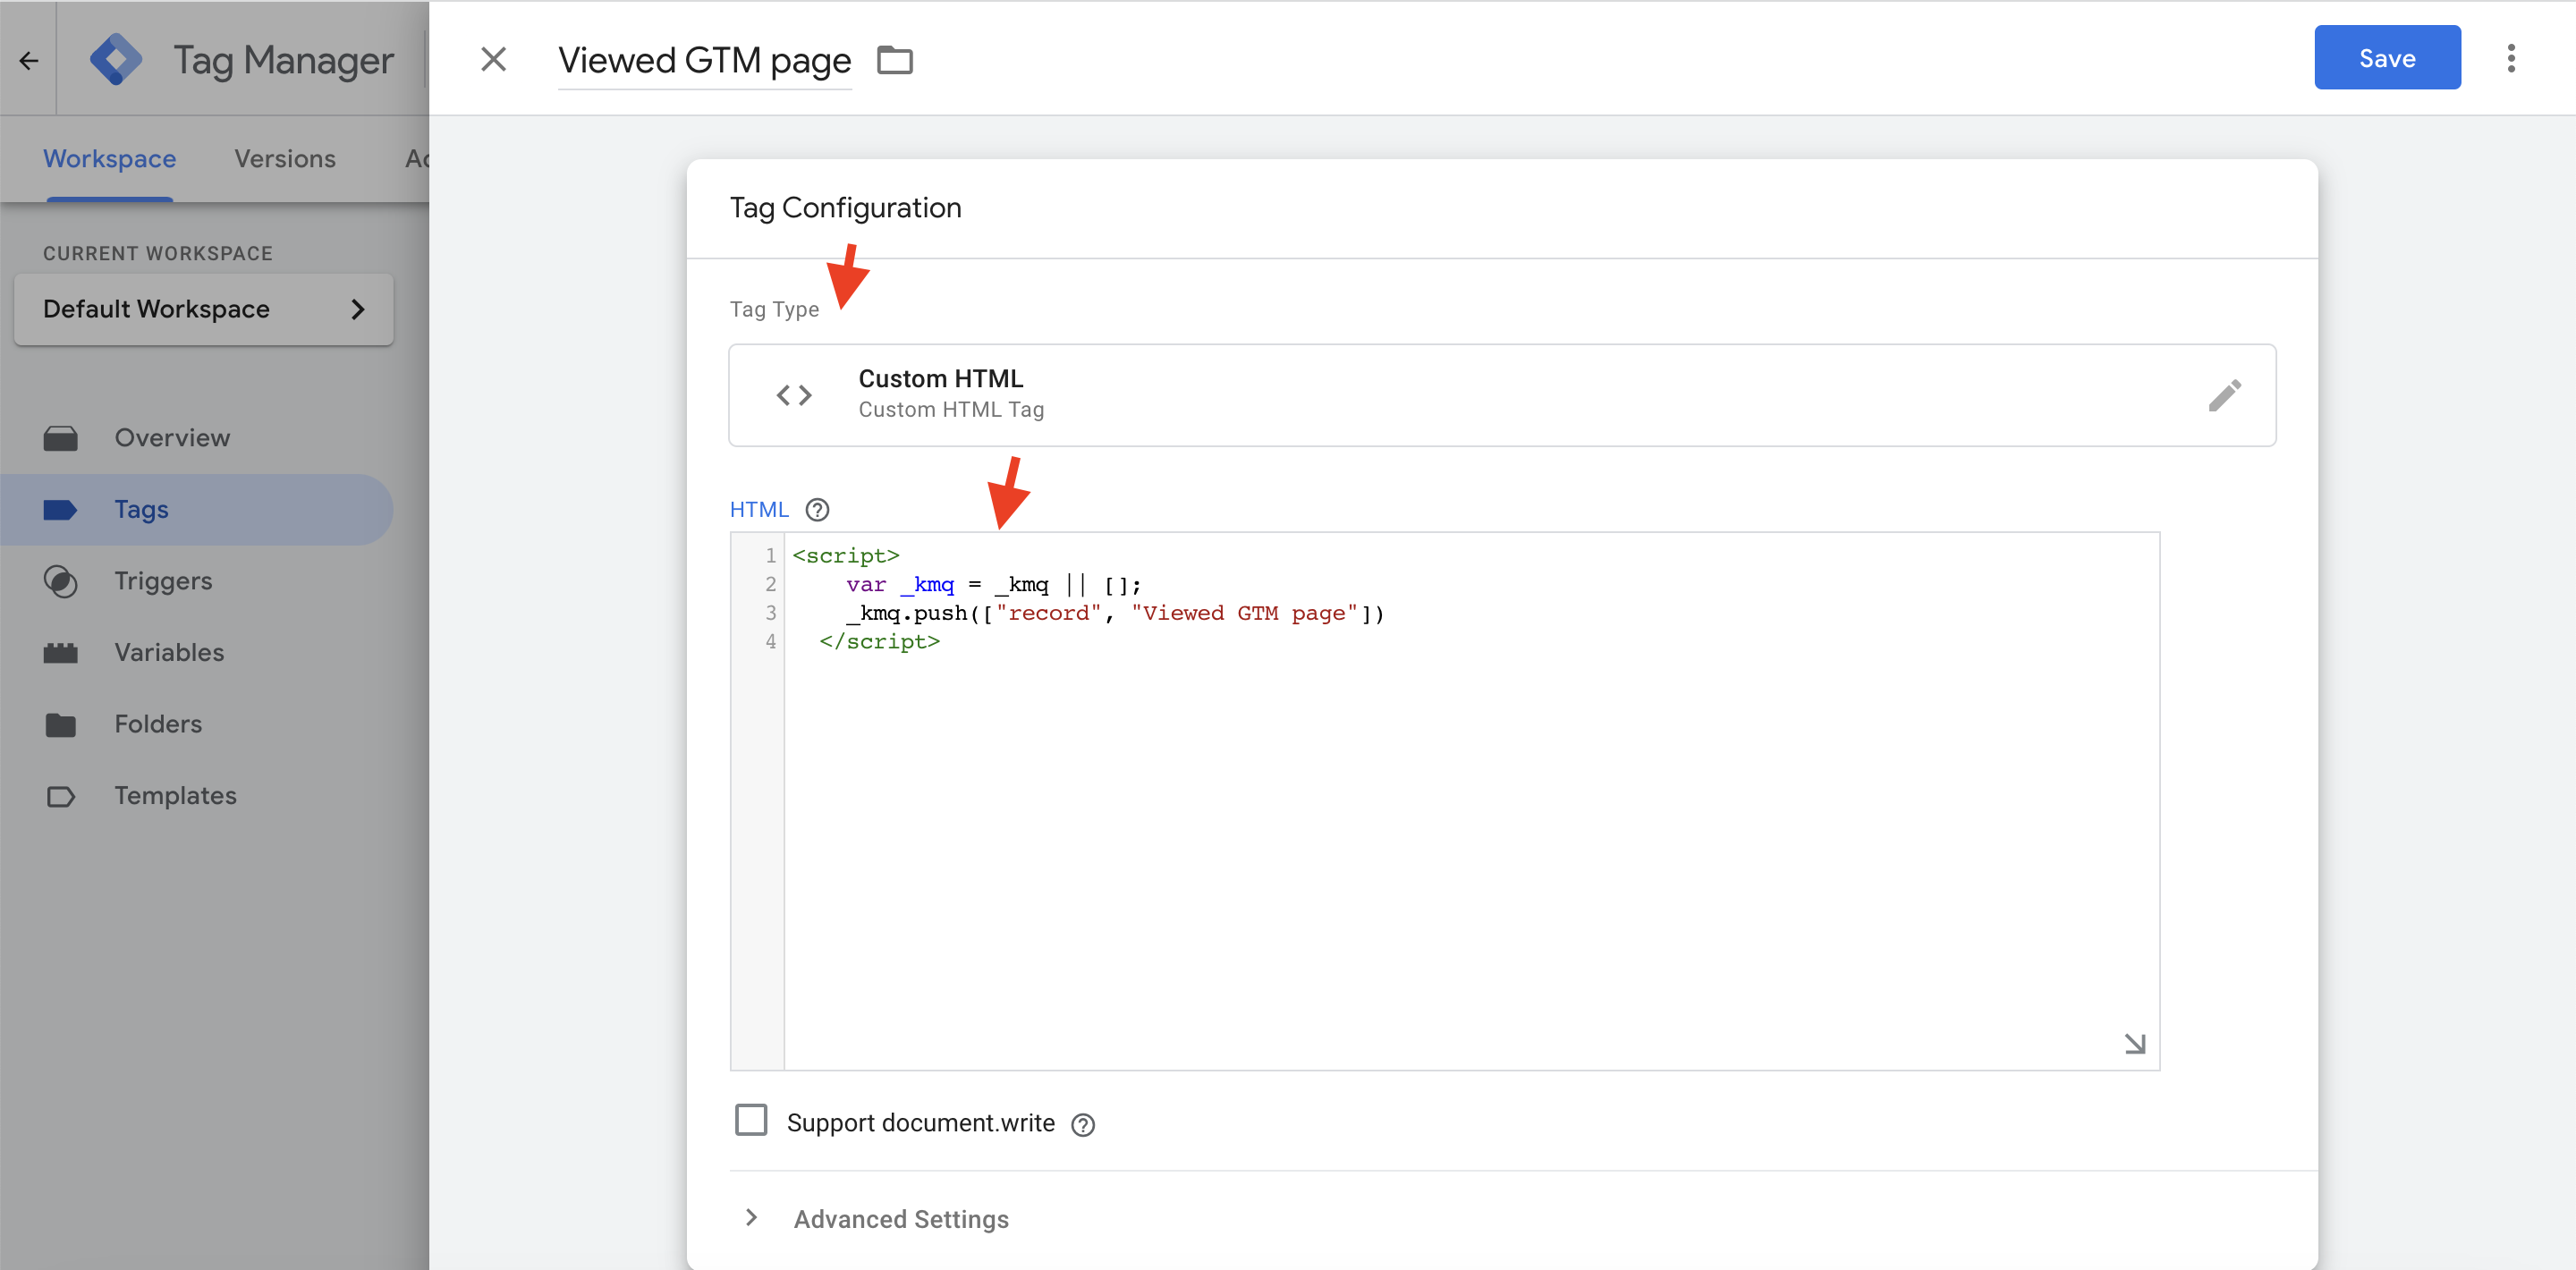
New Custom HTML Tag
Notice the presence of
var _kmq = _kmq || [];. This is necessary because Google Tag Manager doesn’t let you control the order in which your tags are loaded. Without adding this line above your JavaScript for custom events, you may end up with JavaScript errors.
- Define a new Page View Trigger for your tag;
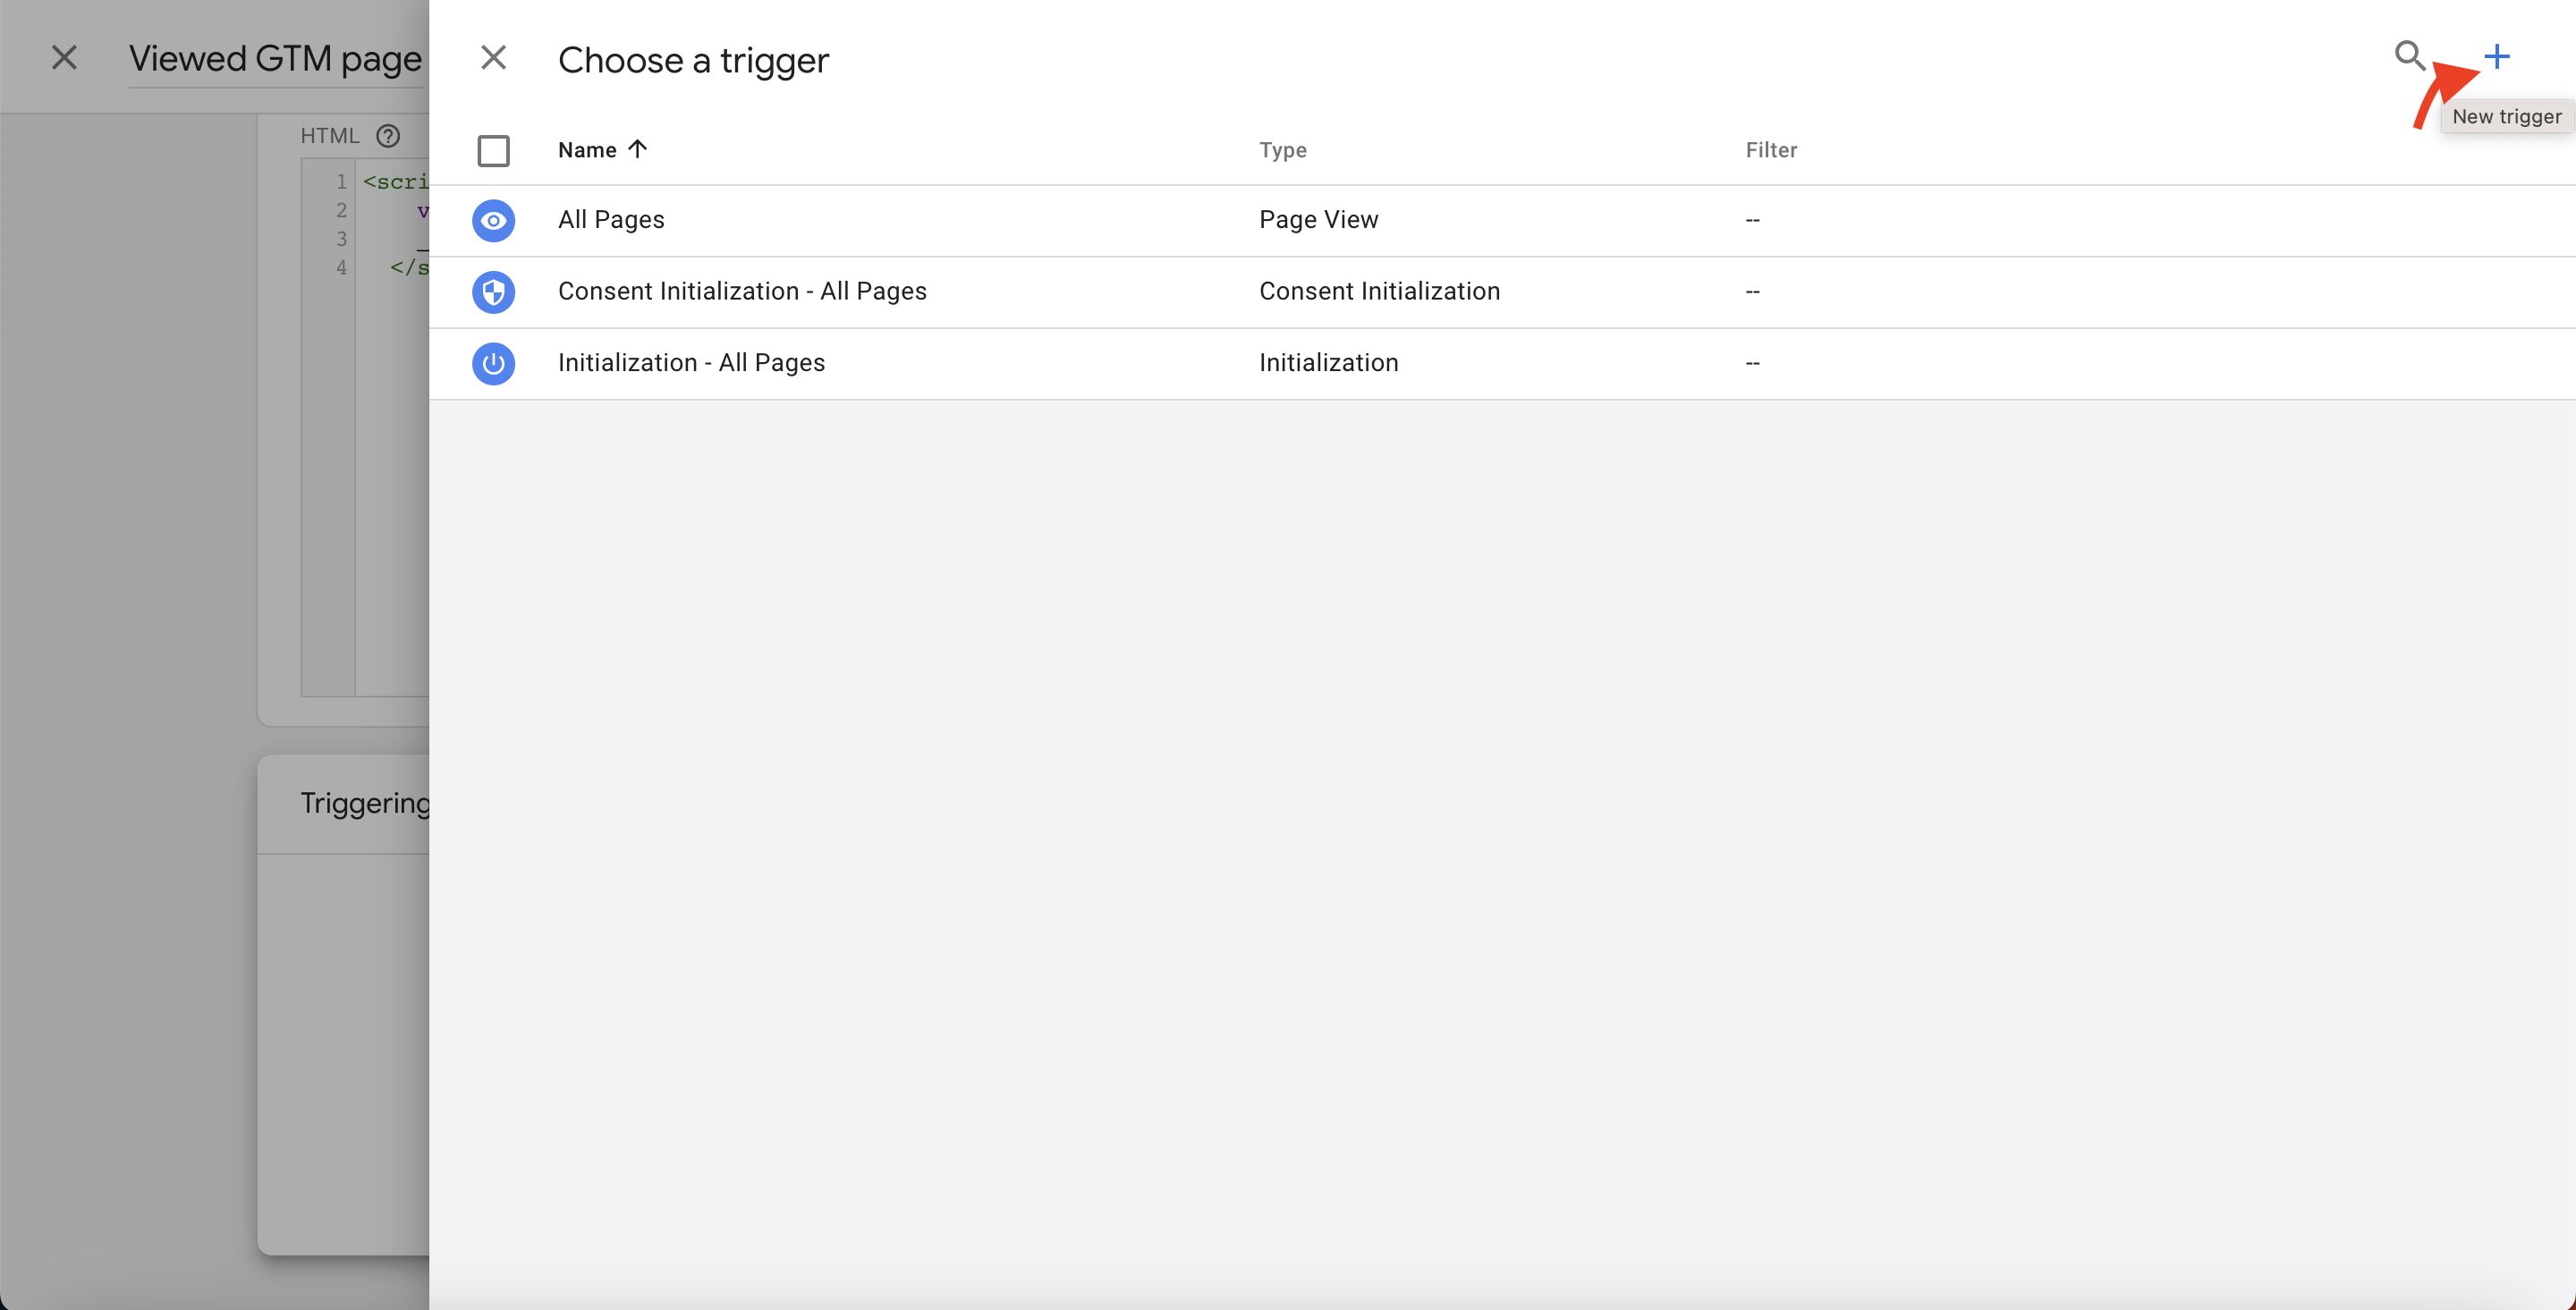
+New Trigger
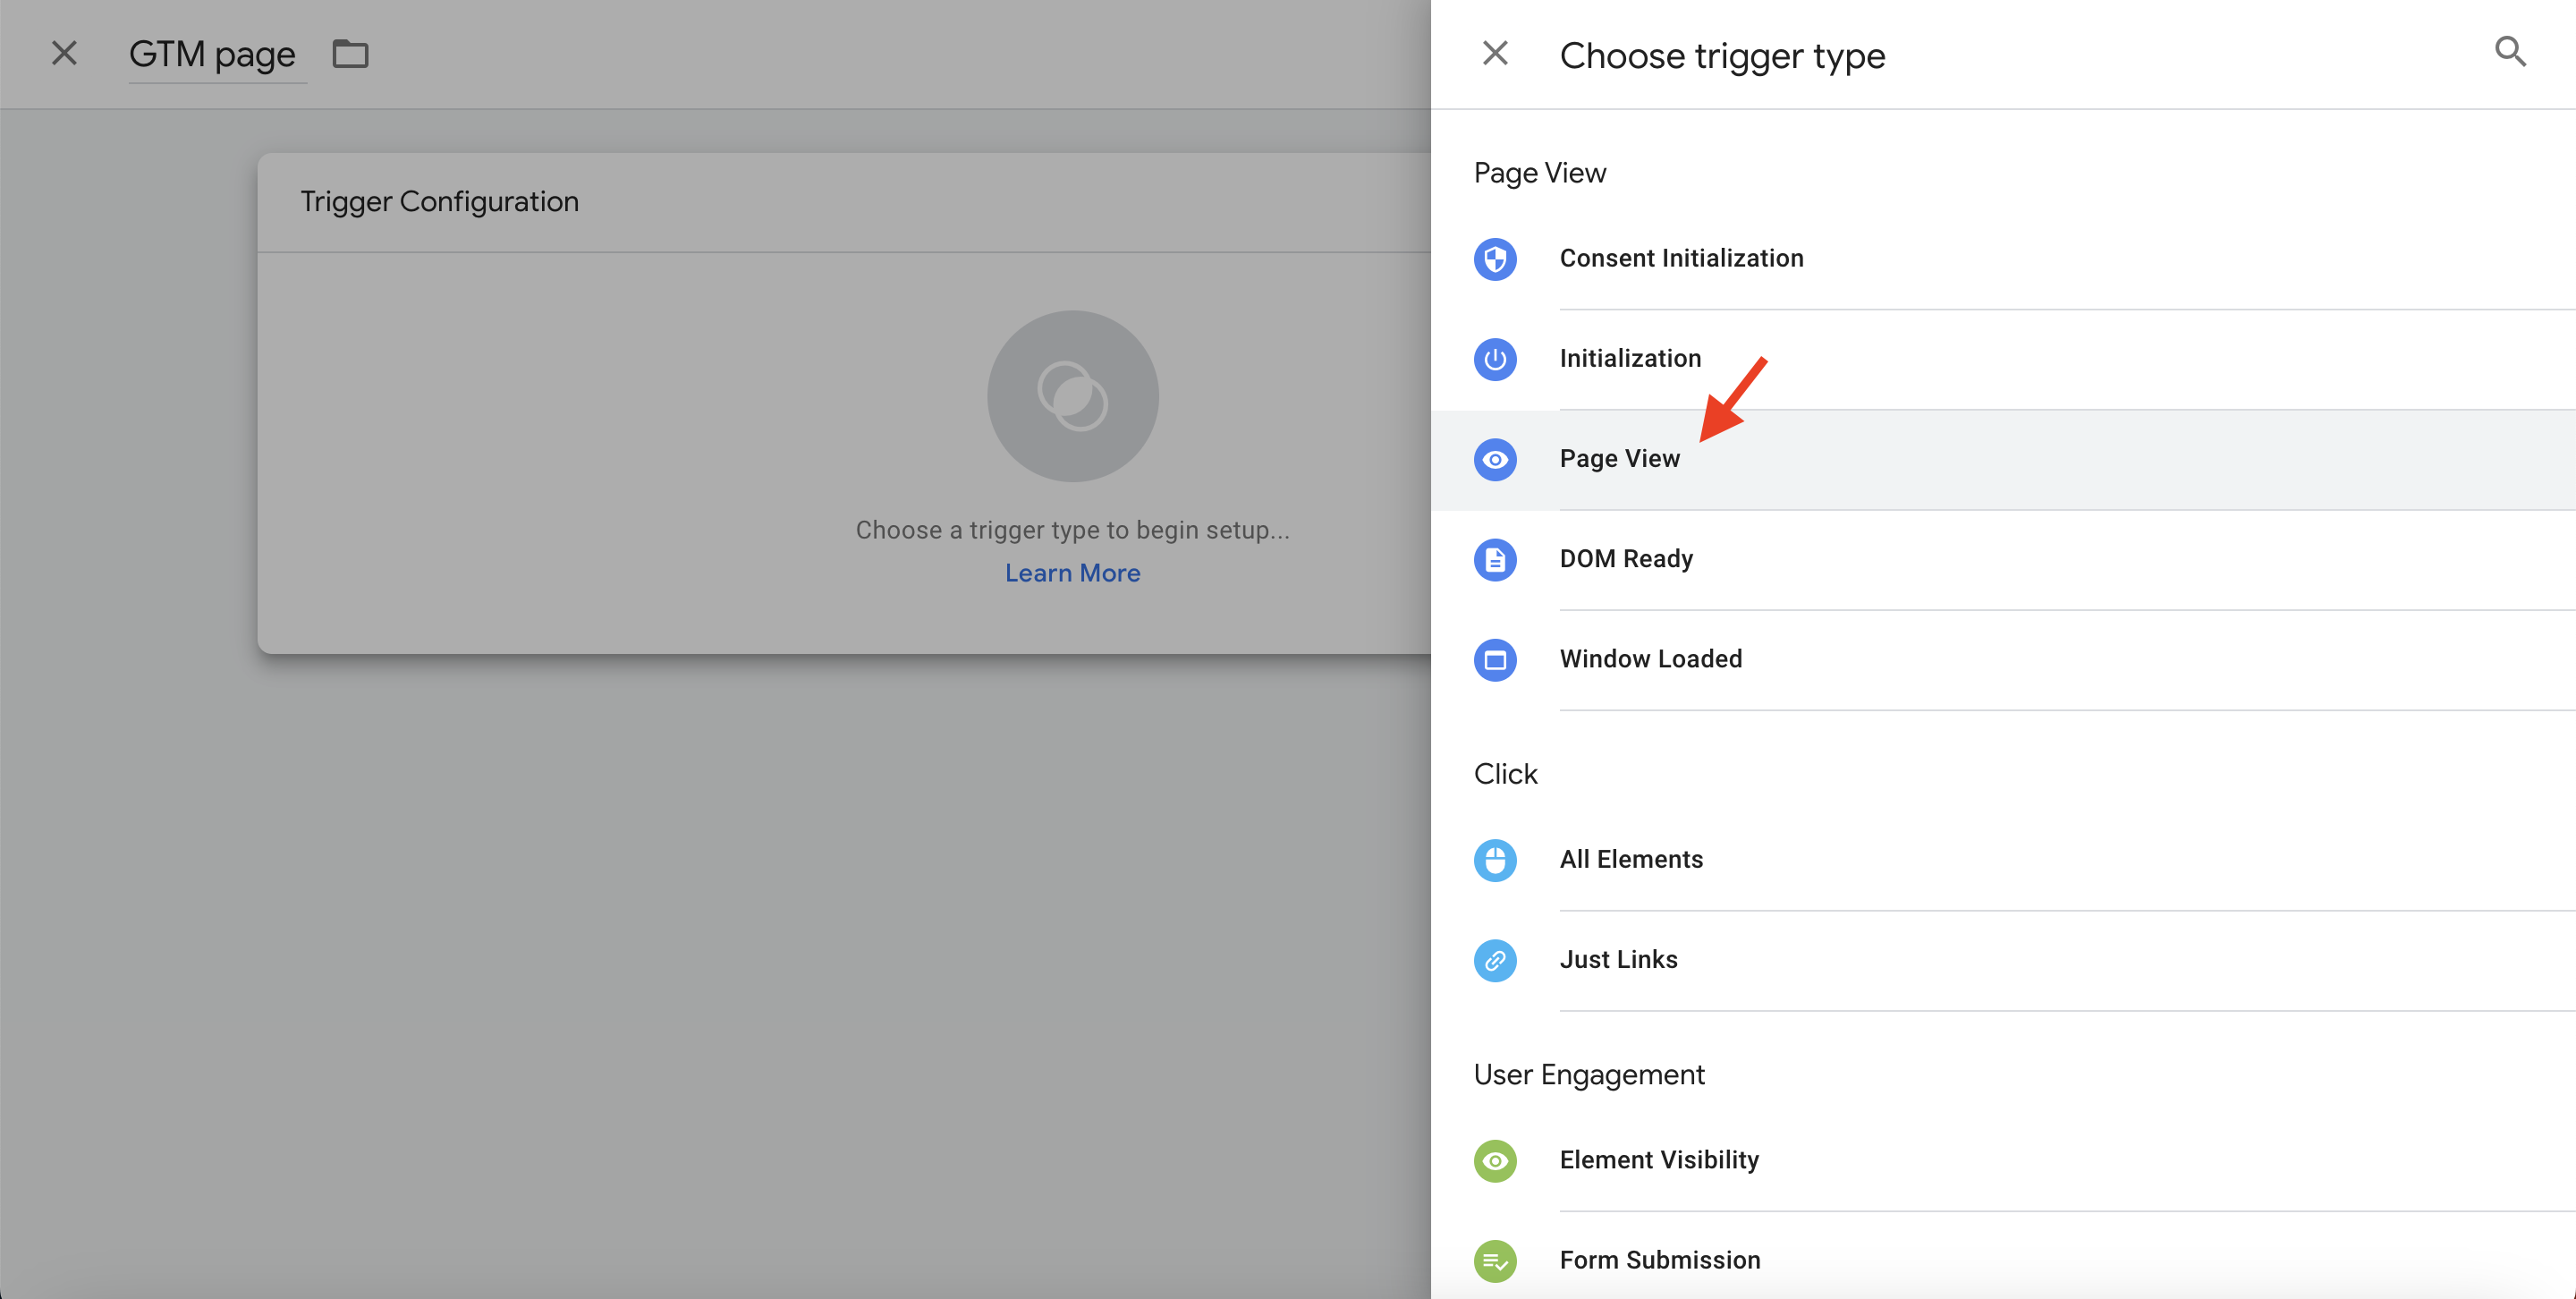
Trigger Name and Trigger Type
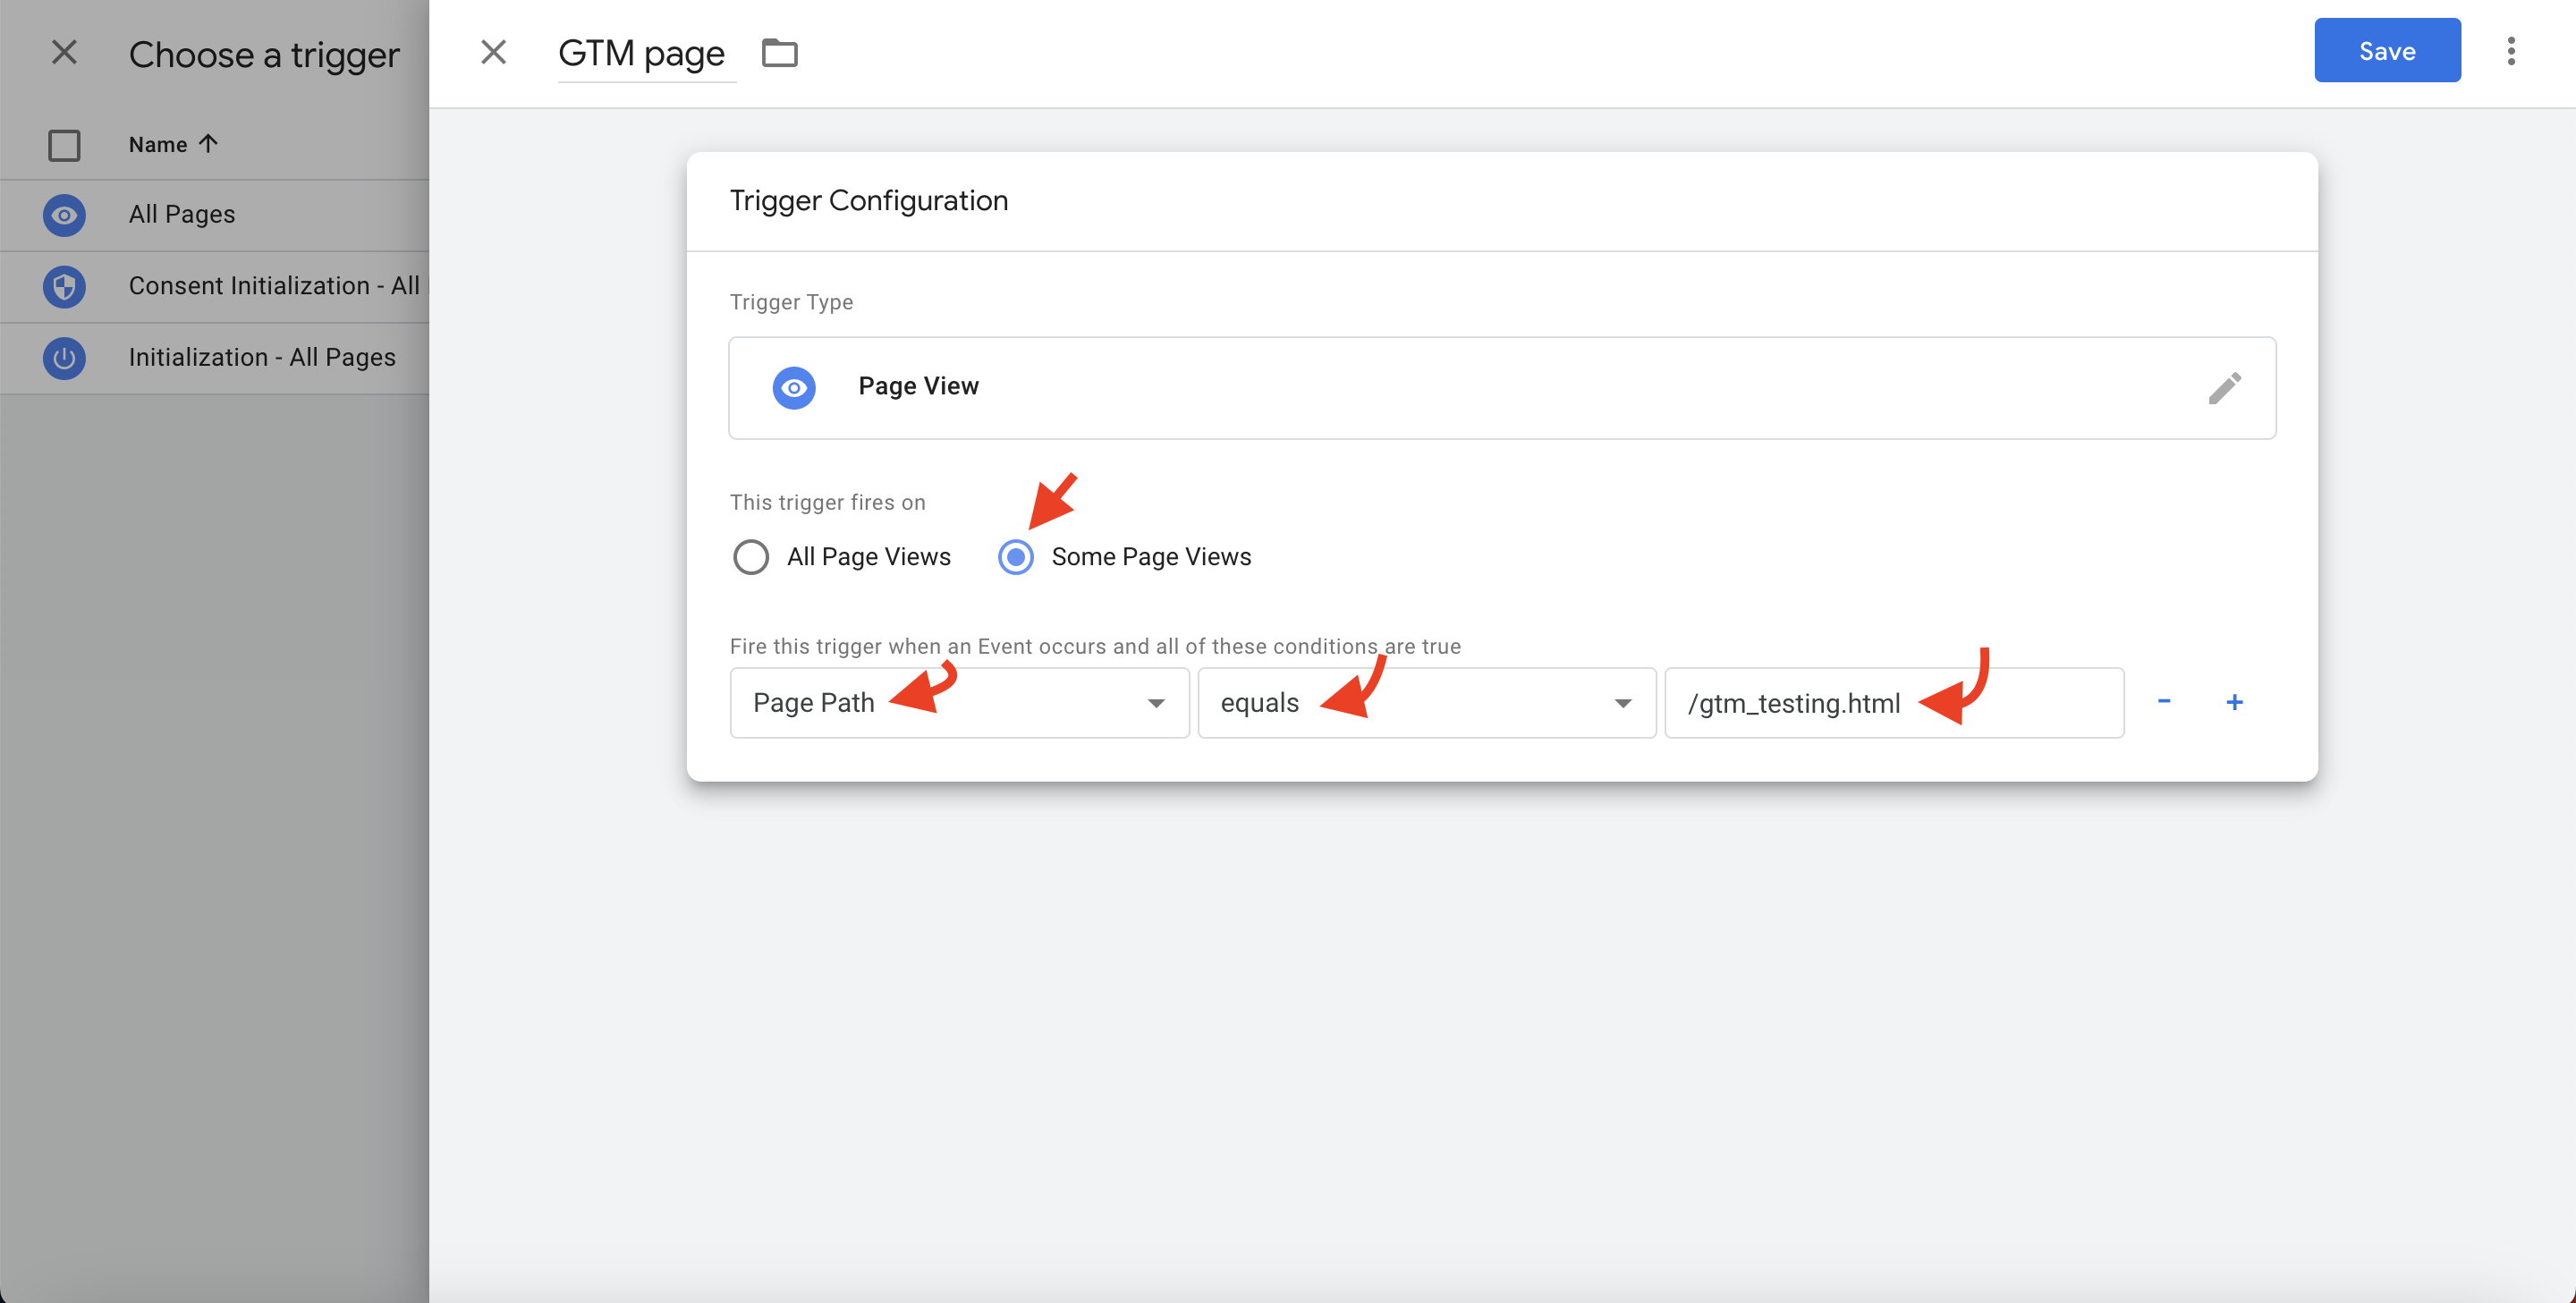
Add the trigger conditions and hit save
- Save the tag
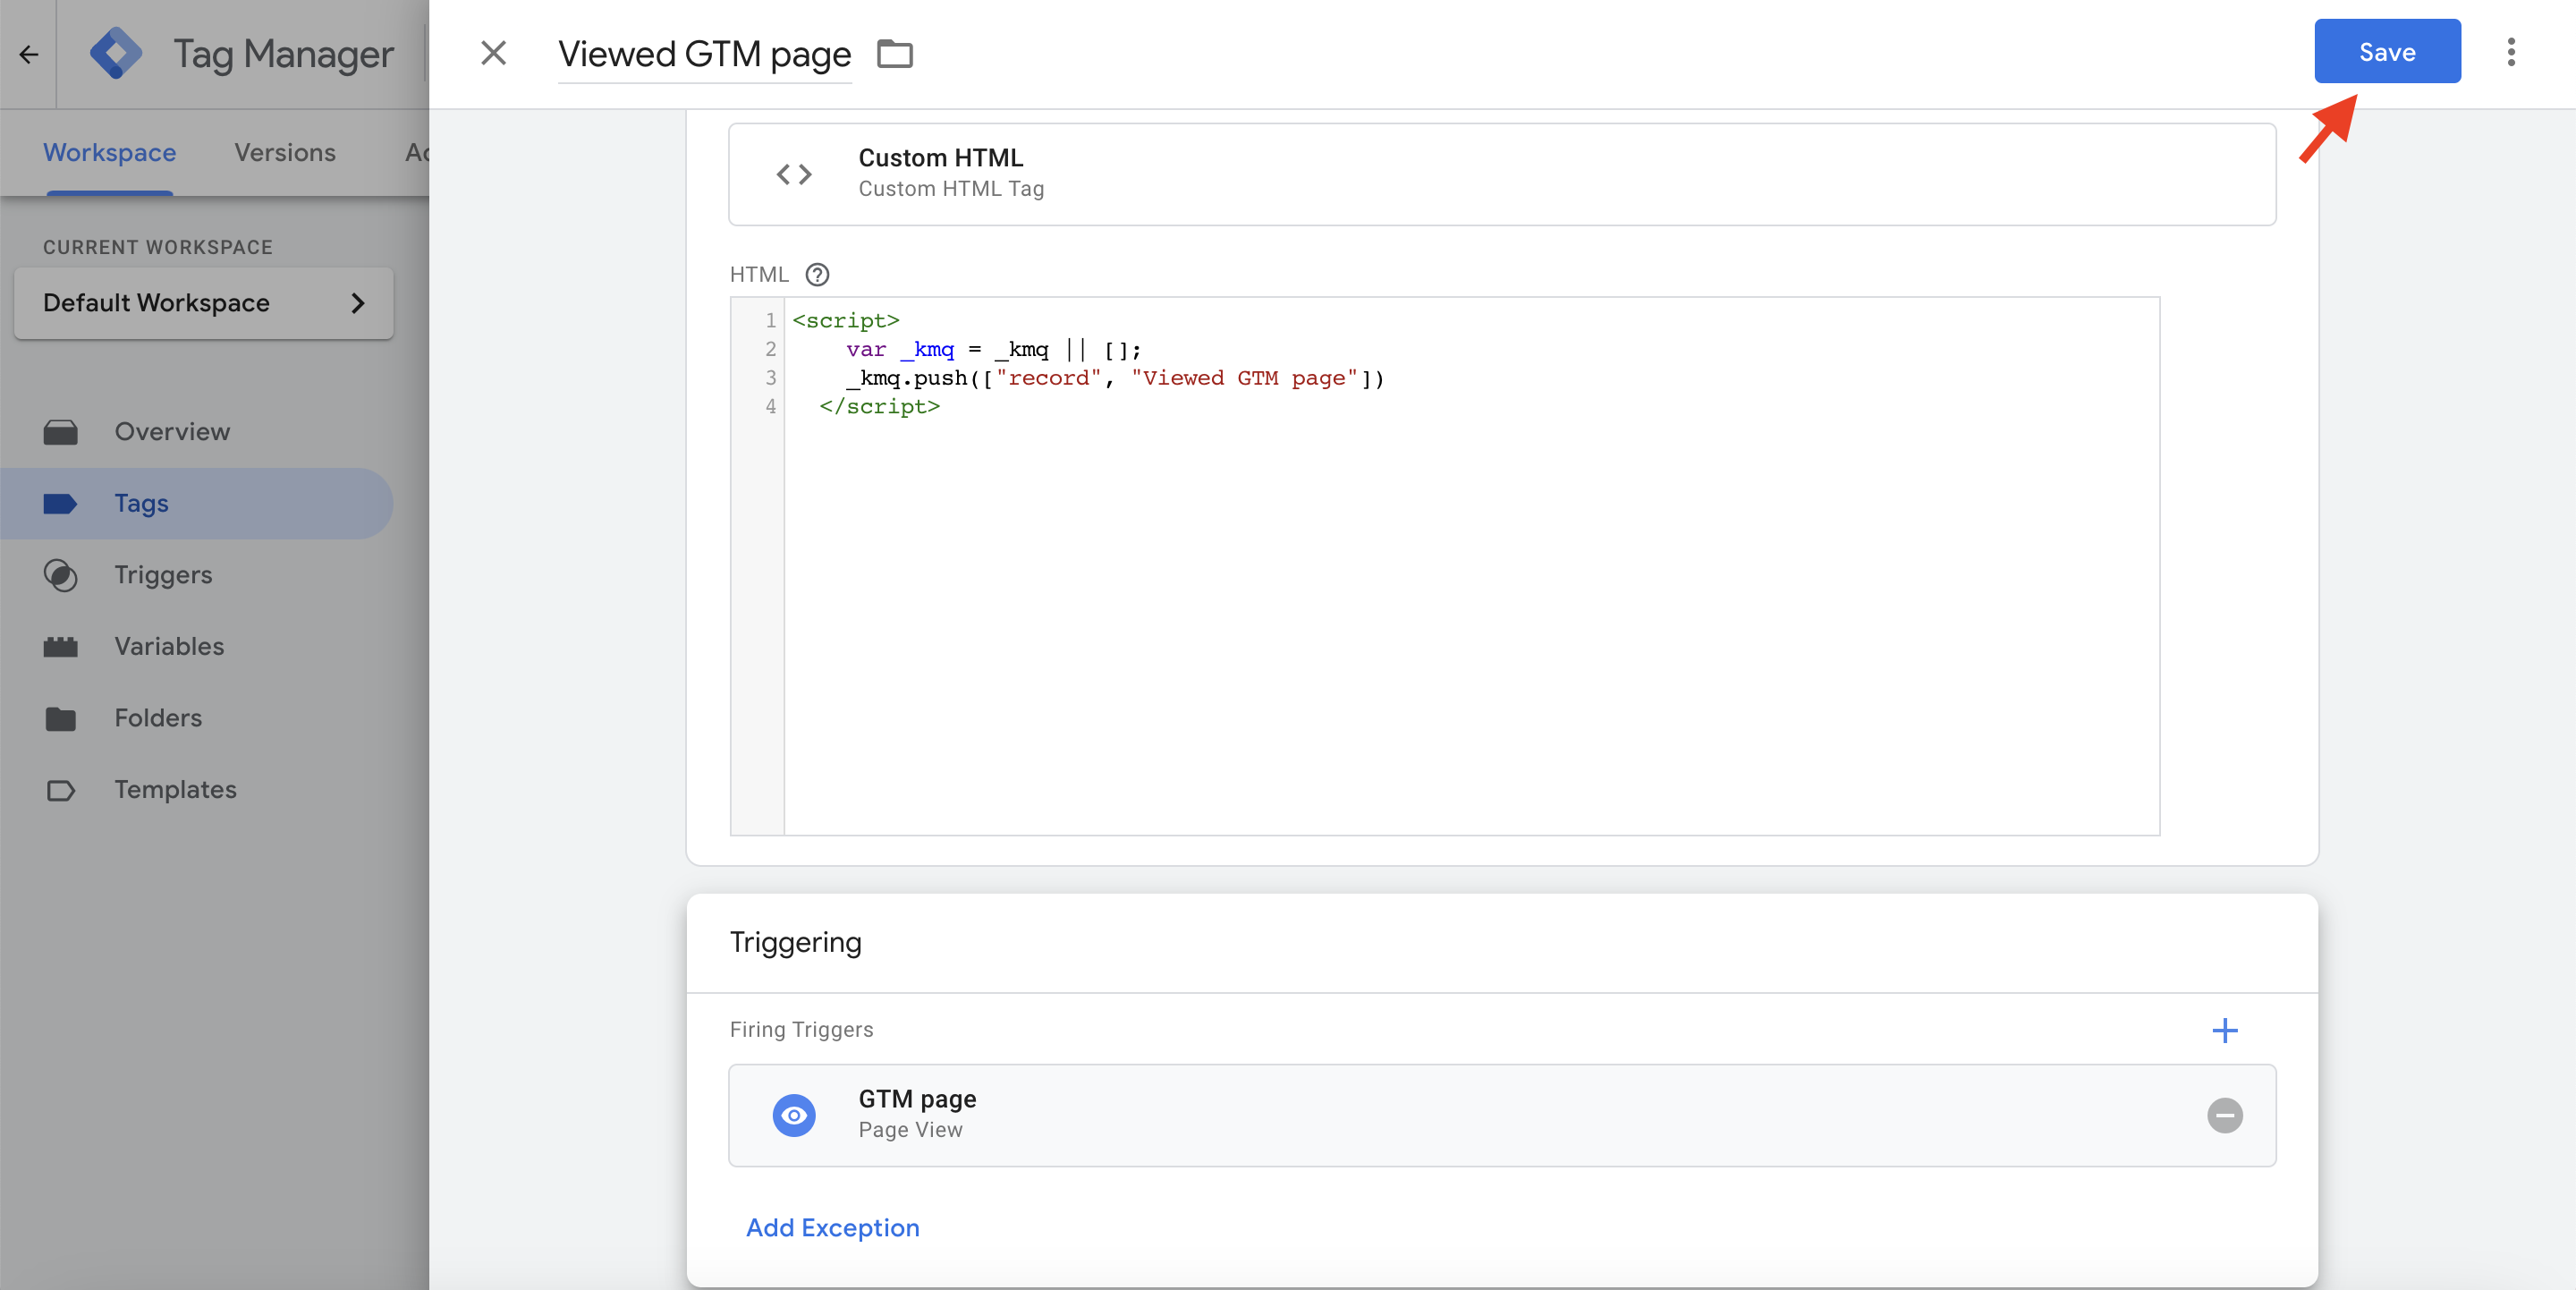
Save tag with the new trigger
Step 5: Create a Container Version and Publish
After creating the tags, it is key to Submit and Publish the changes before testing.
- Tags section;
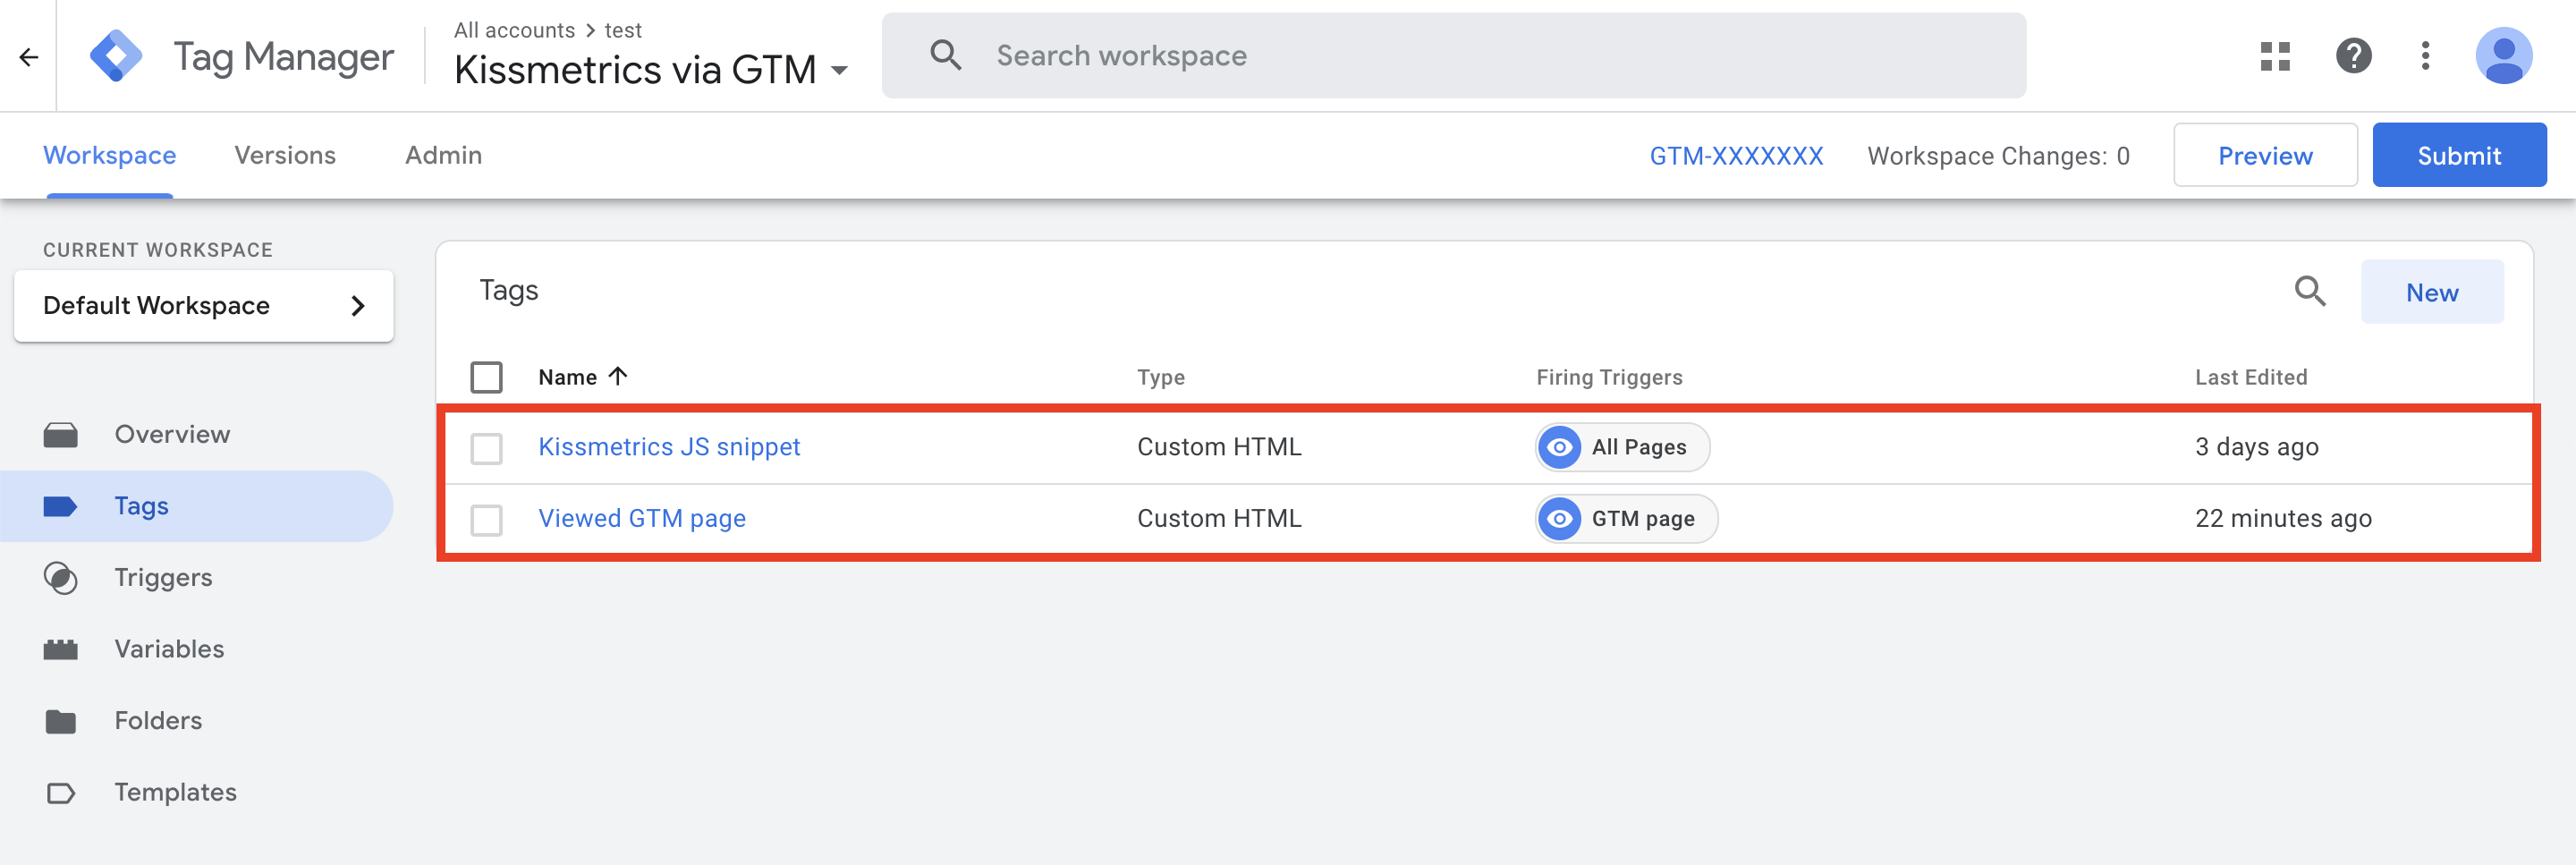
All tags view
- click "Submit";
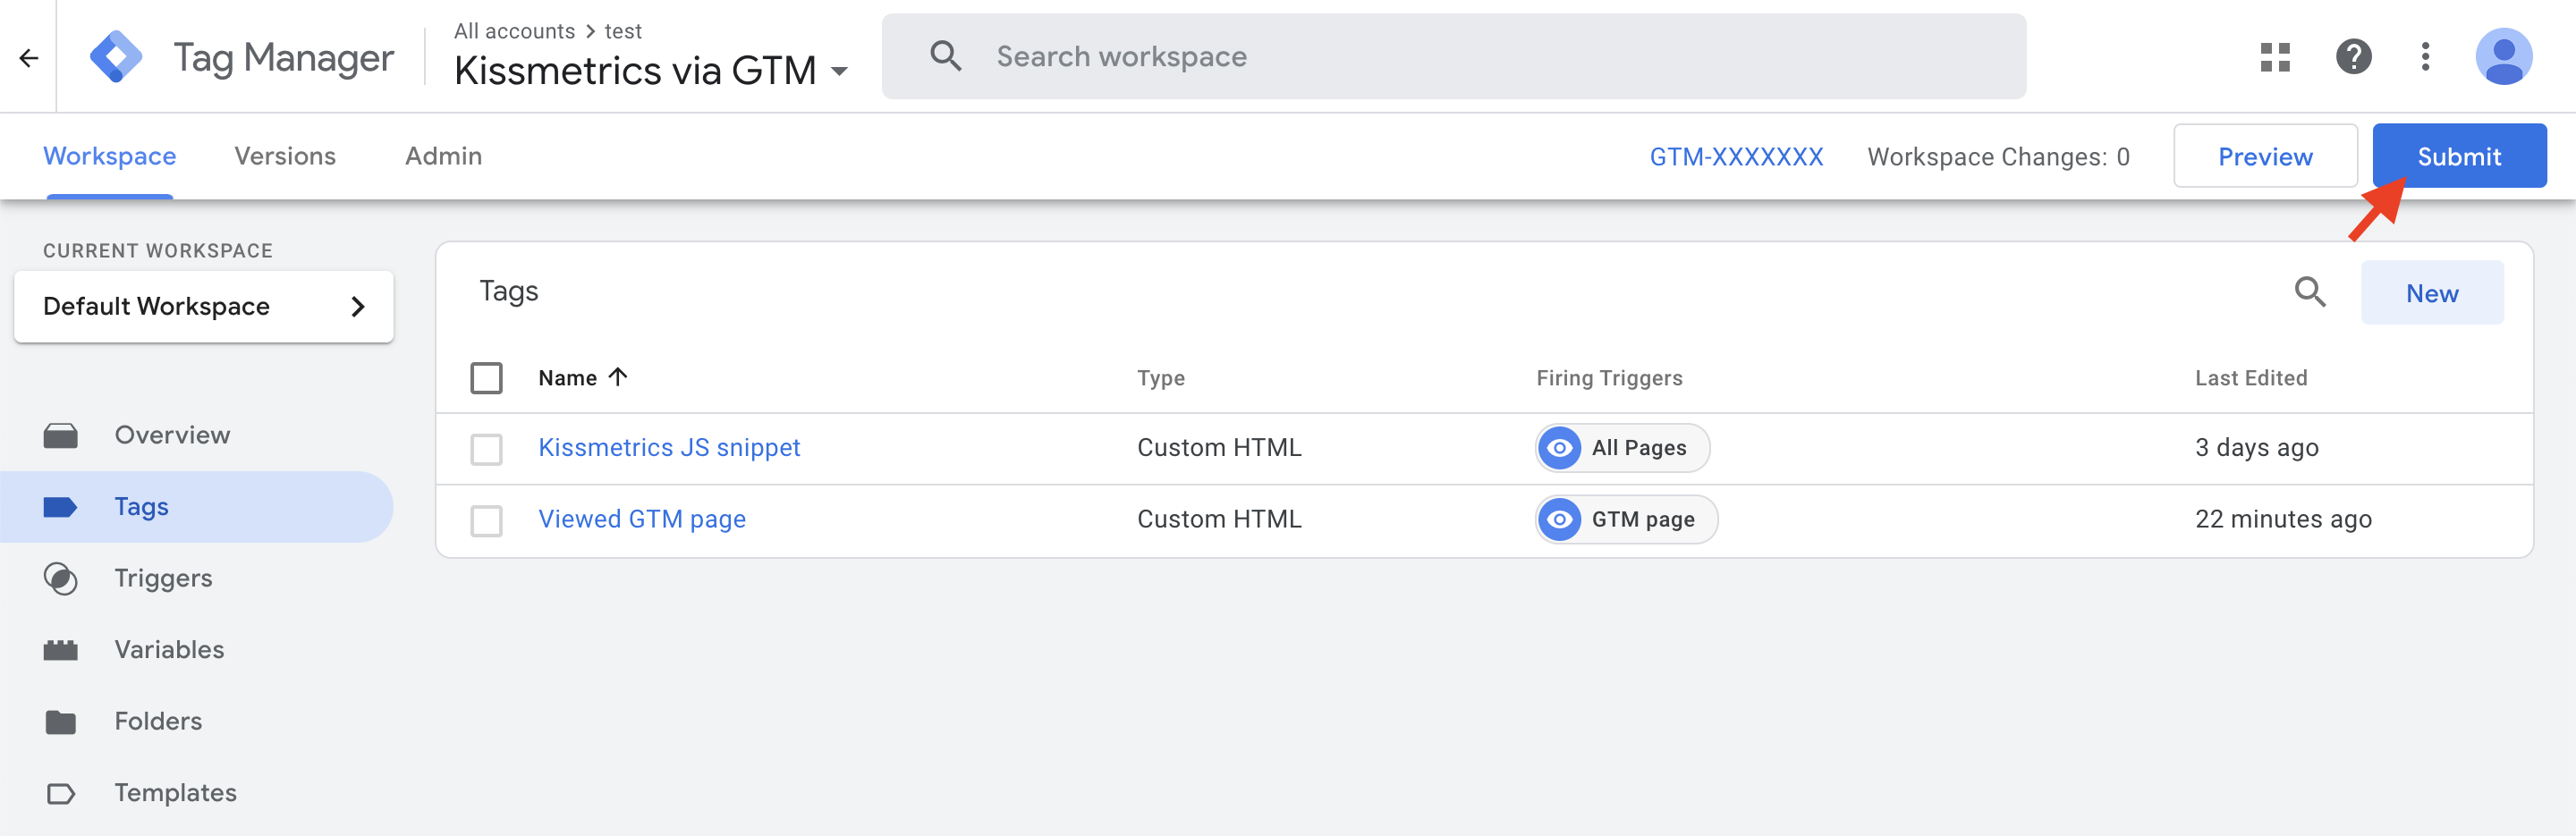
Submitting changes
- Add the Version Name and Publish the changes;
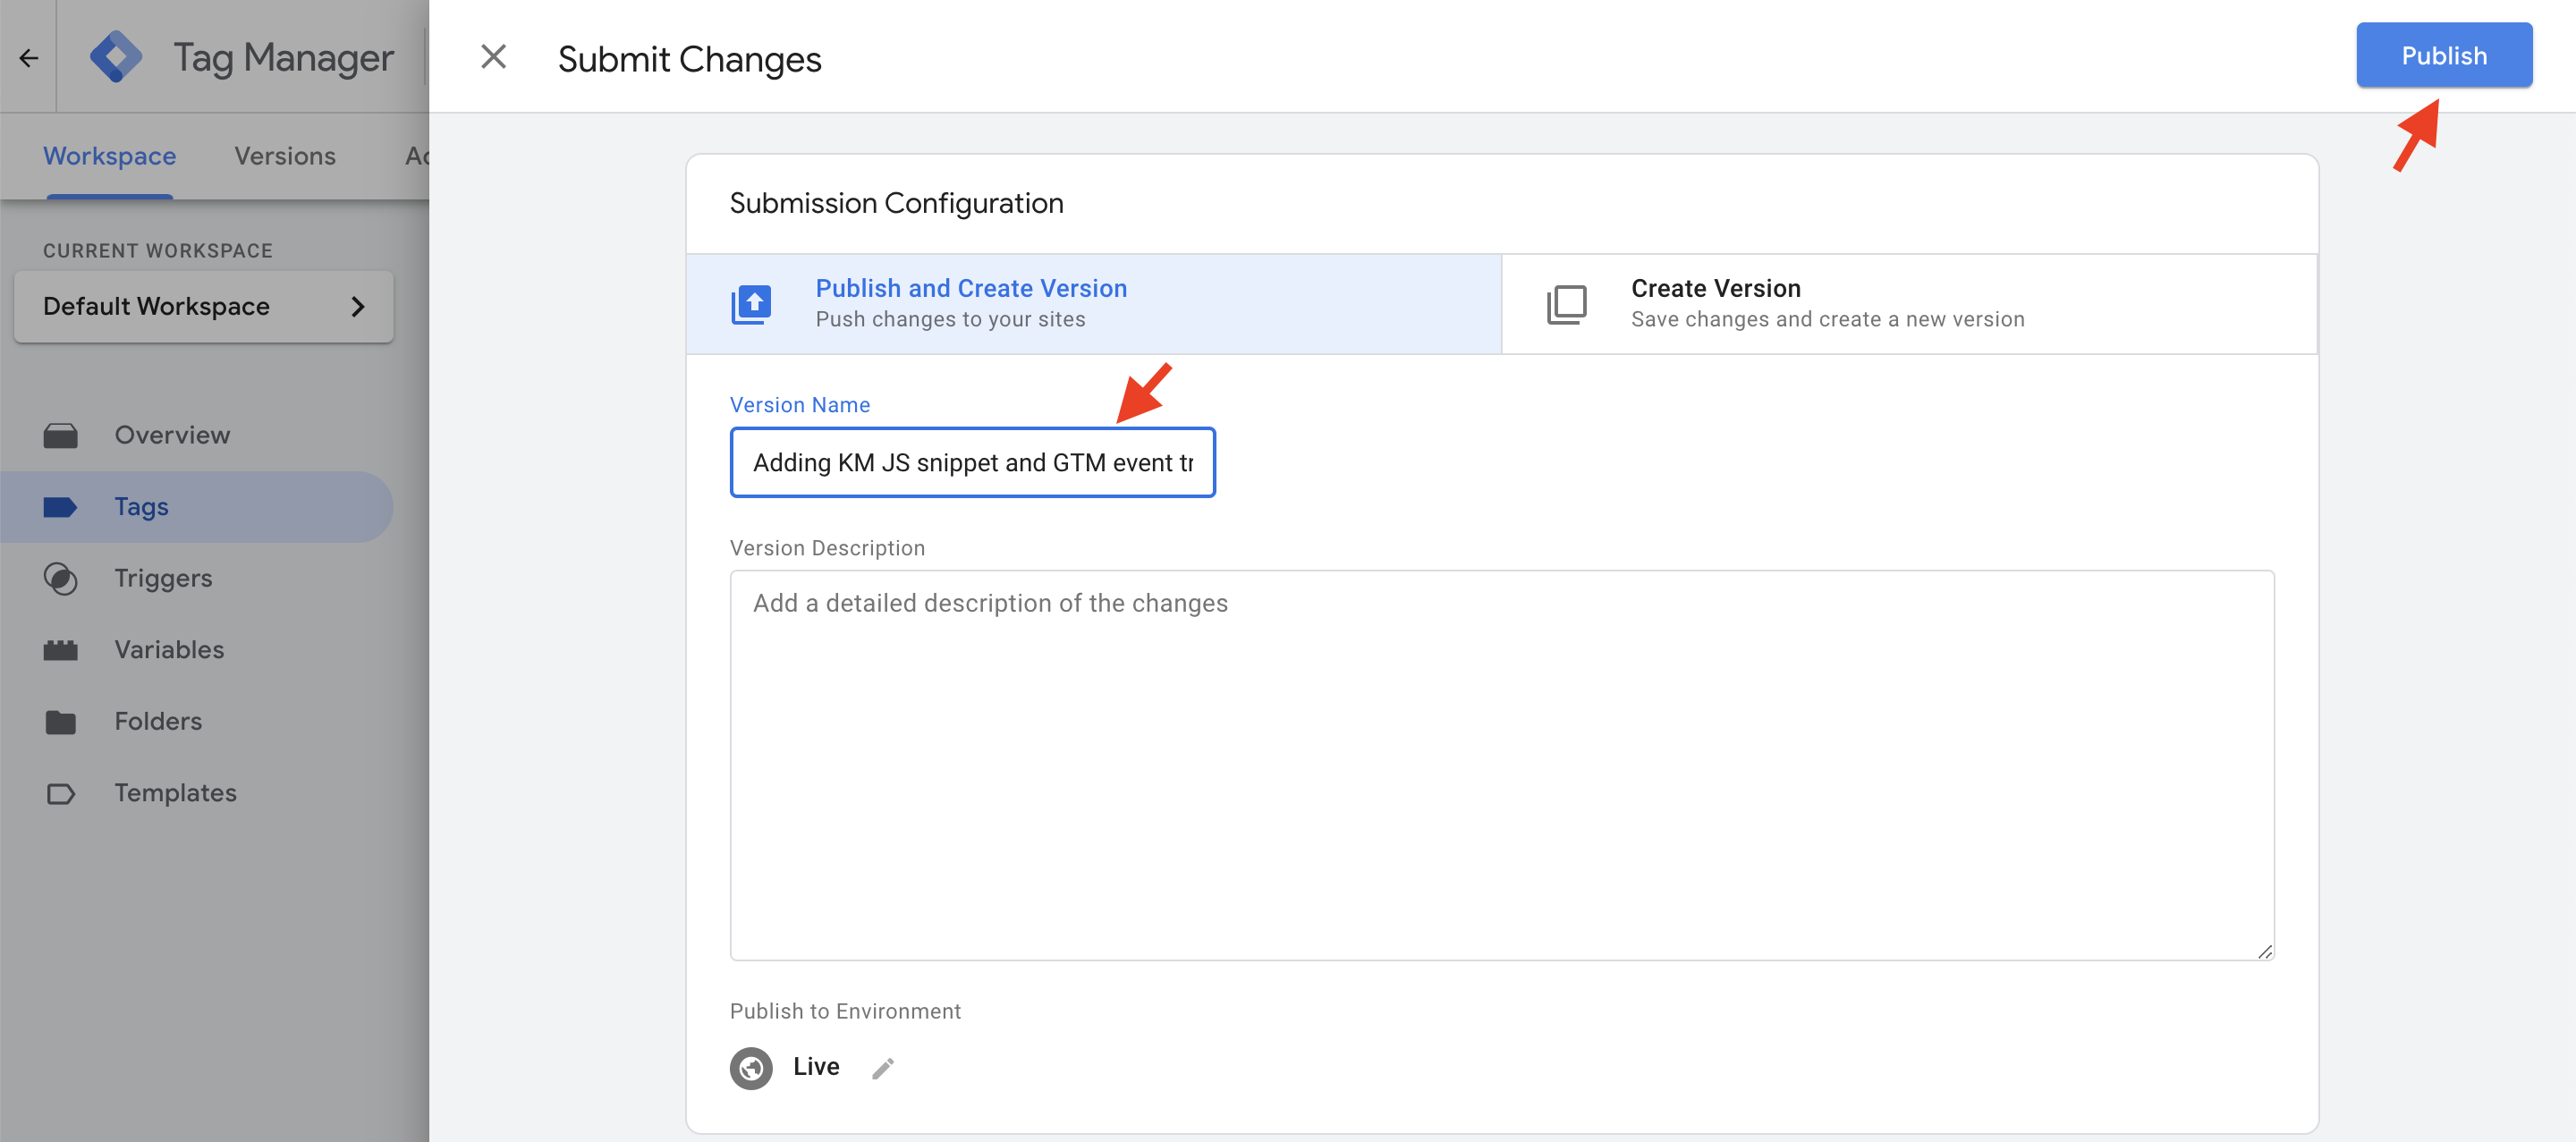
Publishing changes
Step 6: Troubleshoot the setup
As always, you can check in Kissmetrics Live to look for your own activity, and to check that you’ve installed properly.
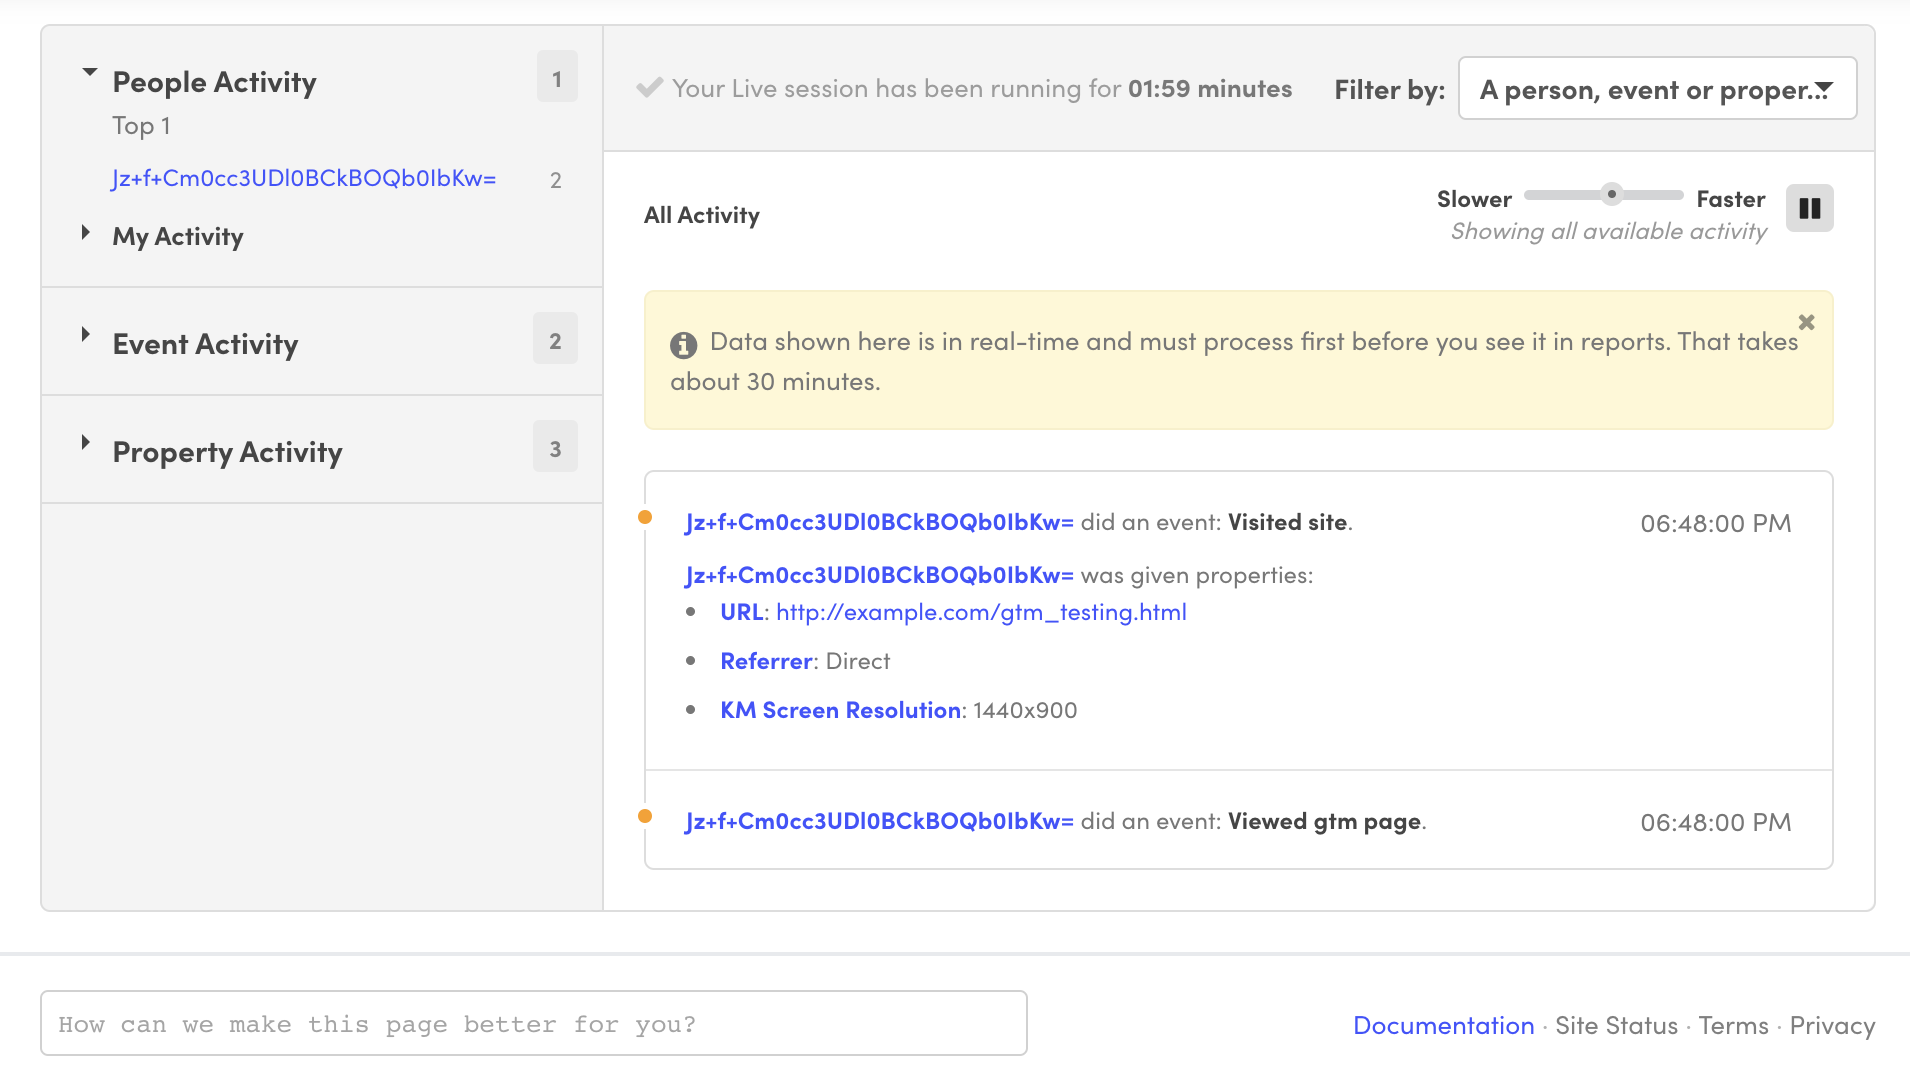
Live View test
That’s It!
To recap, there are 4 steps:
- Create a tag containing the JavaScript snippet and/or API calls.
- Create a trigger that tells on which pages to load those tags.
- Create a version to save a history of your changes.
- Publish the version so that it is actively running on your site.
Updated about 1 year ago