
Mailchimp
If you have been using Mailchimp to send out email newsletters, you can now import event data about the people who saw, opened, and clicked through your emails.
Disclaimer:This integration works best if you’re already using visitors’ email addresses to identify them.
Integration Details
| Event Name | Properties | Identity |
|---|---|---|
| Received Campaign E-mail |
| Email address, according to Mailchimp |
| Opened Campaign E-mail |
| Email address, according to Mailchimp |
| Clicked Campaign E-mail |
| Email address, according to Mailchimp |
|
Frequency of Import
- We will import data from your existing campaigns from the last 100 campaigns, starting with the most recent ones.
- We will check for activity on a campaign up to 60 days after the campaign was sent.
Setup
1. Obtain a Mailchimp API Key
- While logged into your Mailchimp account, open your Account Settings and navigate to API Keys (under Extras):
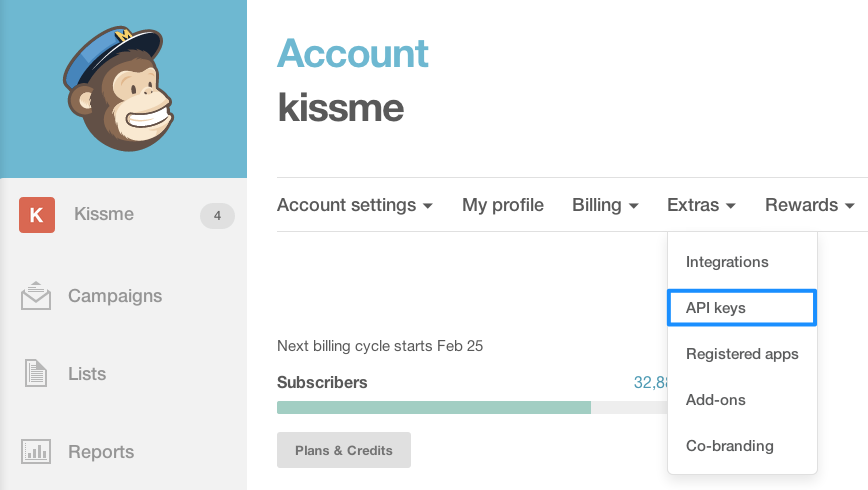
- Click “Create A Key”

- Now let’s add this API key to your Kissmetrics account in the next step.
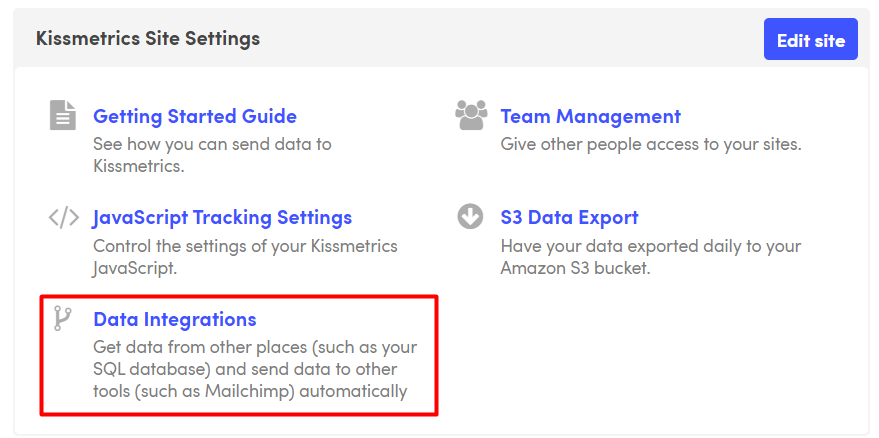
2. Register the API Key with Kissmetrics
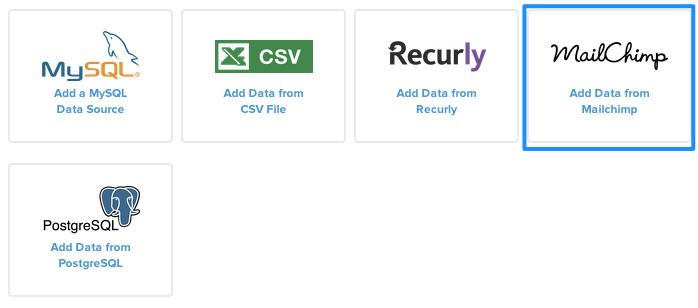
- Navigate to the Data Integrations area under Settings.
- Click Add Data from Mailchimp
- Enter your Mailchimp API Key from above.
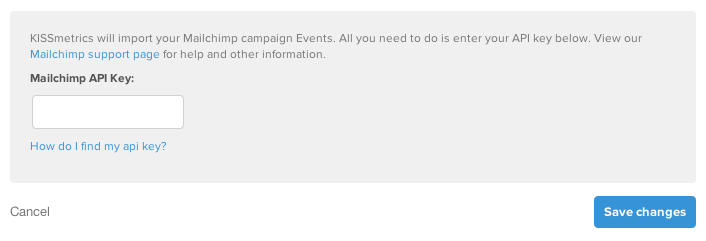
- One more step to go! You can come back to this page and check the status of the import.
3. Unifying Mailchimp Data to the JavaScript Library
In connecting Mailchimp to Kissmetrics, you’ll see events attributed directly to the user’s email address.
Sample Data
[email protected]has Received Campaign E-mail.[email protected]has Viewed Campaign E-mail.[email protected]has Clicked Campaign E-mail.
However, our JavaScript library should also recognize these visitors by their email address. Let’s pass the email address from Mailchimp to our JavaScript Library, so that we can connect the user’s path, starting from the email and continuing through their browsing session:
Example
[email protected]has Visited Site.[email protected]has Signed Up.
Here’s how to do so.
Using Mailchimp’s Merge Tags with the URL API
Mailchimp provides a merge tag *|URL:EMAIL|*, which is replaced by each recipient’s email address for their particular email. We’ll use that in conjunction with our URL API to send our JavaScript library the person’s email.
Todo: for any links to your site, if you want to record campaign-specific events or properties, use our URL API to tag the links. Then add the parameter kmi=*|URL:EMAIL|*, to use the recipient’s email address as their KM identity.
Example
So for example, if your Mailchimp campaign links to http://www.yoursite.com/landing, use this link to pass the email address to our JavaScript:
http://www.yoursite.com/landing?kmi=*|URL:EMAIL|*Updated about 1 year ago